Help

Documentation & support

Customer beta

Premium is included during beta

Every signed-in beta member gets Premium workspace features free through September 30, 2026, with 100,000 DotMD AI tokens per month. No card is required and DotMD will not charge you automatically.

Found a bug? Report it to Customer Care so we can address it in a future cycle.

Features & tutorials

A guided tour of what DotMD can do — with real product screenshots and step-by-step instructions.

Docs

A Markdown-native editor with everything you need to write, structure, and ship documents.

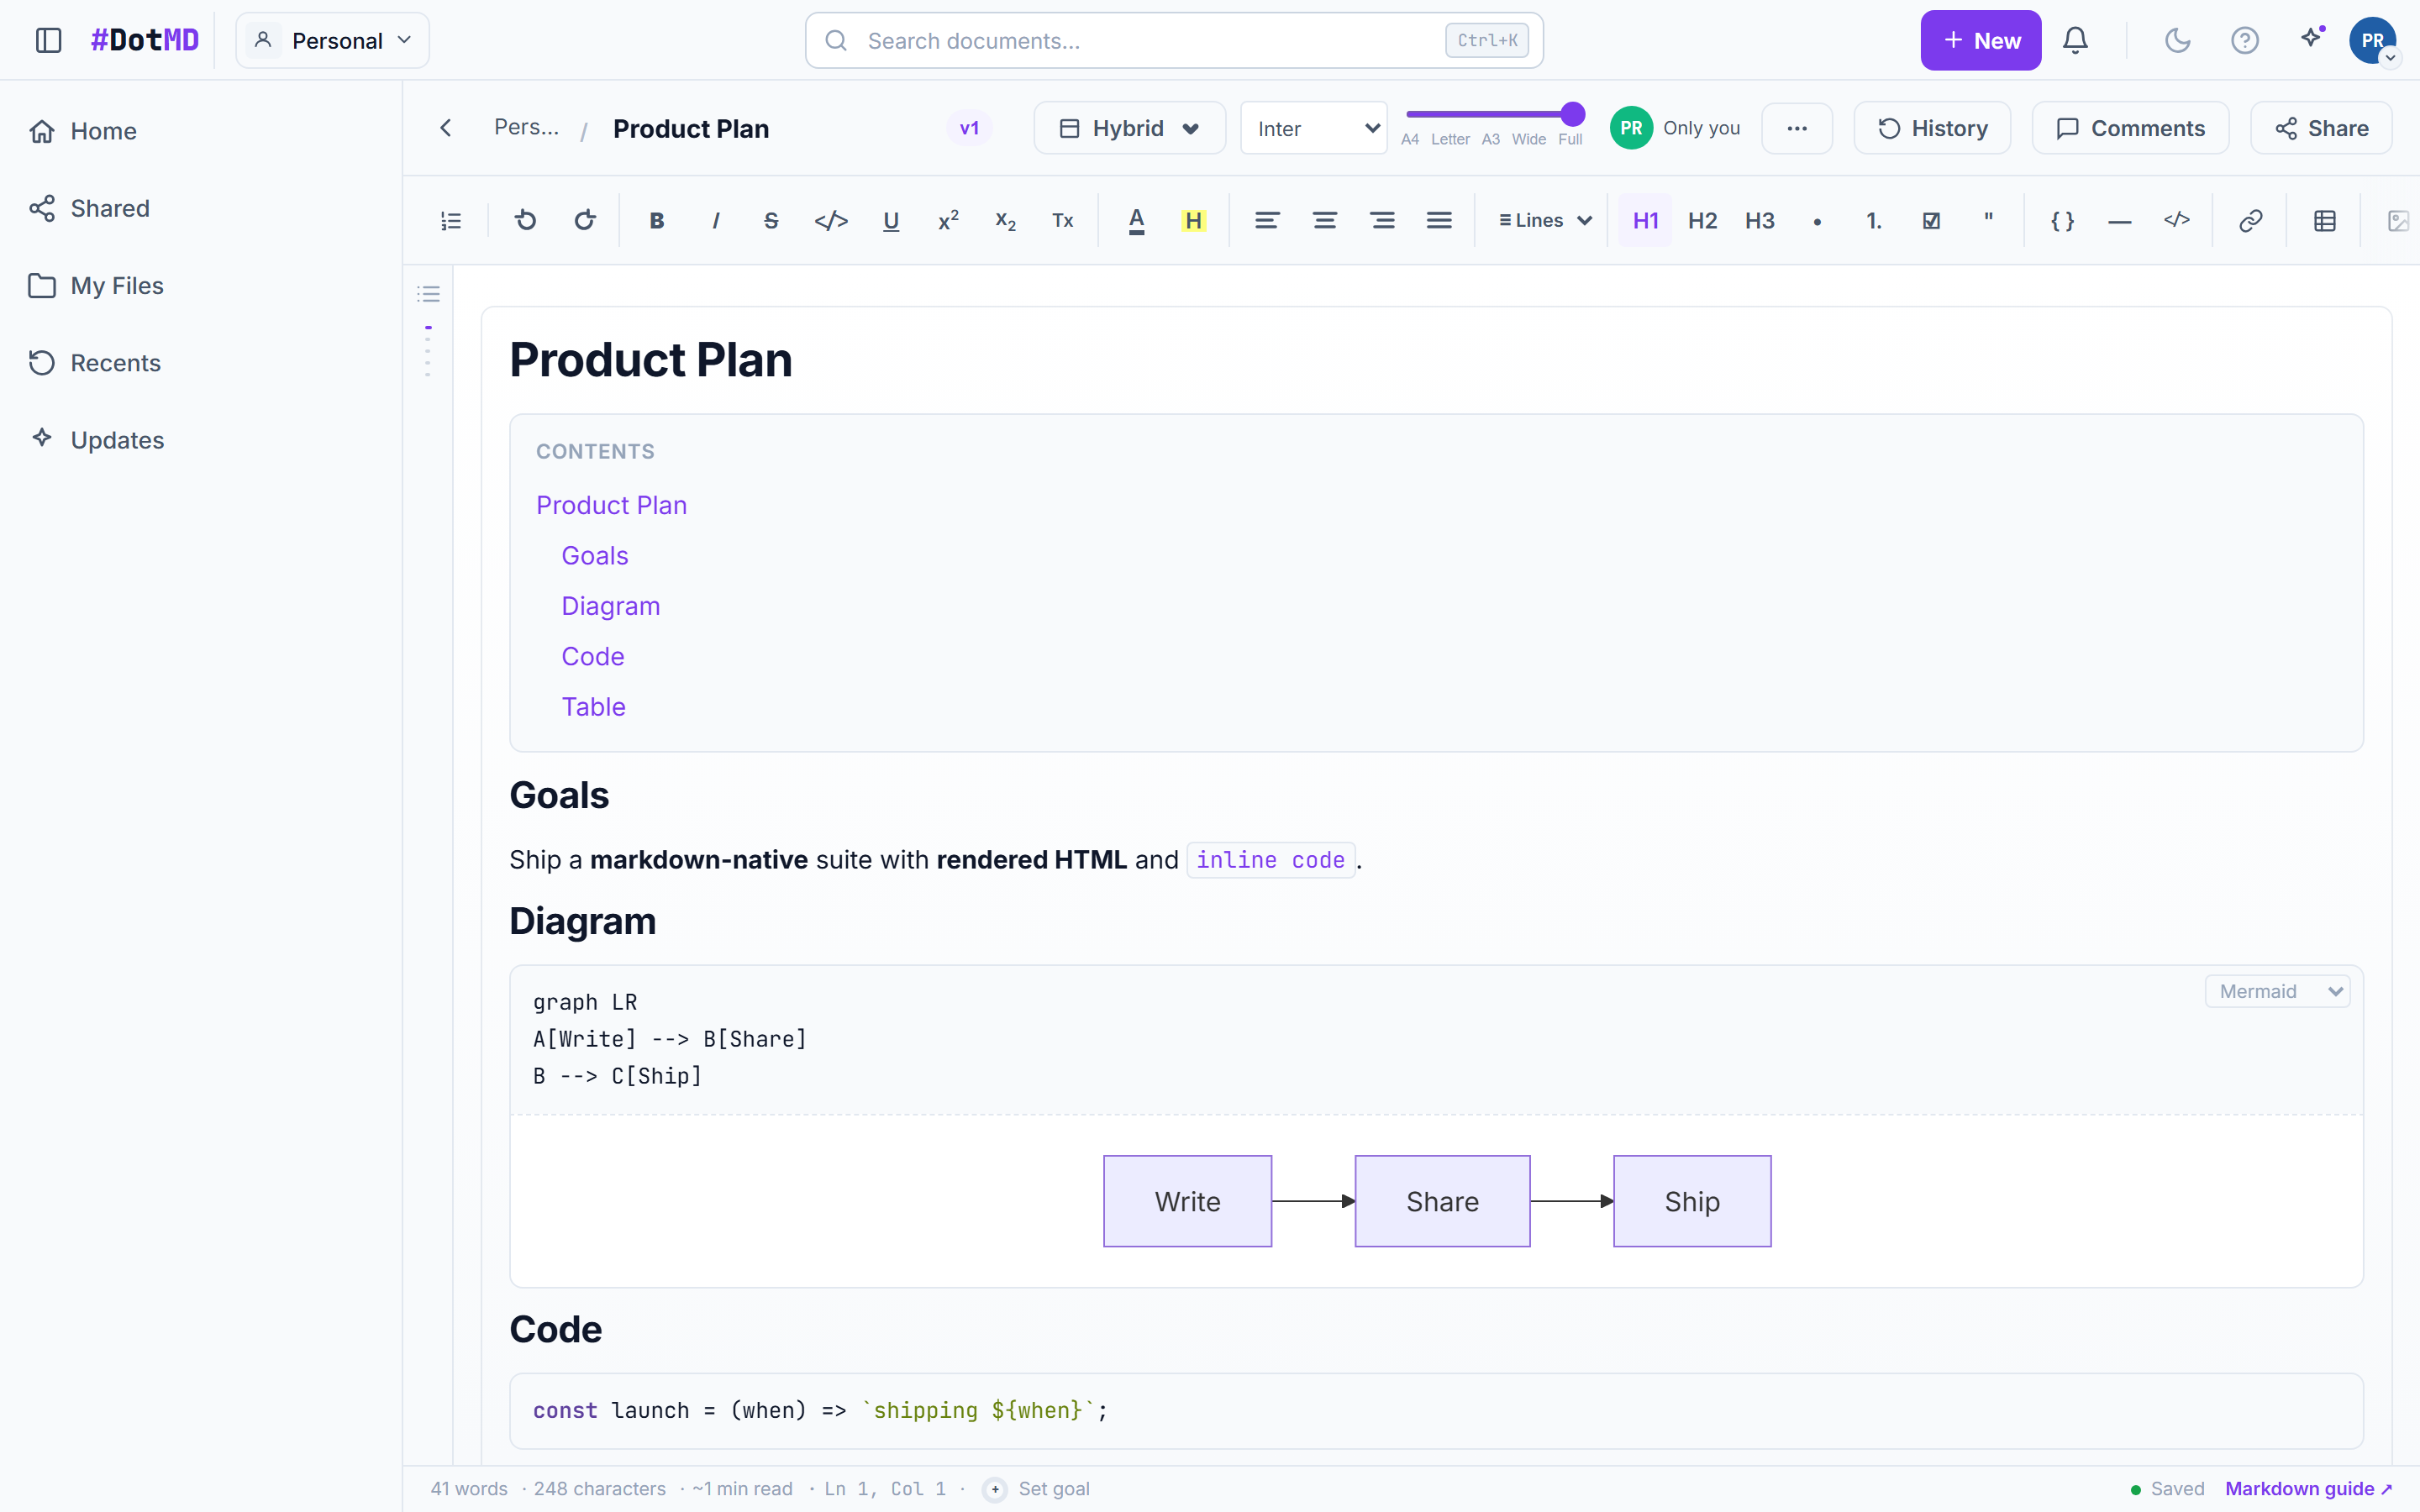
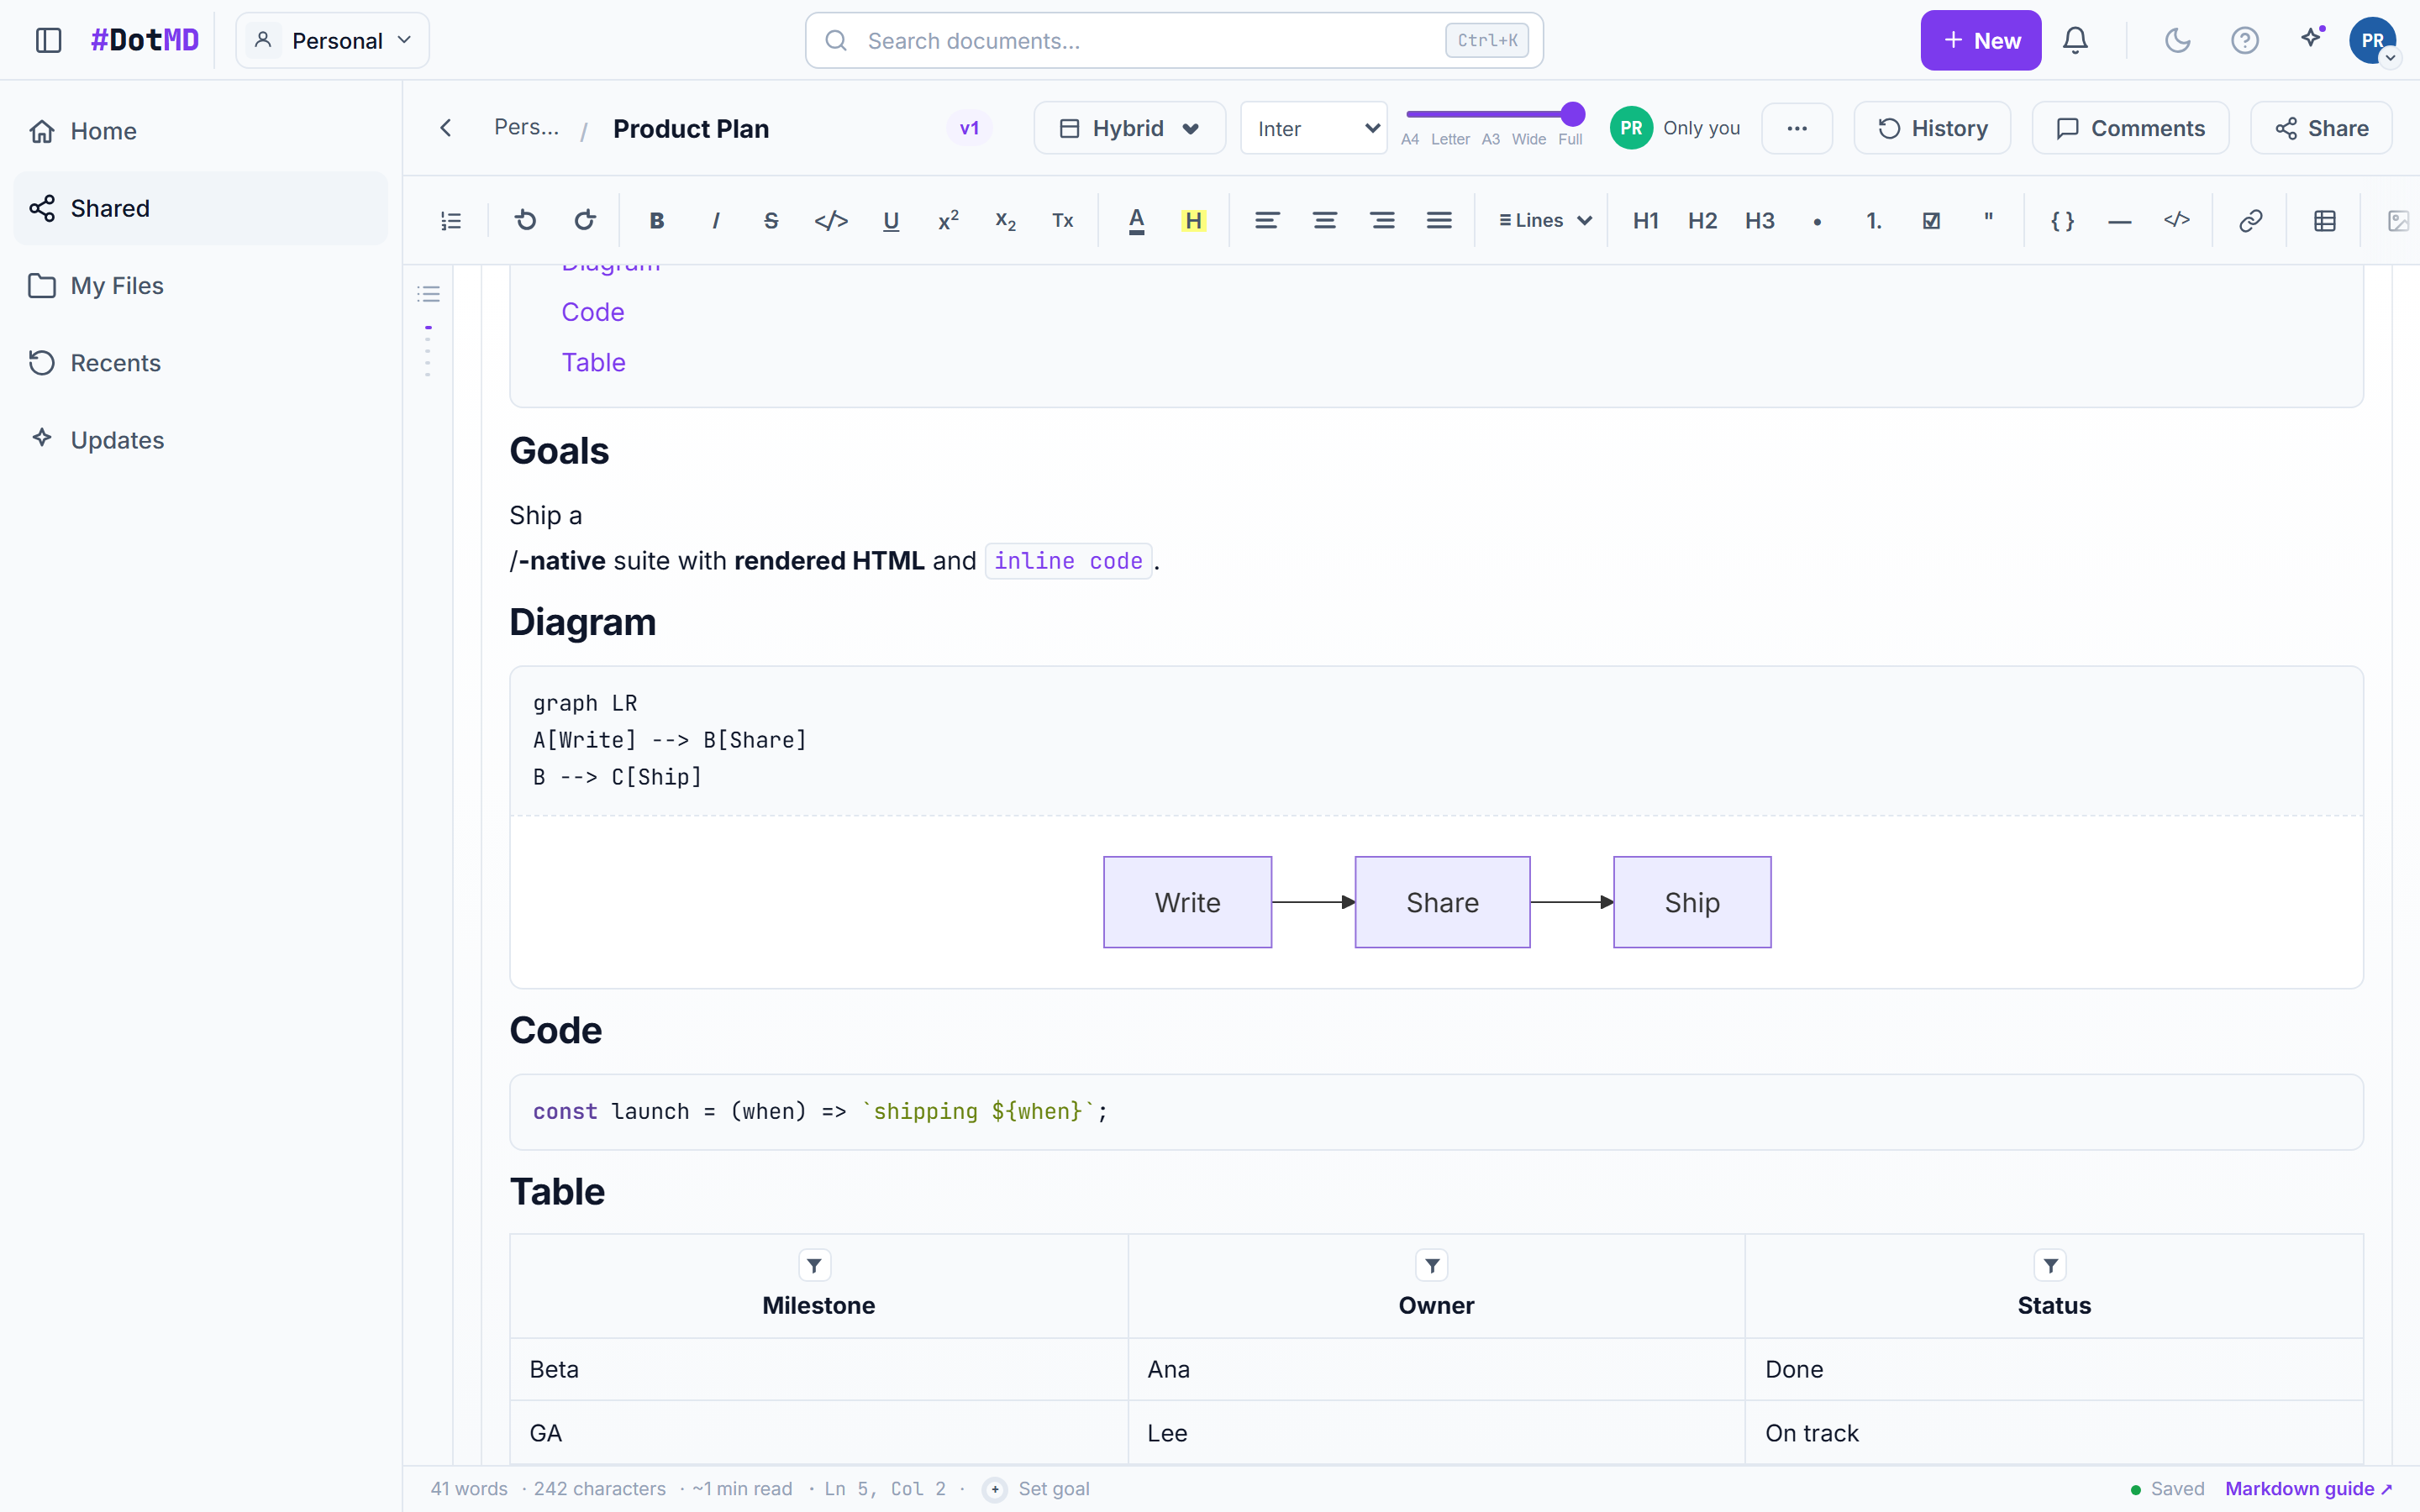
The DotMD document editor showing a rendered Markdown document with the formatting toolbar and view-mode switcher

The live Markdown editor

Write plain Markdown and see it rendered as you type — no lock-in, no proprietary format. Switch between Edit, Split, and Preview whenever you want to see the source, the result, or both.

  1. Open any document — you start in the rendered editing view. Standard Markdown works directly: # headings, **bold**, *italic*, lists, > quotes, and fenced code blocks.
  2. Use the view switcher in the toolbar to flip between Edit, Split (Markdown source and rendered result side by side), and Preview.
  3. Paste or write a fenced code block — the language is auto-detected and syntax-highlighted for you; you can also pick the language on the block.
  4. Raw HTML in your Markdown renders GitHub-style, so existing README-grade content looks right out of the box.
  5. Drop in images (Premium) by pasting or uploading — each image can be up to 10 MB; export any document from the Export menu as PDF or Markdown (.md).
Good to know
  • Tables support dropdown-select columns plus per-column sort and filter.
  • Version history (the clock icon) keeps snapshots you can restore — Free keeps your last 10, Premium keeps everything.
  • Focus mode dims everything but the paragraph you are writing; word goals track progress toward a target count.
  • Select text to comment on it — threads support replies, emoji reactions, and resolve.

Still stuck? Contact Customer Care
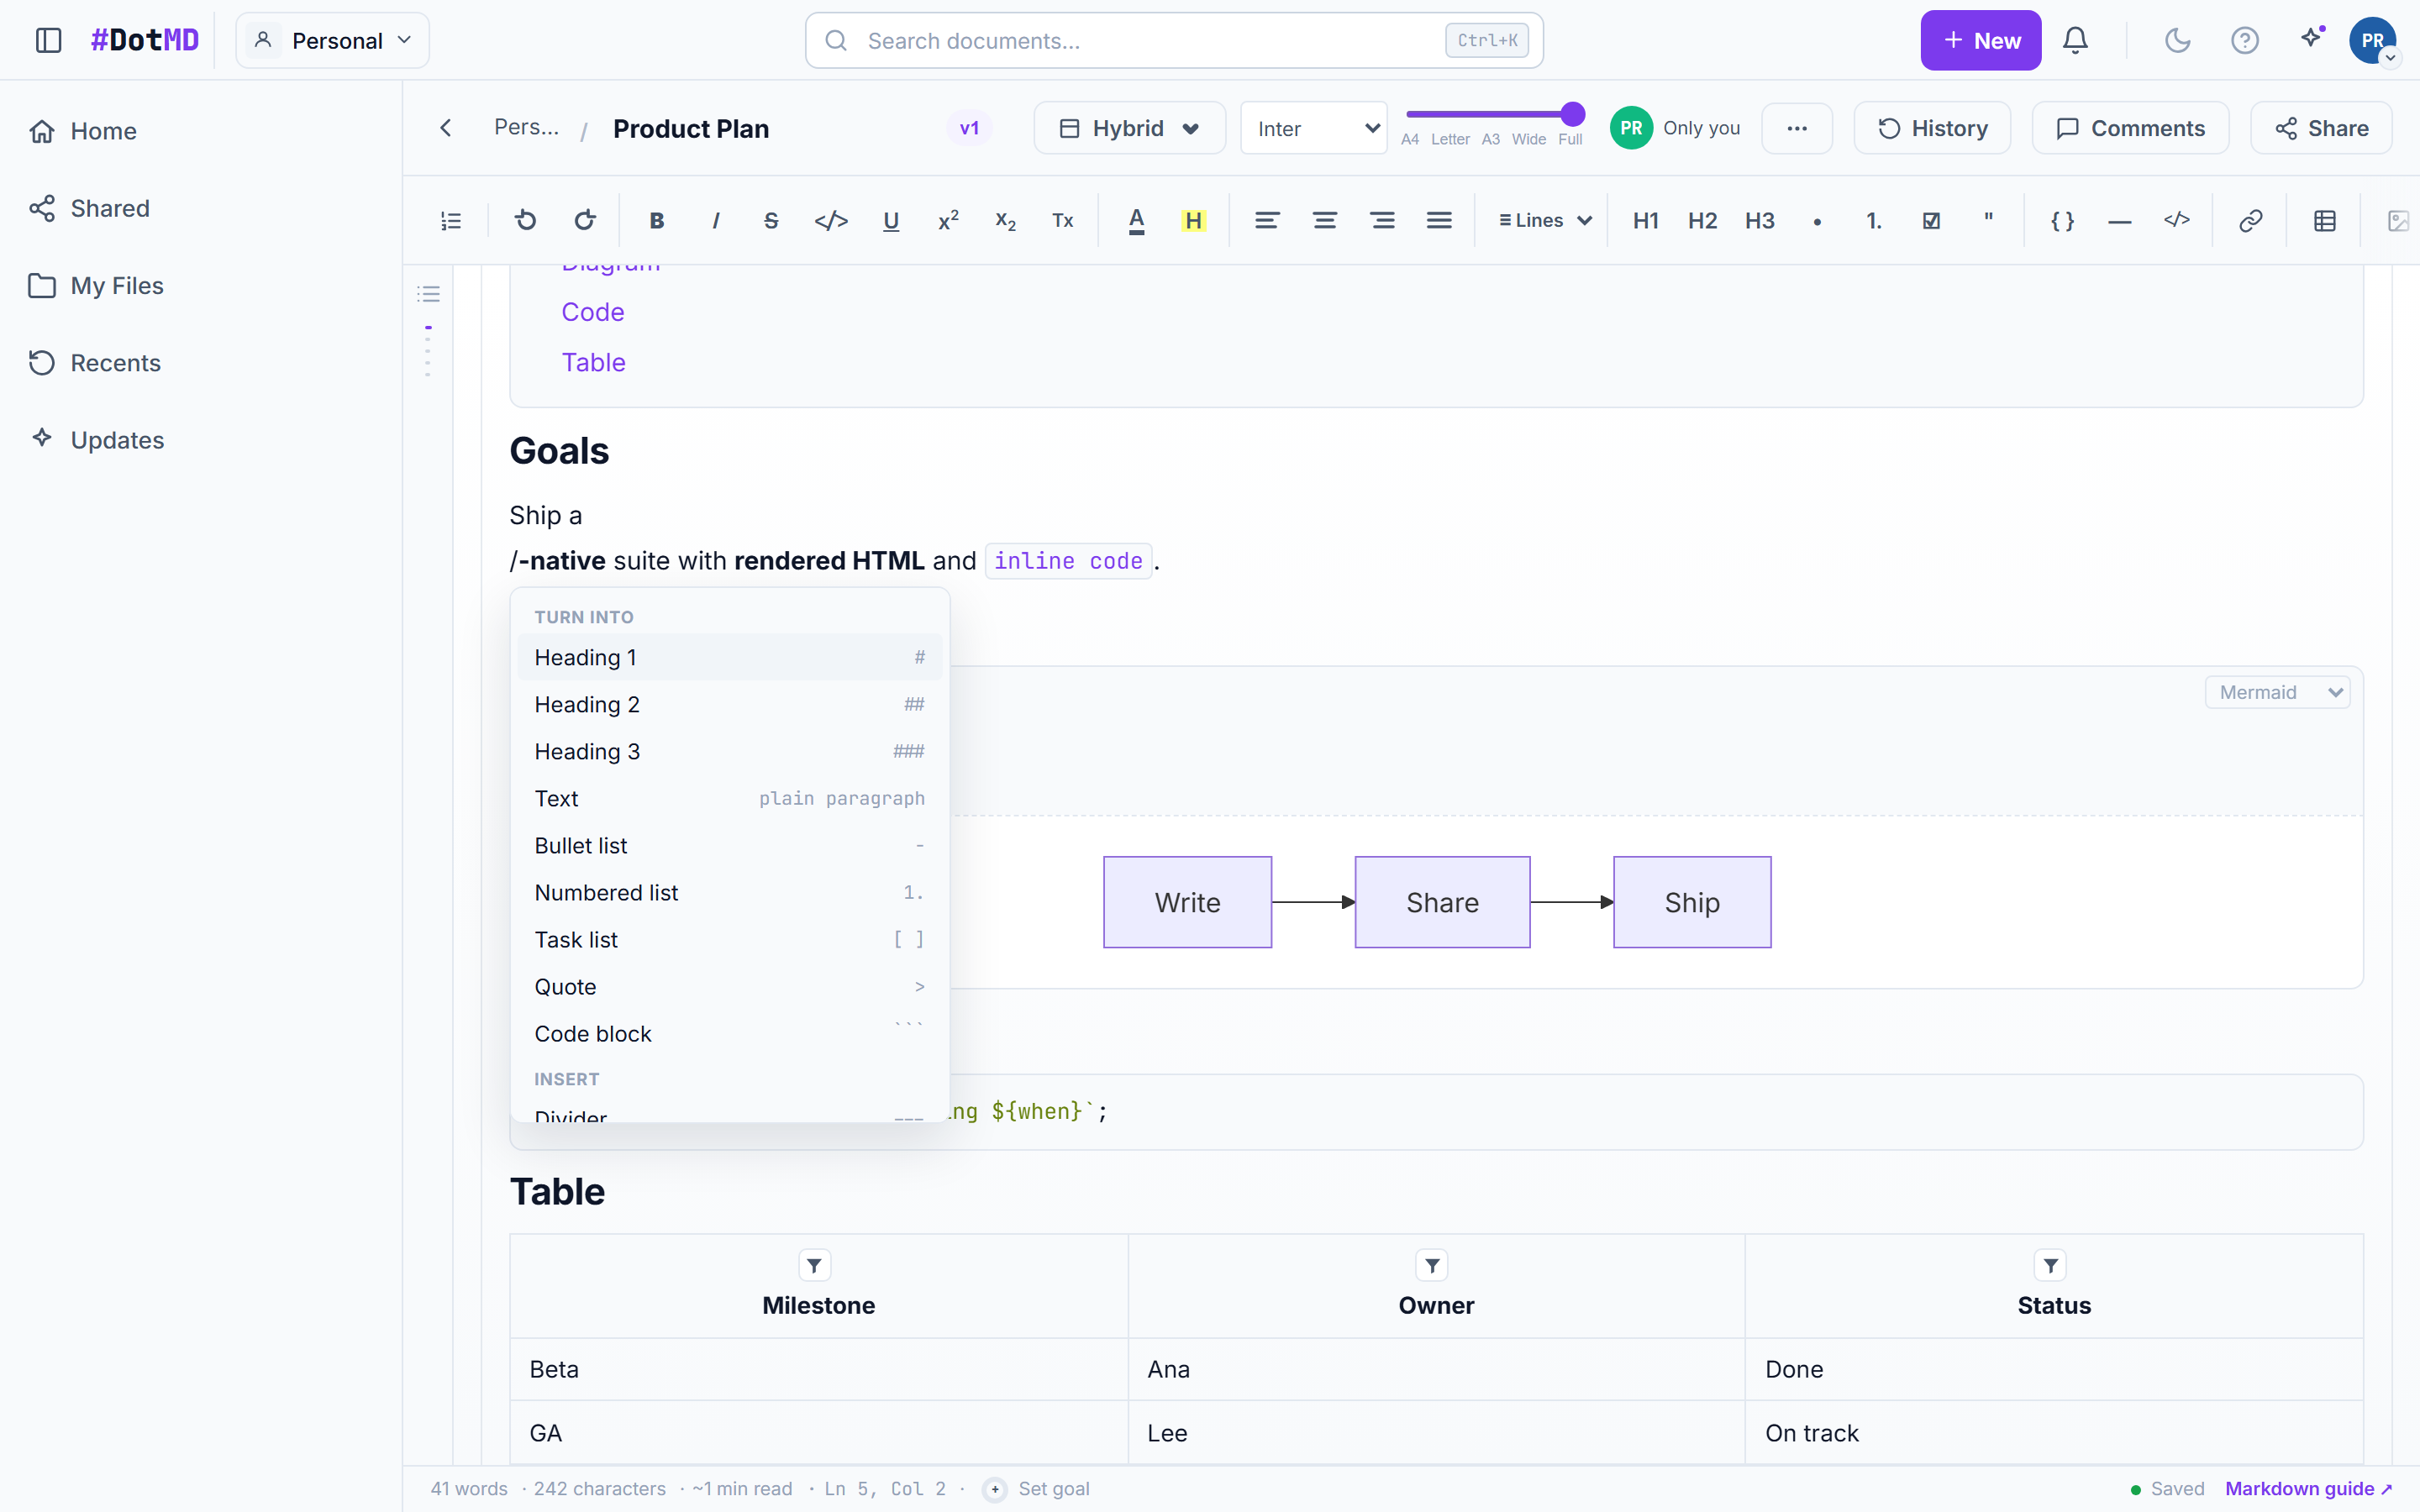
The slash-command menu open in the editor, listing insertable blocks such as headings, callouts, columns, and diagrams

Slash commands & rich blocks

Type "/" and insert anything — headings, callouts, multi-column layouts, diagrams — without memorizing syntax.

  1. Put the cursor on an empty line and type "/" to open the slash menu.
  2. Keep typing to filter (e.g. "/call" for callouts) and press Enter to insert.
  3. Insert callouts for notes and warnings, 2- to 4-column layouts for side-by-side content, mermaid blocks for diagrams that render live, and a table of contents that stays in sync with your headings.
Good to know
  • The outline rail beside the editor mirrors your heading structure — click any entry to jump.

Still stuck? Contact Customer Care

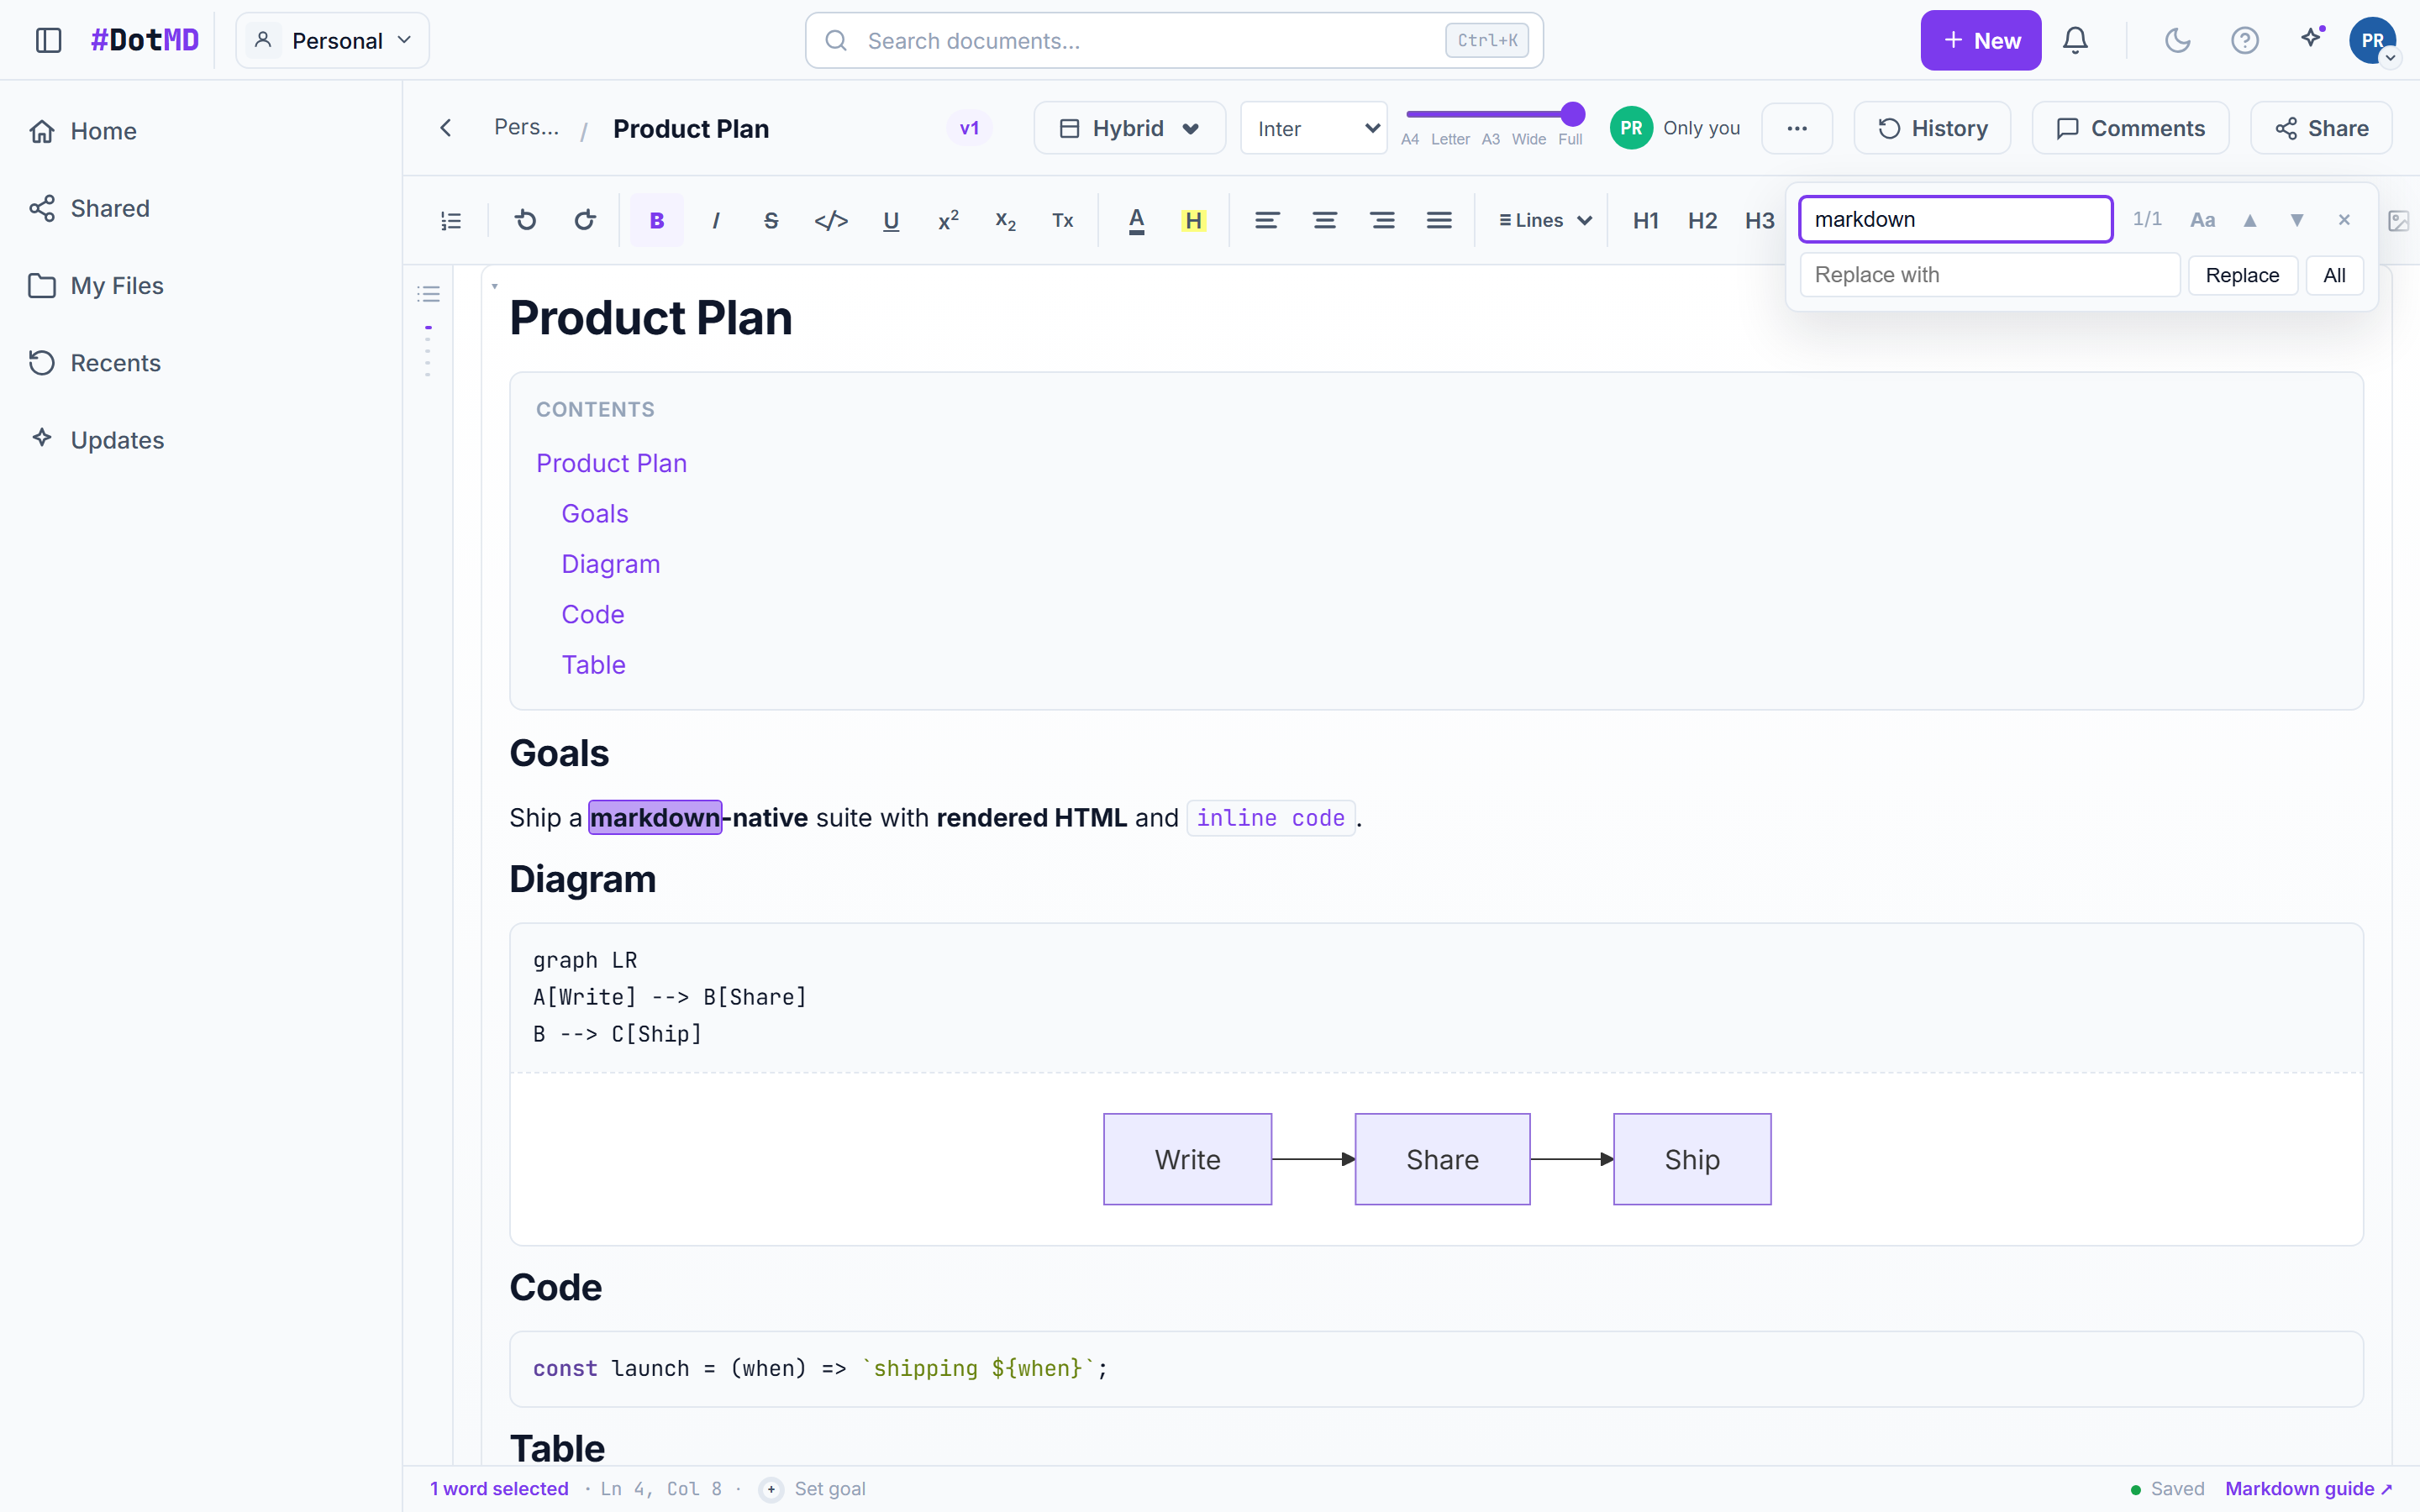
The in-document find-and-replace bar with a search query, match count, and replace controls

Find & replace

Search inside a document and replace one match or all of them — right from the keyboard.

  1. Press Ctrl/Cmd+F inside a document to open the find bar.
  2. Type a query — matches highlight live and the bar shows the match count; use the arrows to step through them.
  3. Expand to Replace to swap the current match or Replace all in one go.

Still stuck? Contact Customer Care

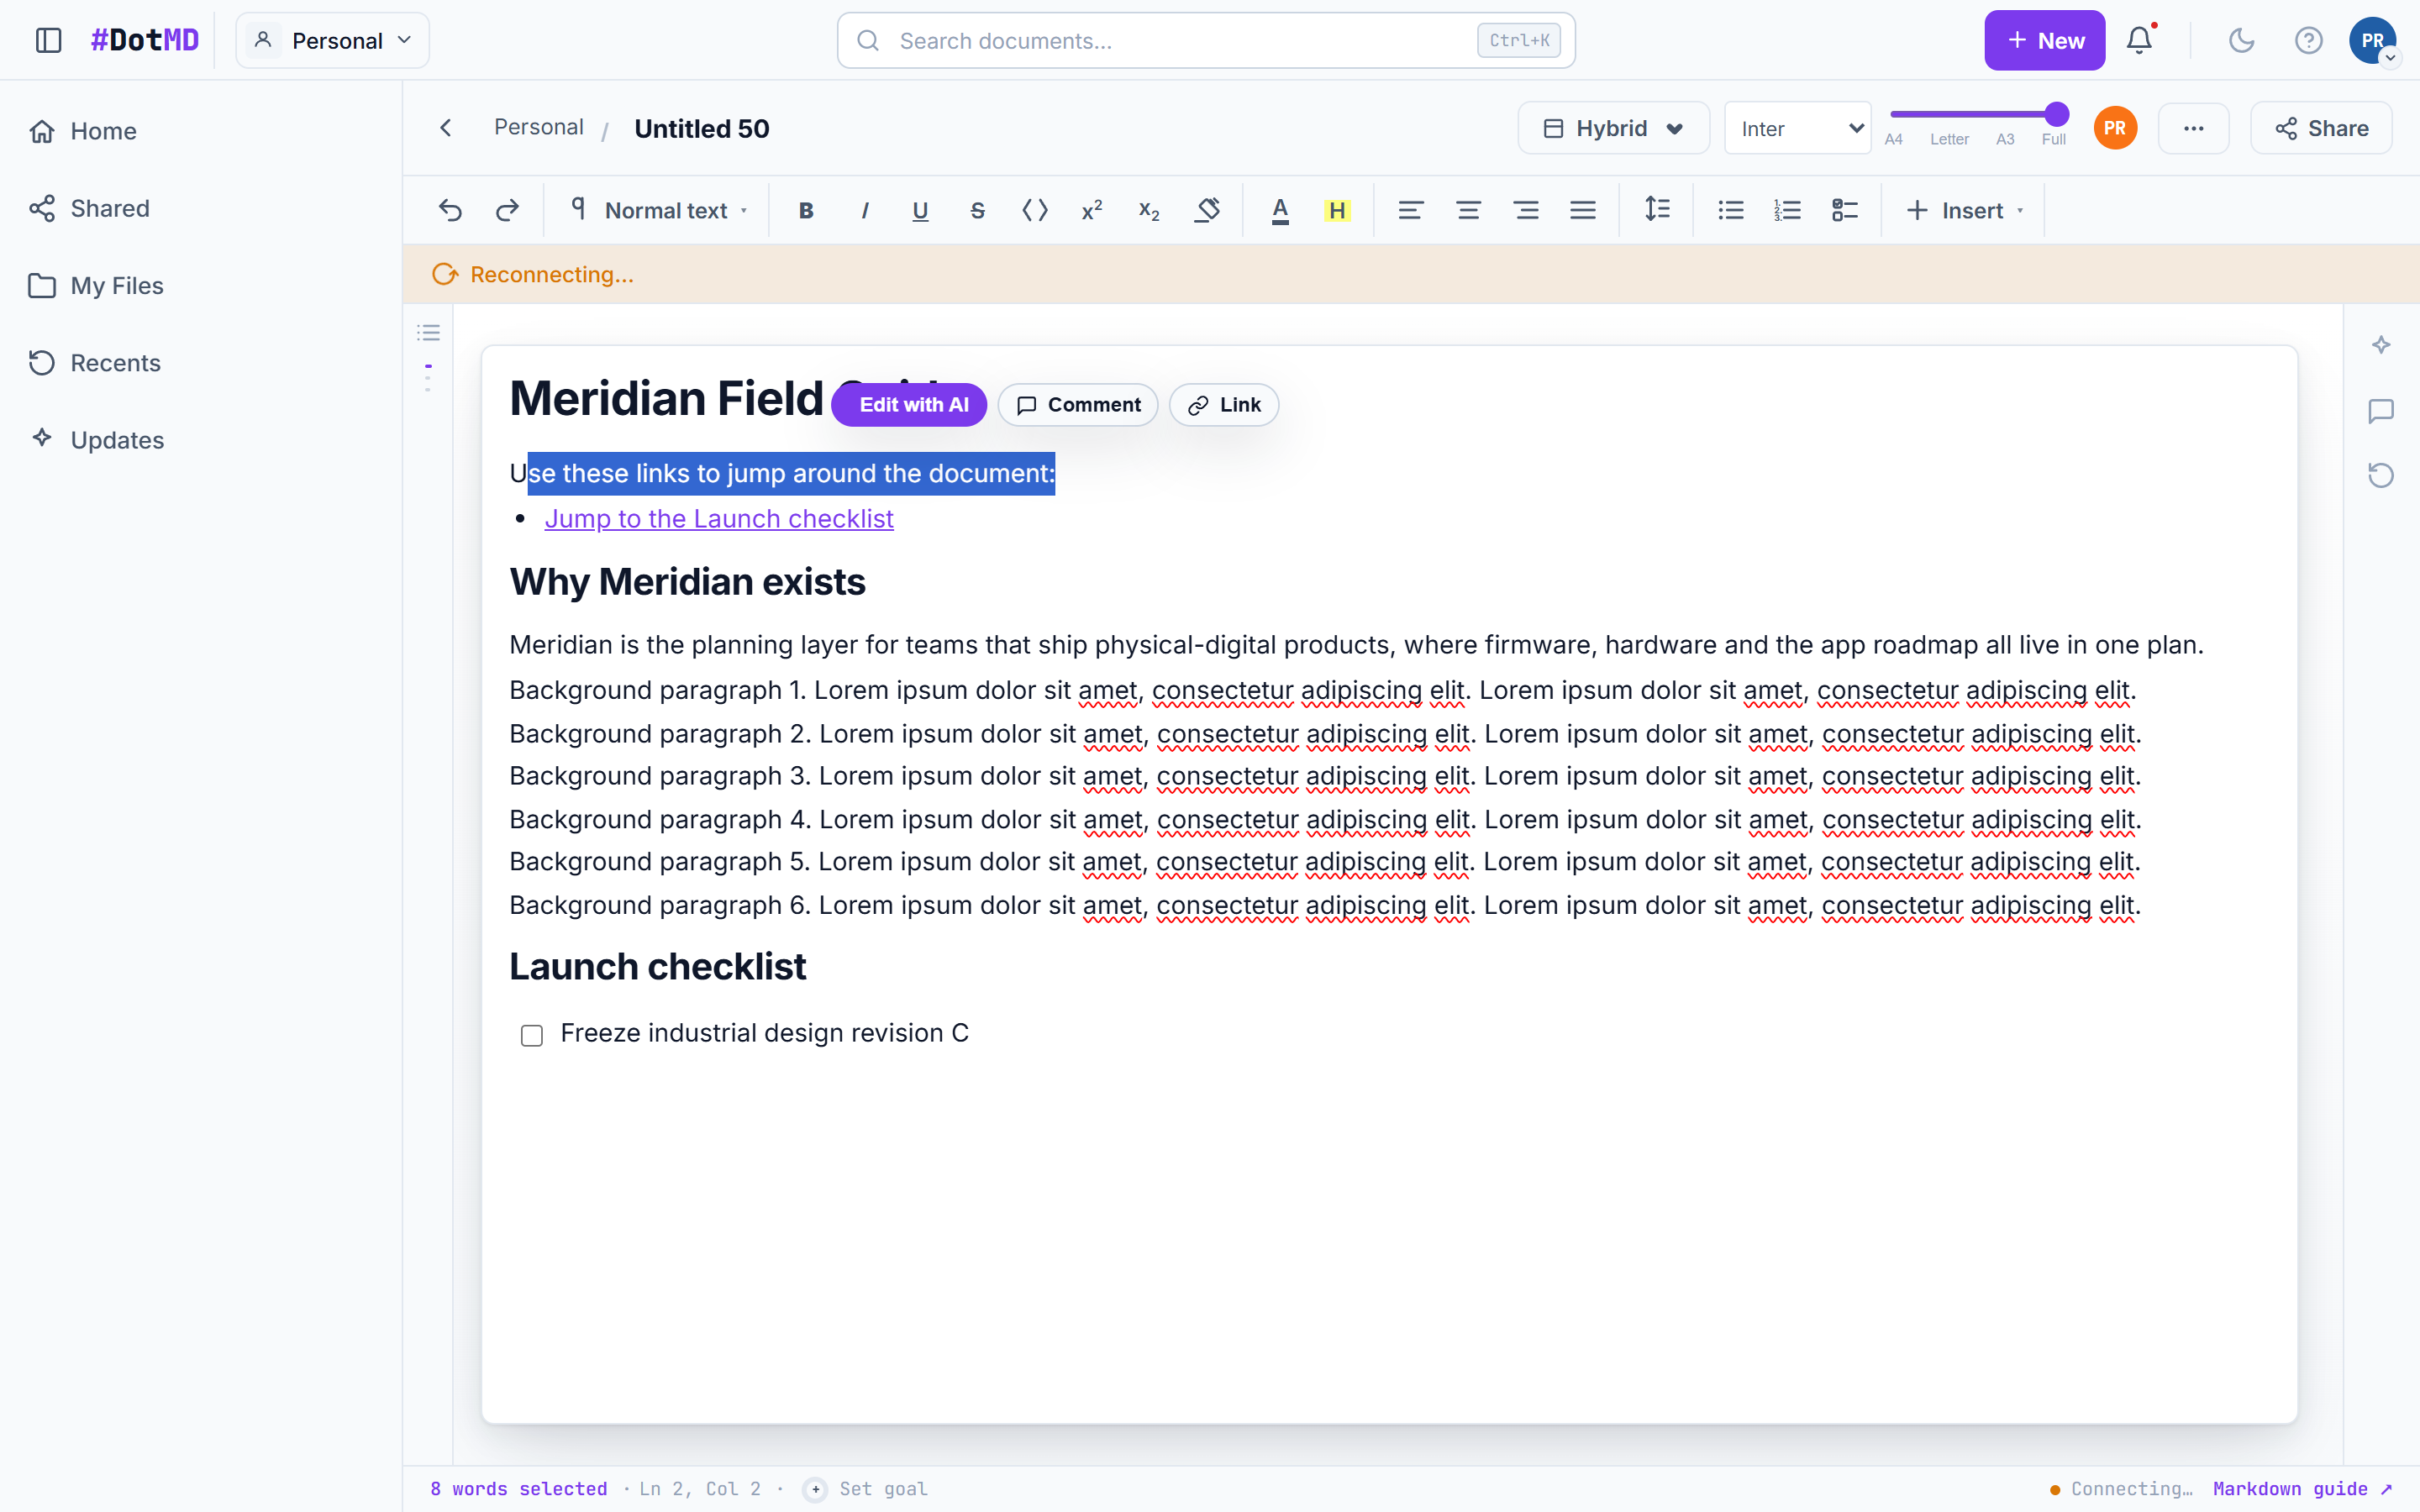
A document with a heading copy-link glyph and the selection "Link" pill that copies a deep link to that block

Anchor links — deep-link to any spot

Link to an exact heading, section, or line inside a document — like a hyperlink, but pointing inside the same doc. Share the URL and it opens scrolled right to that spot, and the links keep working as the document is edited.

  1. Hover any heading — a small link icon appears in the left margin; click it to copy a link straight to that heading. The address bar updates with a #section fragment.
  2. To link an arbitrary block, select some of its text and click the "Link" pill in the pop-up (or press Ctrl/Cmd+Shift+A). DotMD attaches a stable anchor to that block and copies its link.
  3. Paste an anchor link into any document with Ctrl/Cmd+K → type "#" to pick a heading or existing anchor from the list.
  4. Click any internal link (or open a shared anchor URL) — the page scrolls to the target and briefly flashes it so you can see where you landed.
Good to know
  • Heading links use the heading text, so renaming a heading changes its link; block links (the Link pill / Ctrl+Cmd+Shift+A) are sticky and survive edits, moves, and collaboration.
  • The same idea works across surfaces: Slides use #s2 for slide 2, and Sheets use #Sheet2!A1 for a cell or range.

Still stuck? Contact Customer Care
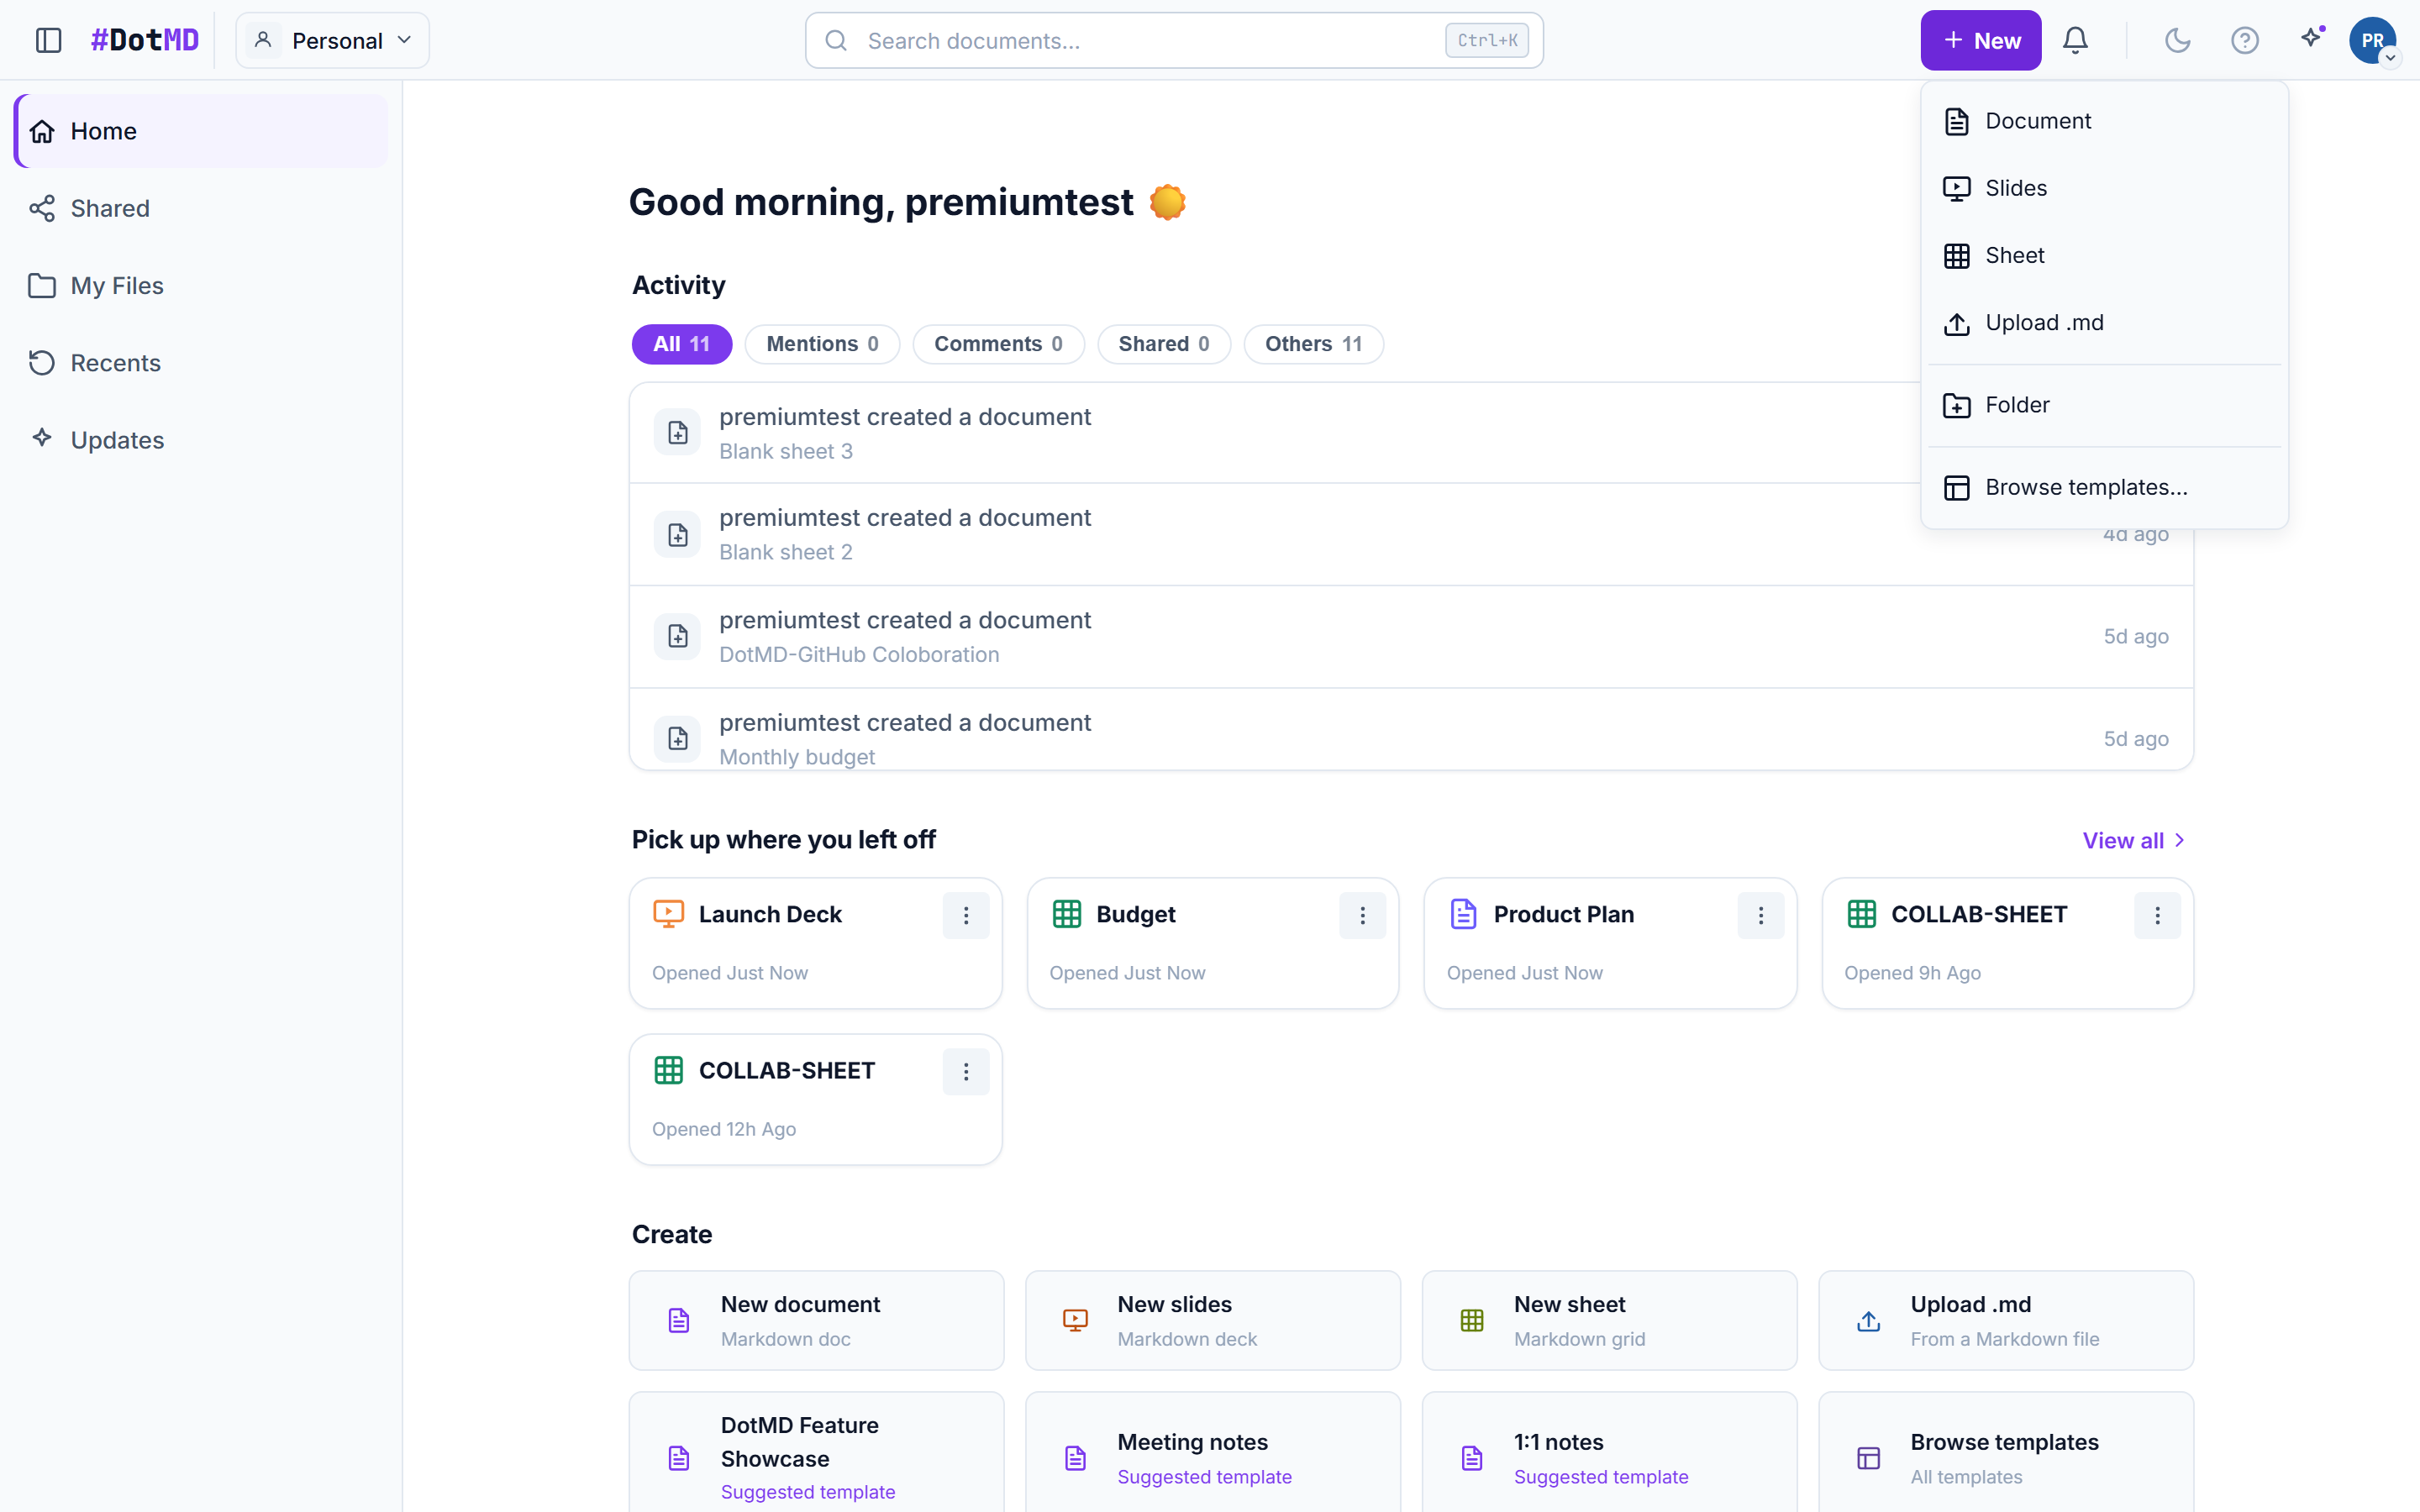
The "+ New" menu on the dashboard offering a new document, slides, sheet, folder, and the template gallery

Creating documents & templates

Start from a blank page, a slides deck, a sheet — or skip the blank page entirely with the template gallery.

  1. Click "+ New" in the top bar (or the dashboard quick-action cards) and pick Document, Slides, or Sheet.
  2. Choose "Templates" to browse the gallery with a live preview — meeting notes, specs, decks, and more.
  3. Everything saves automatically as you type; organize documents into folders from the sidebar.

Still stuck? Contact Customer Care
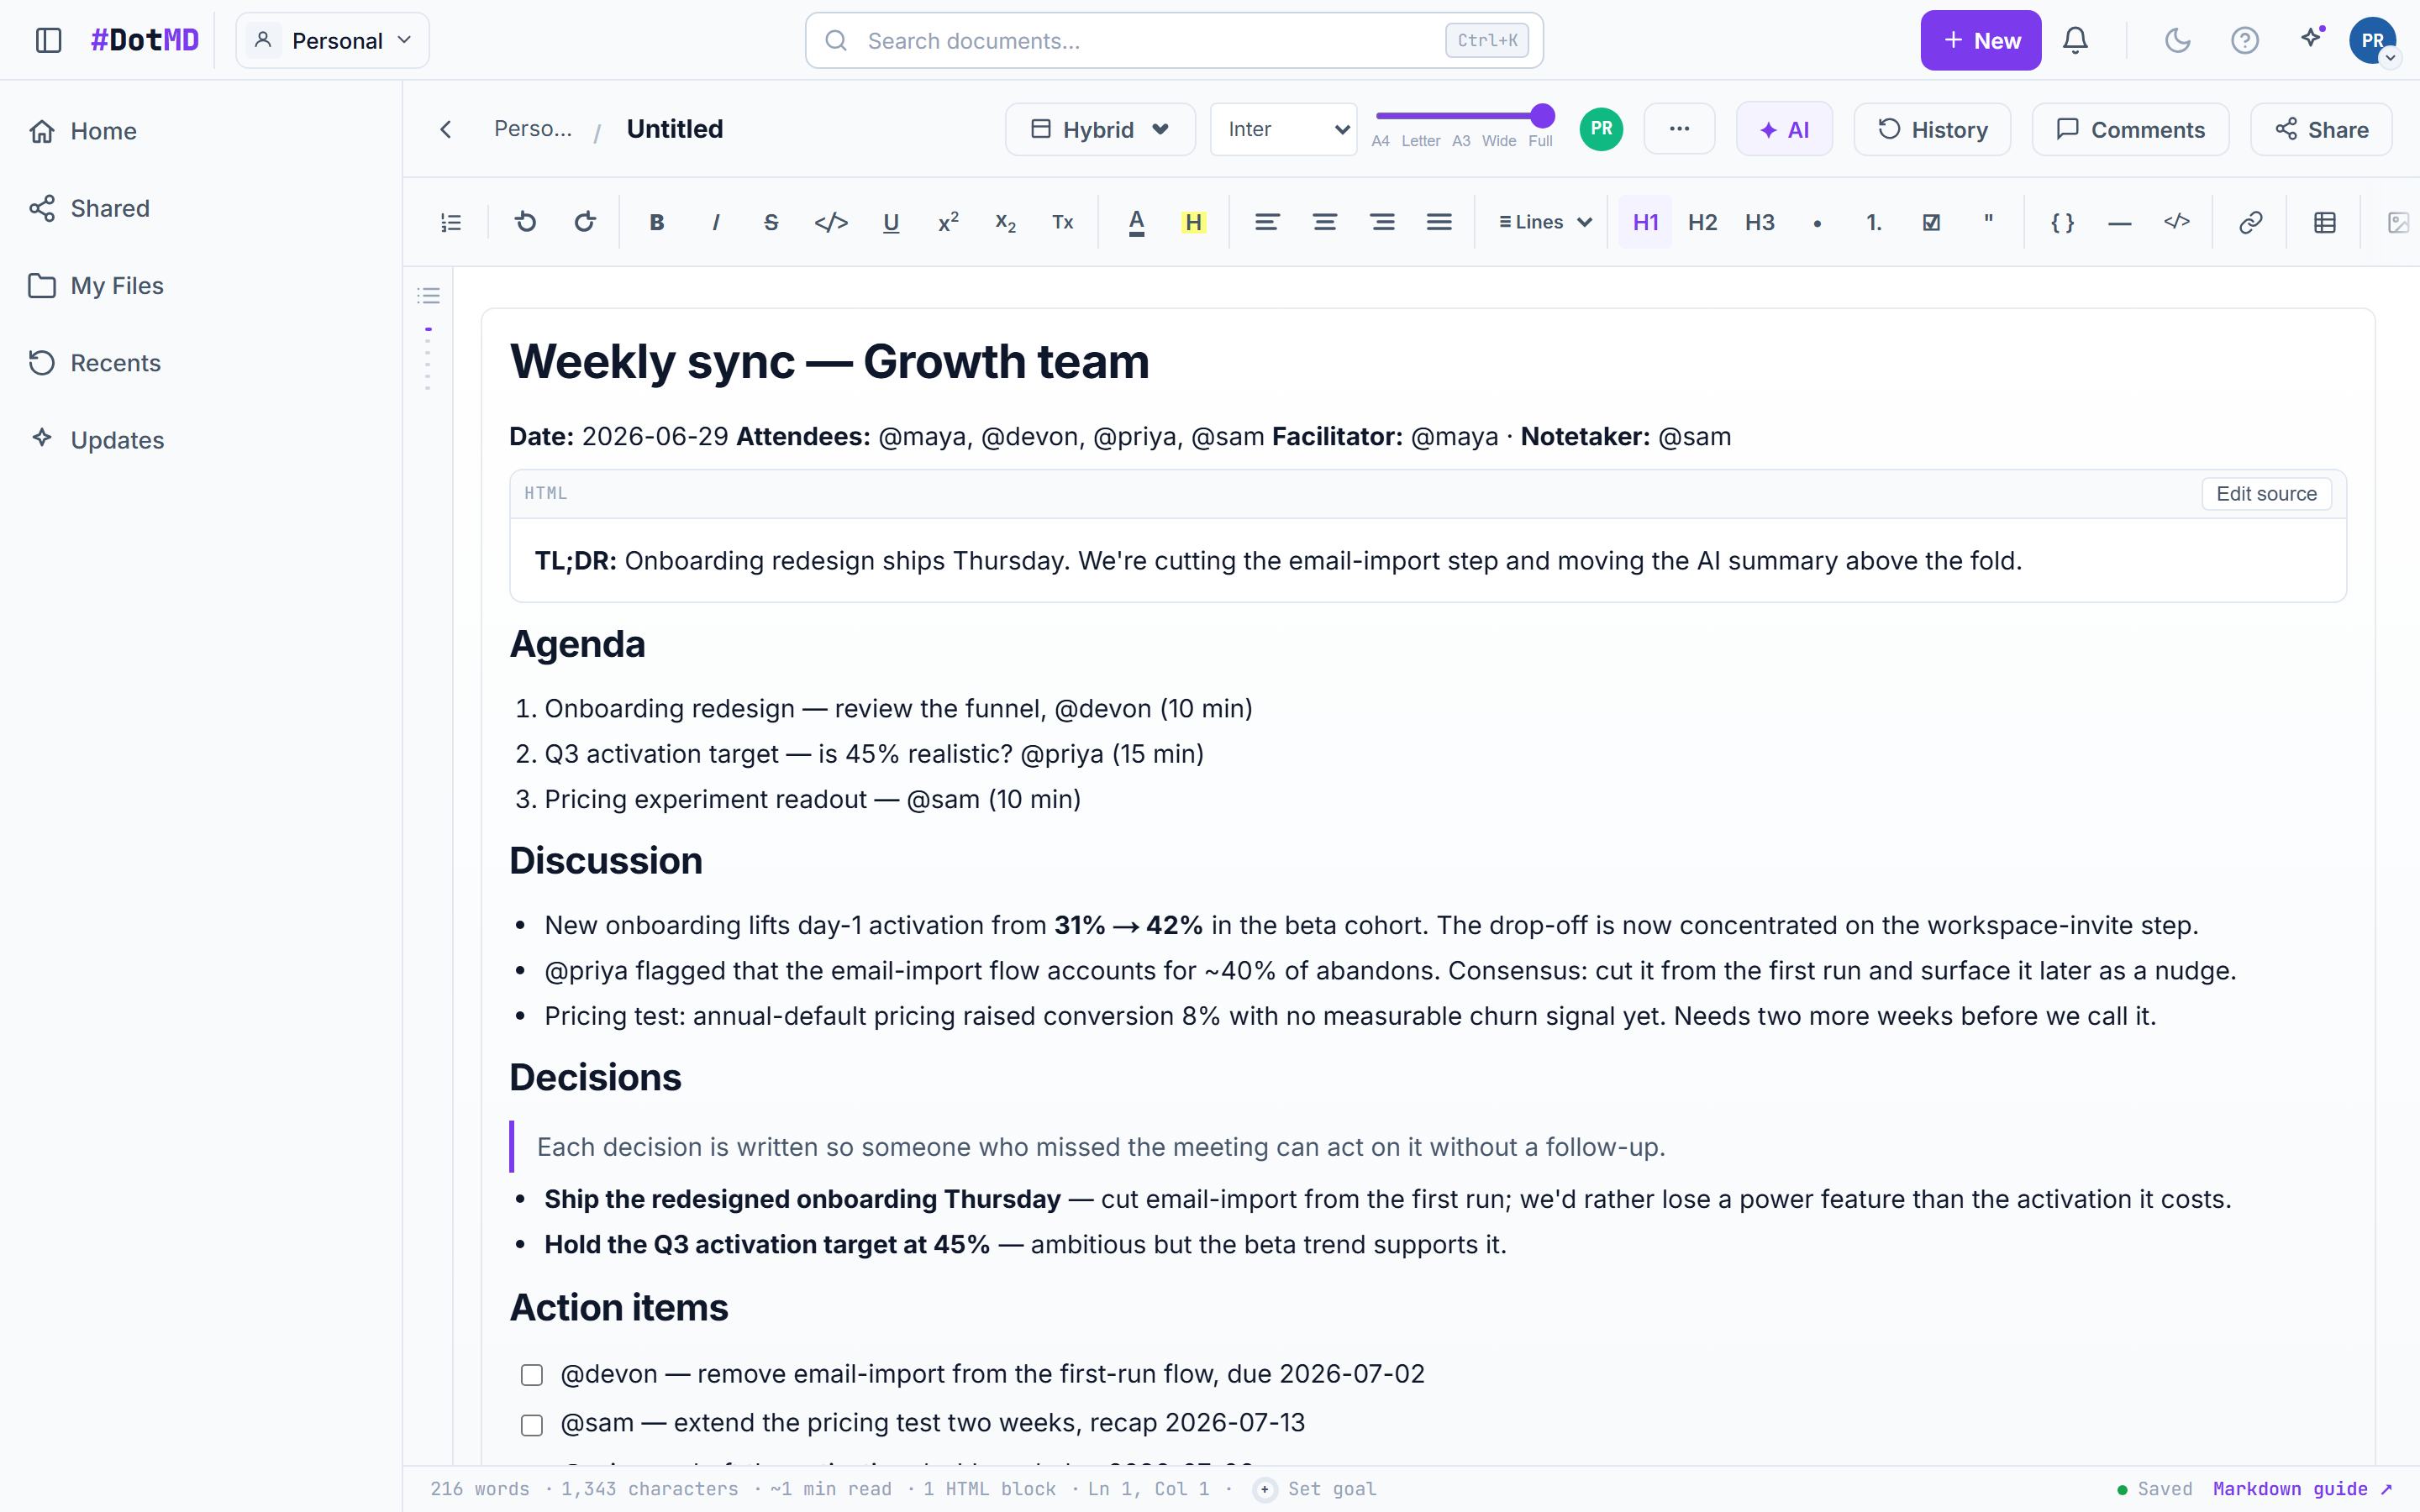
The document editor with the formatting toolbar across the top: text styles, headings, lists, table, code, and link controls

A tour of the formatting toolbar

Everything you need to format a document sits in one toolbar above the page — no hidden menus, no memorizing Markdown if you don’t want to.

  1. Select some text and use the toolbar to make it bold, italic, or struck through — or press Ctrl/Cmd+B and Ctrl/Cmd+I.
  2. Use the heading control to turn a line into a title, section heading, or sub-heading. Your headings automatically build the document outline in the side rail.
  3. Create bulleted, numbered, or checkbox to-do lists from the list buttons — press Tab inside a list to indent a level.
  4. Insert a table from the toolbar, then click any column header for sorting, filtering, and column options.
  5. Use the code button for inline code, or insert a code block for longer snippets — the language is detected and highlighted for you.
  6. Select text and click the link button (or press Ctrl/Cmd+K) to turn it into a link.
Good to know
  • Prefer typing? Standard Markdown works as you type: # for headings, - for lists, ** for bold, and ` for code.

Still stuck? Contact Customer Care
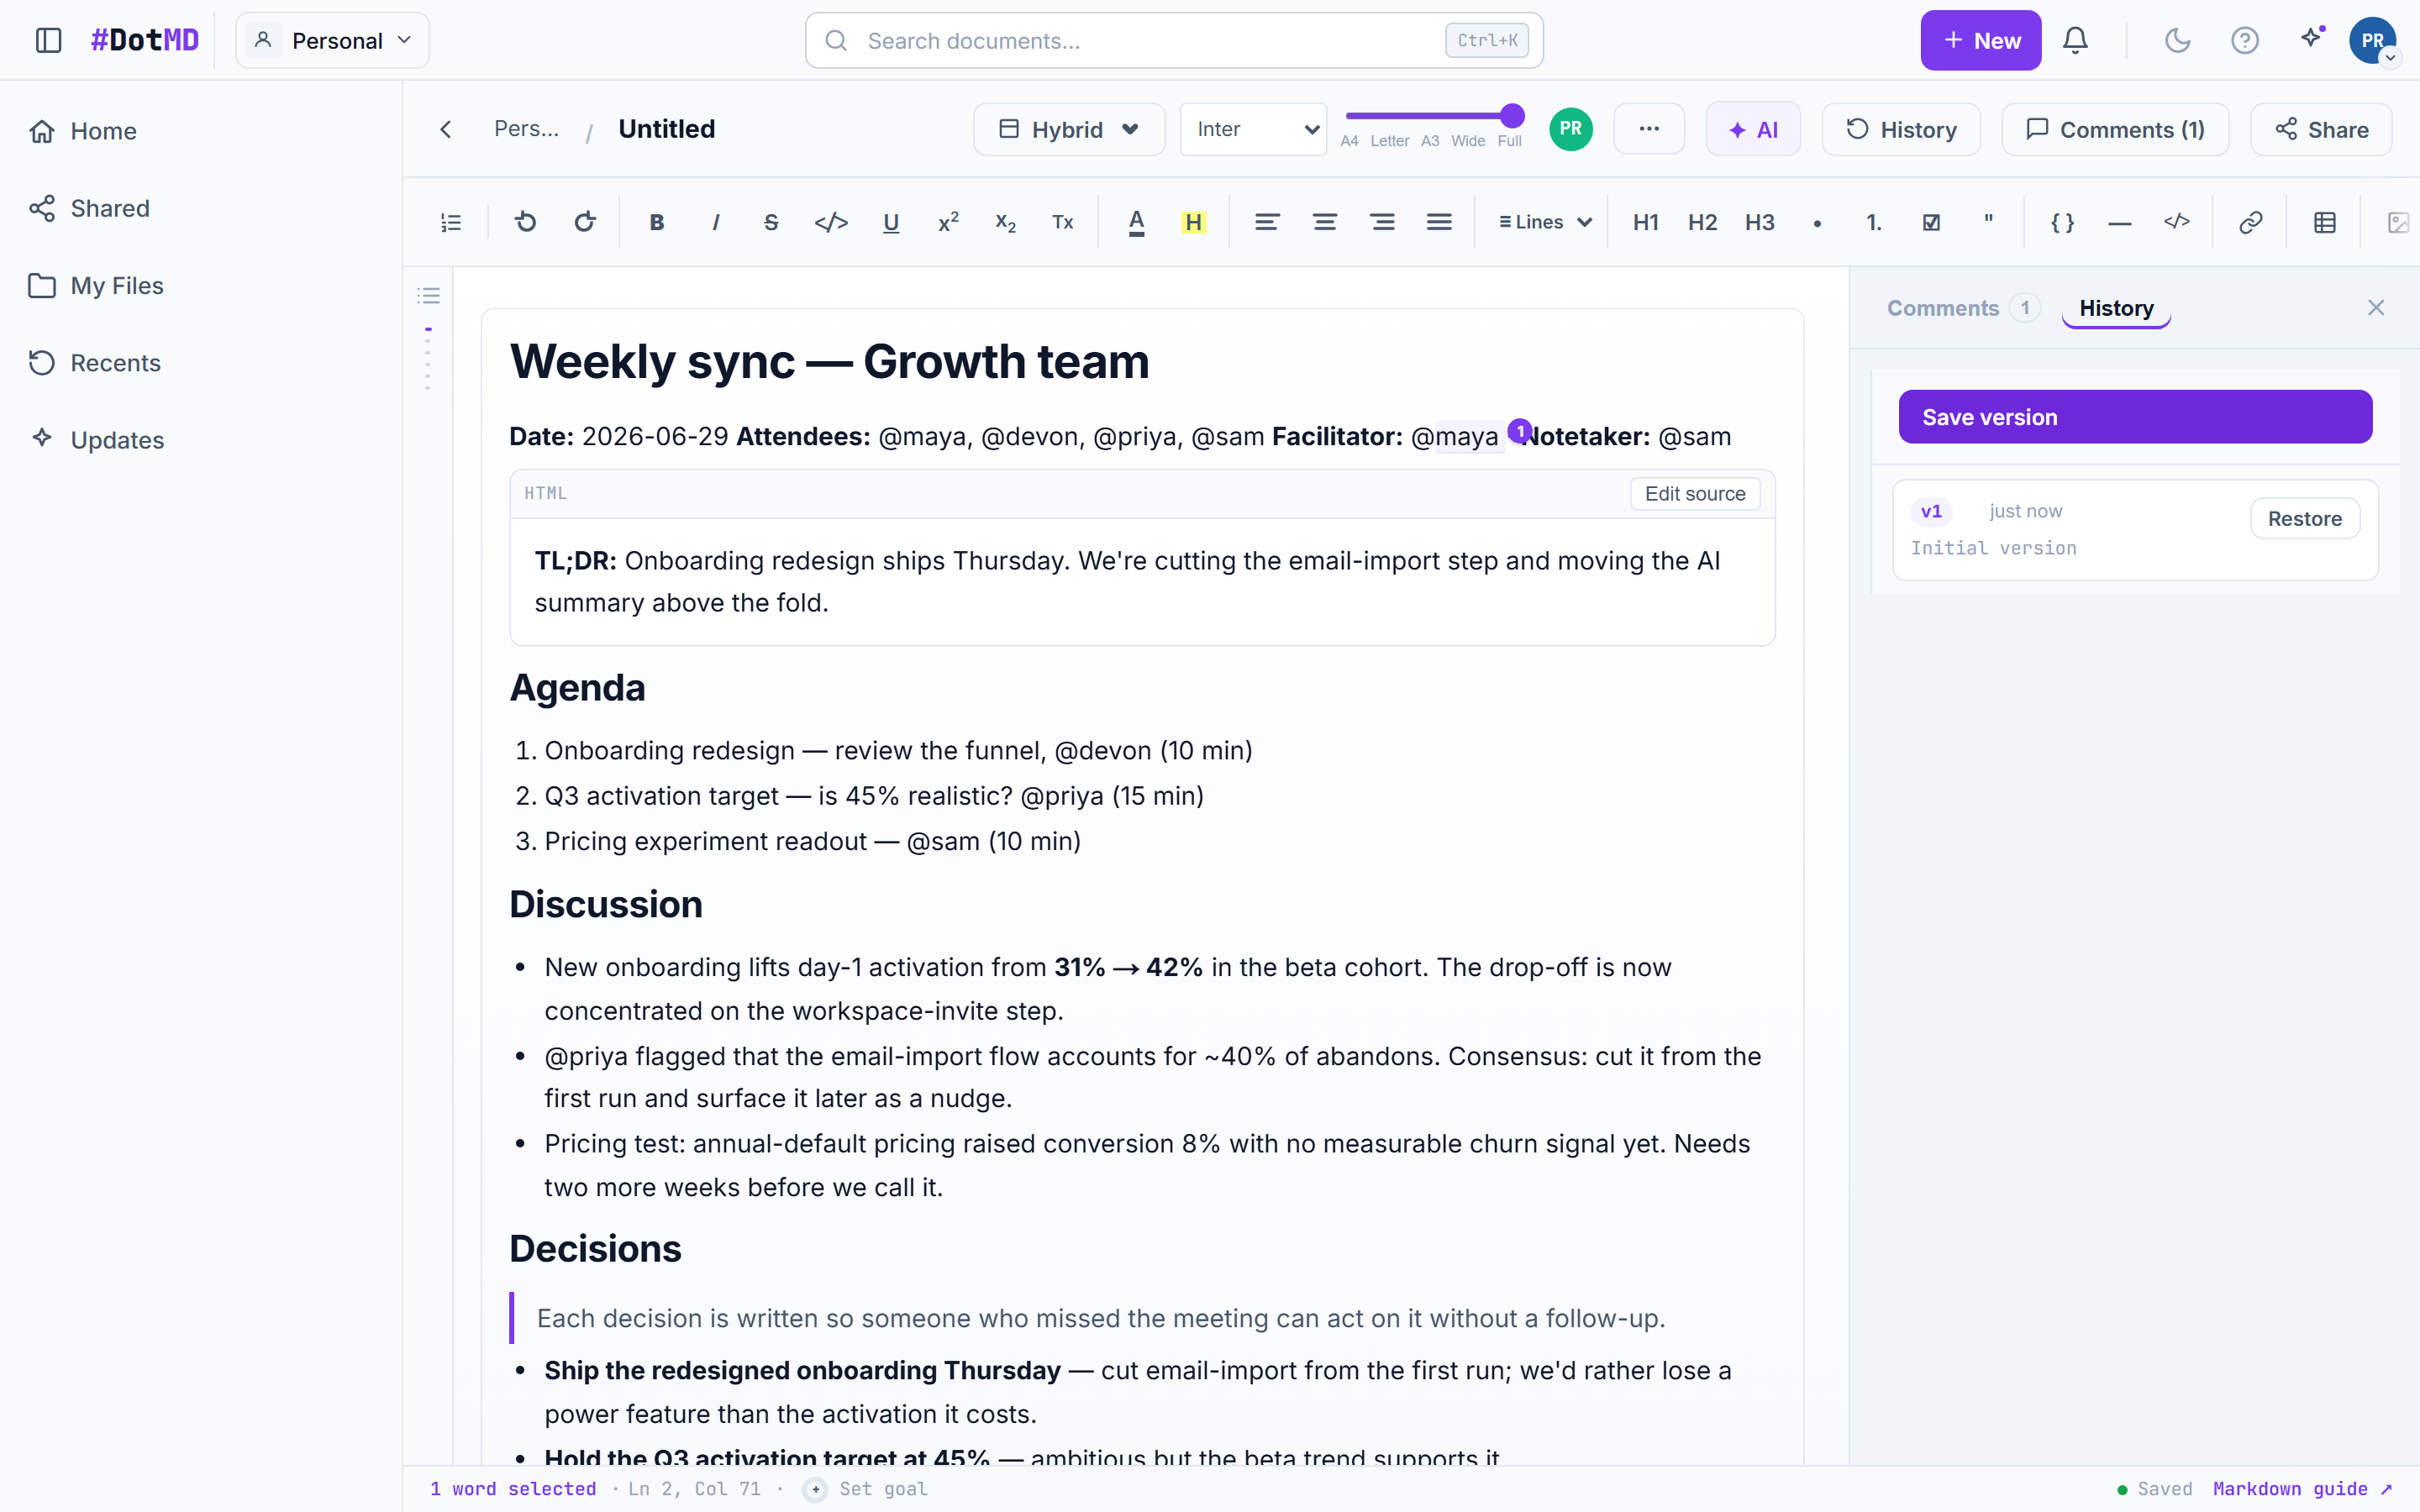
The version history panel open beside a document, listing snapshots with timestamps and restore controls

Version history — save, compare, restore

DotMD quietly keeps snapshots of your document as you work. If something goes wrong — or you just liked yesterday’s draft better — you can look back, compare, and restore.

  1. Open a document and click the clock icon in the top bar to open Version history.
  2. Browse the list of snapshots — each shows when it was saved. Click one to preview the document as it was at that moment.
  3. Use the comparison view to see exactly what changed between then and now — additions and removals are highlighted line by line.
  4. Click Restore to bring that version back. Restoring never destroys anything: the state you restored from becomes a snapshot too, so you can always change your mind.
Good to know
  • The Free plan keeps your last 10 snapshots; Premium keeps every version for as long as you want.

Still stuck? Contact Customer Care
The sidebar file tree showing folders with documents nested inside them

Folders & keeping documents organized

Group related documents into folders — projects, teams, topics — and find anything again from the sidebar or the ⌘K search.

  1. Create a folder from the "+ New" menu (or the sidebar’s new-folder button) and give it a name.
  2. Drag documents into folders in the sidebar, or use a document’s "…" menu → Move to pick a destination.
  3. Nest folders inside folders to build whatever structure fits your work.
  4. Can’t remember where you filed something? Press Ctrl/Cmd+K and type part of its title — search finds it wherever it lives.
Good to know
  • Folders can be shared and can even sync two-way with a GitHub repository (see the GitHub section below).

Still stuck? Contact Customer Care
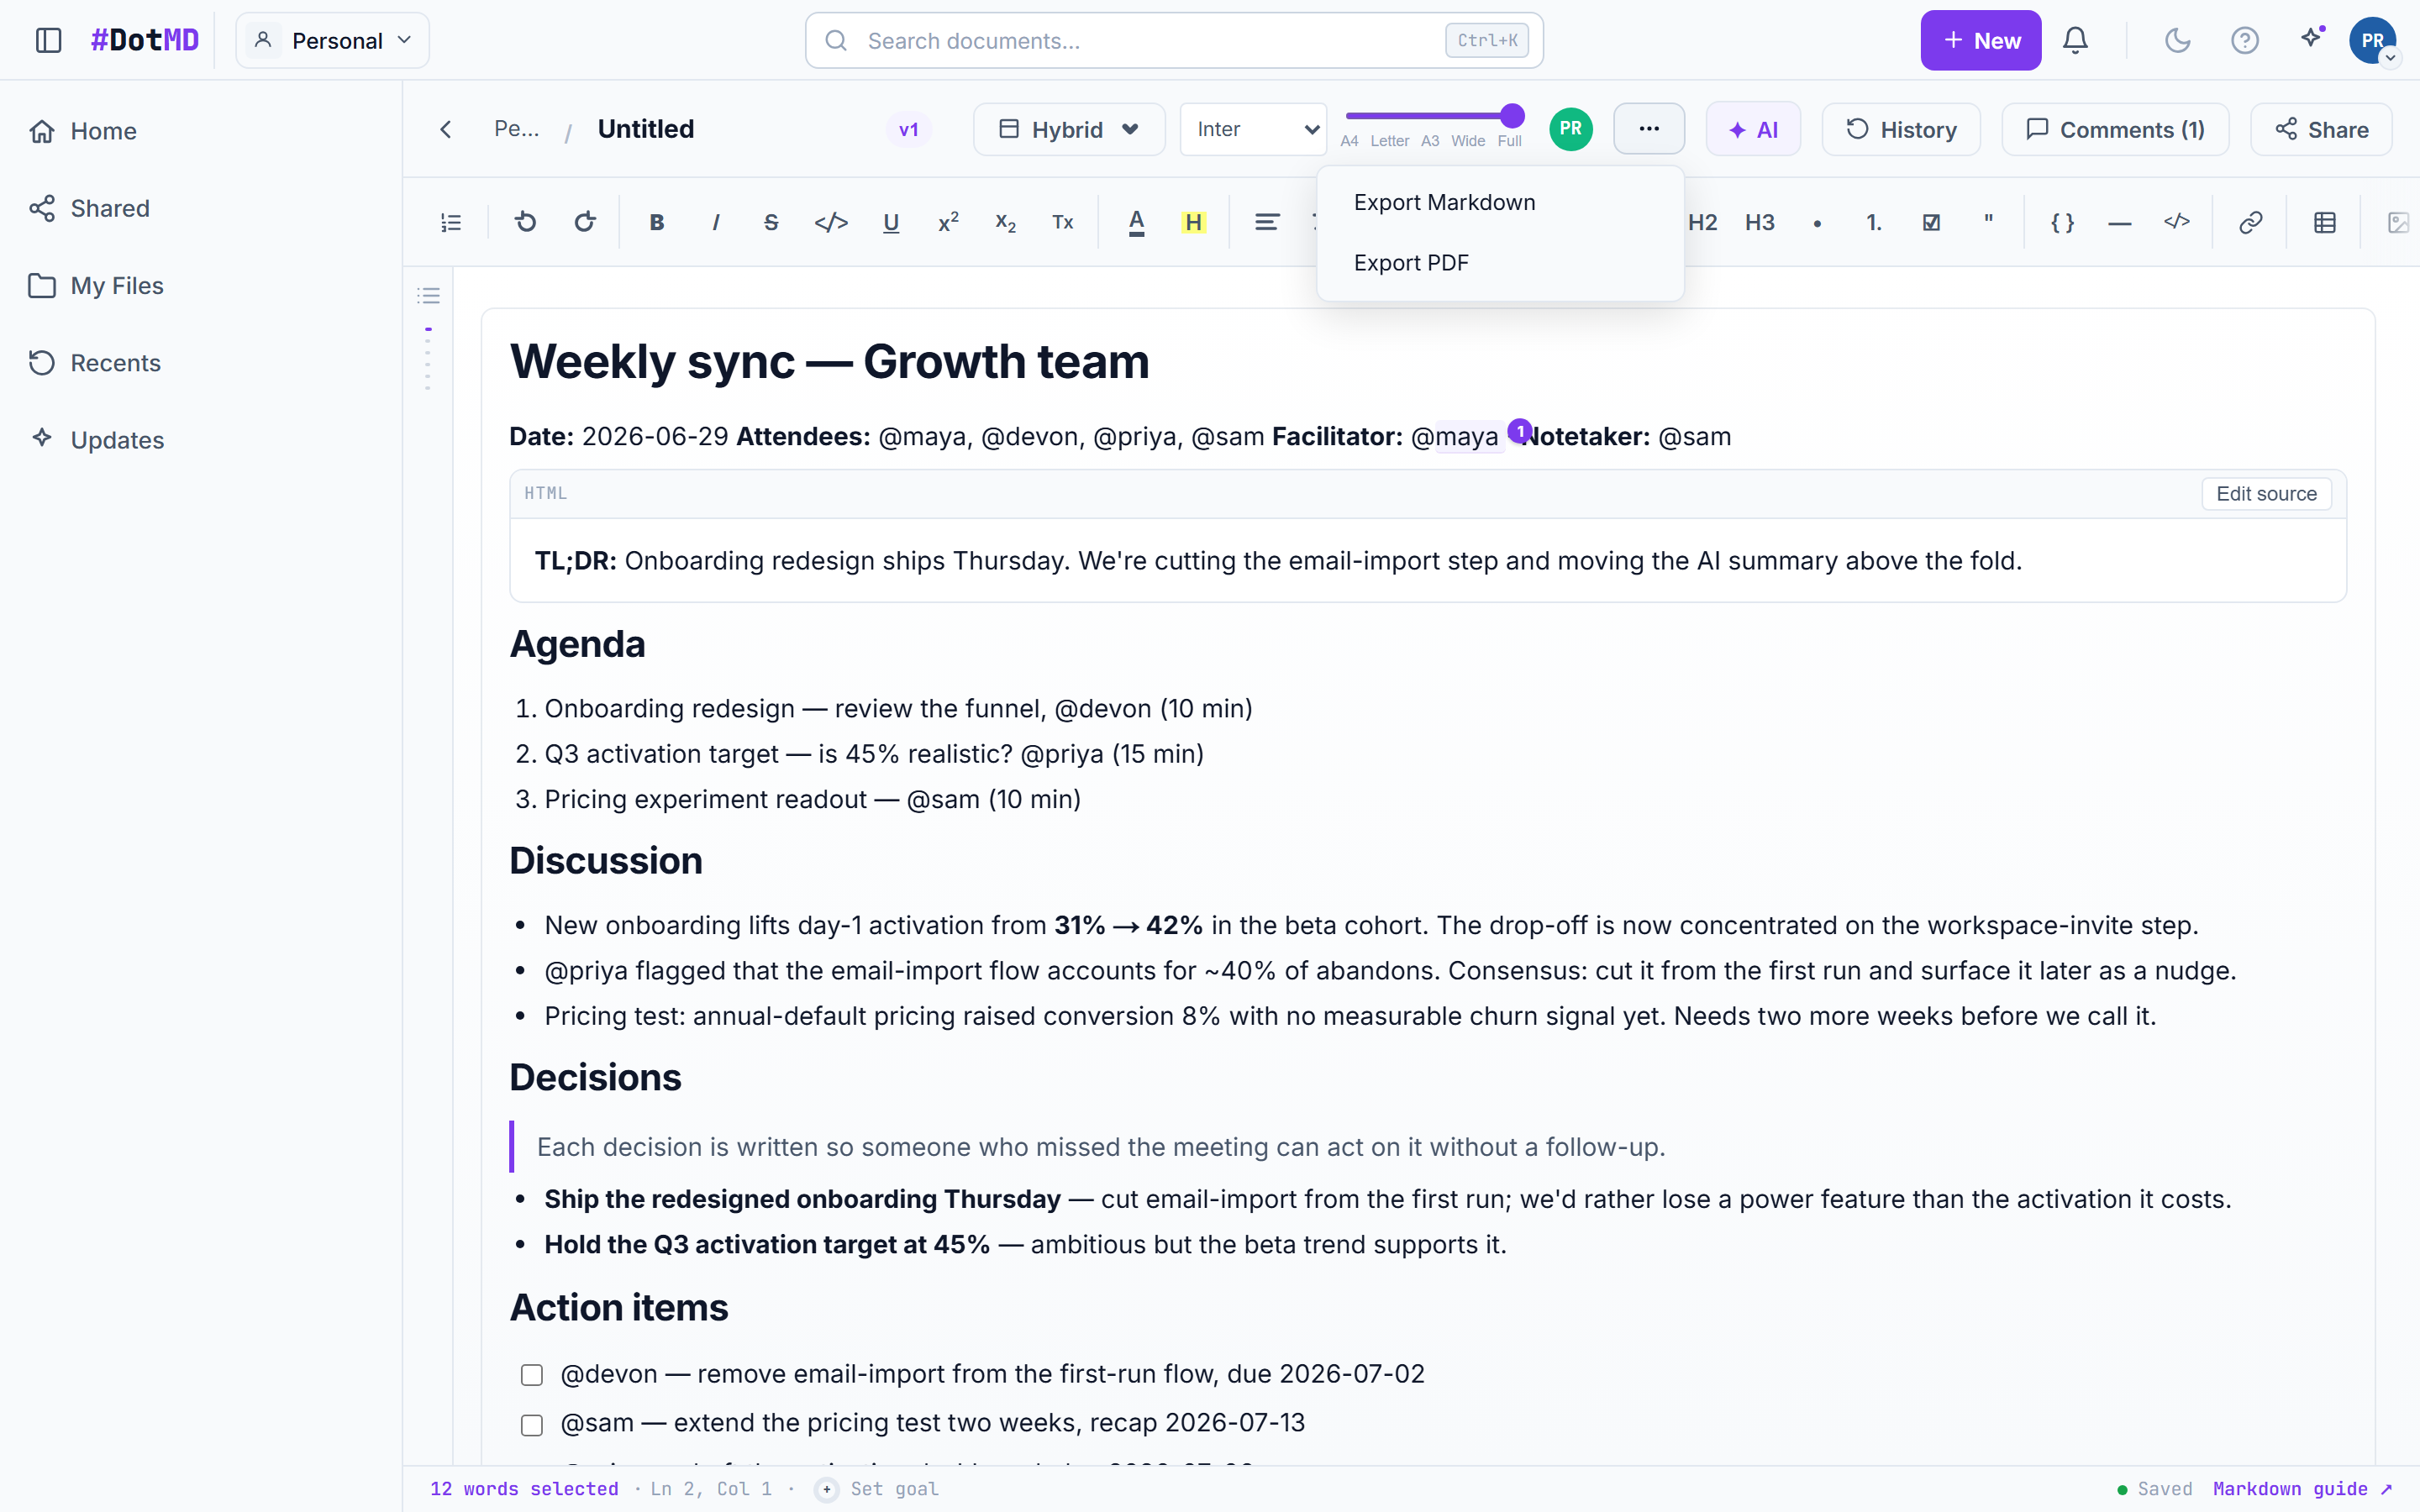
The export menu open on a document, offering PDF and Markdown download options

Export to PDF or Markdown

Your content is never locked in. Any document, deck, or sheet exports to a file you can send, print, or open anywhere.

  1. Open the document and choose Export from the top-bar menu.
  2. Pick PDF for a print-ready file, or Markdown (.md) for the raw text — the same Markdown you see in the editor, readable in any text editor.
  3. For sheets, the choices adapt: PDF exports the whole workbook (one page per sheet), and Markdown offers a "With formulas" option that re-imports losslessly — upload the file later and you get your working spreadsheet back.
  4. Slides decks export the same way — the Markdown file keeps your "---" slide separators, so it stays a deck.
Good to know
  • Want everything at once? Settings → Account → Export your data downloads a bundle of all your documents.

Still stuck? Contact Customer Care
Collaboration

Edit together in real time and control exactly who can see, comment, or edit.

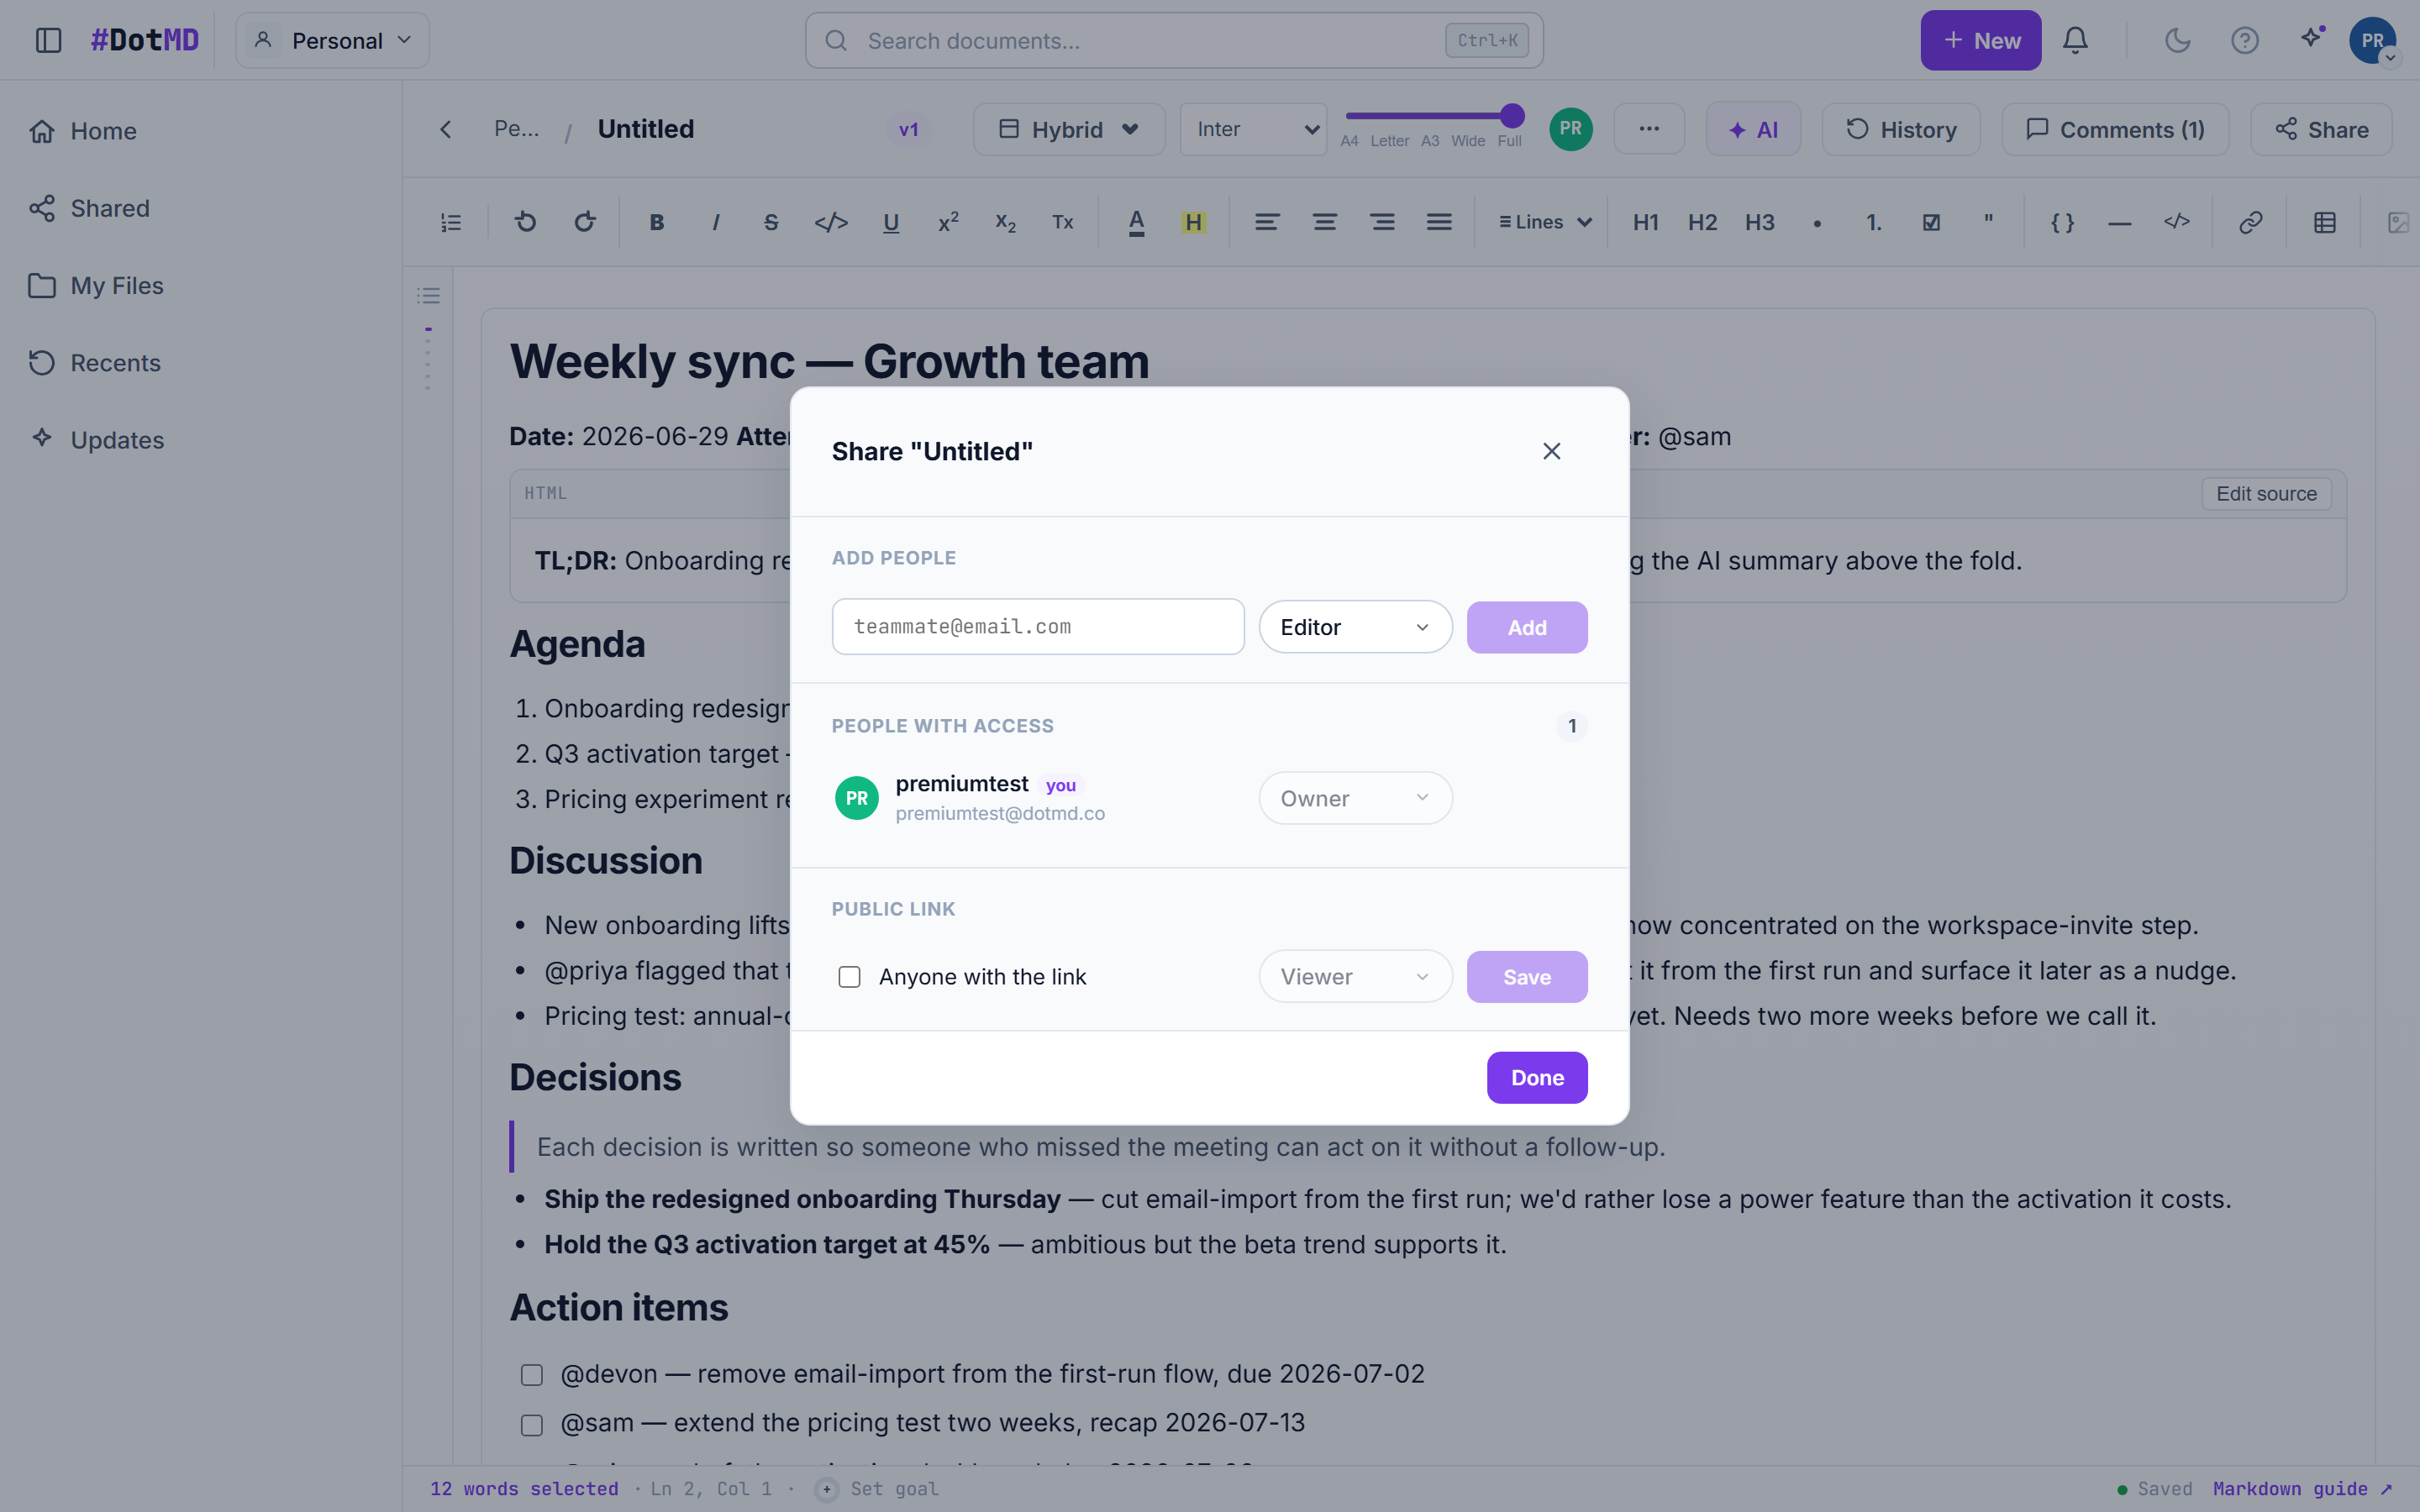
The Share dialog for a document with email invitations and the Viewer, Commenter, and Editor role choices

Sharing & real-time collaboration

Everyone edits the same live document — you see collaborators’ cursors move and an "N viewing" presence count while they are in it.

  1. Open the Share dialog from the editor’s top bar and invite people by email.
  2. Give each person a role: Viewer (read only), Commenter (read + comment), or Editor (full editing). Change or revoke roles later from the same dialog.
  3. Turn on link sharing to let anyone with the link view the document — guests can read shared documents without an account.
  4. Collaborate live: cursors, selections, and the presence count update in real time as people join.
Good to know
  • Collaboration is included on Free with no fixed collaborator limit per document (fair use).
  • A document can be open in at most 2 places at once per account, and each account supports up to 5 active sign-ins (devices).

Still stuck? Contact Customer Care
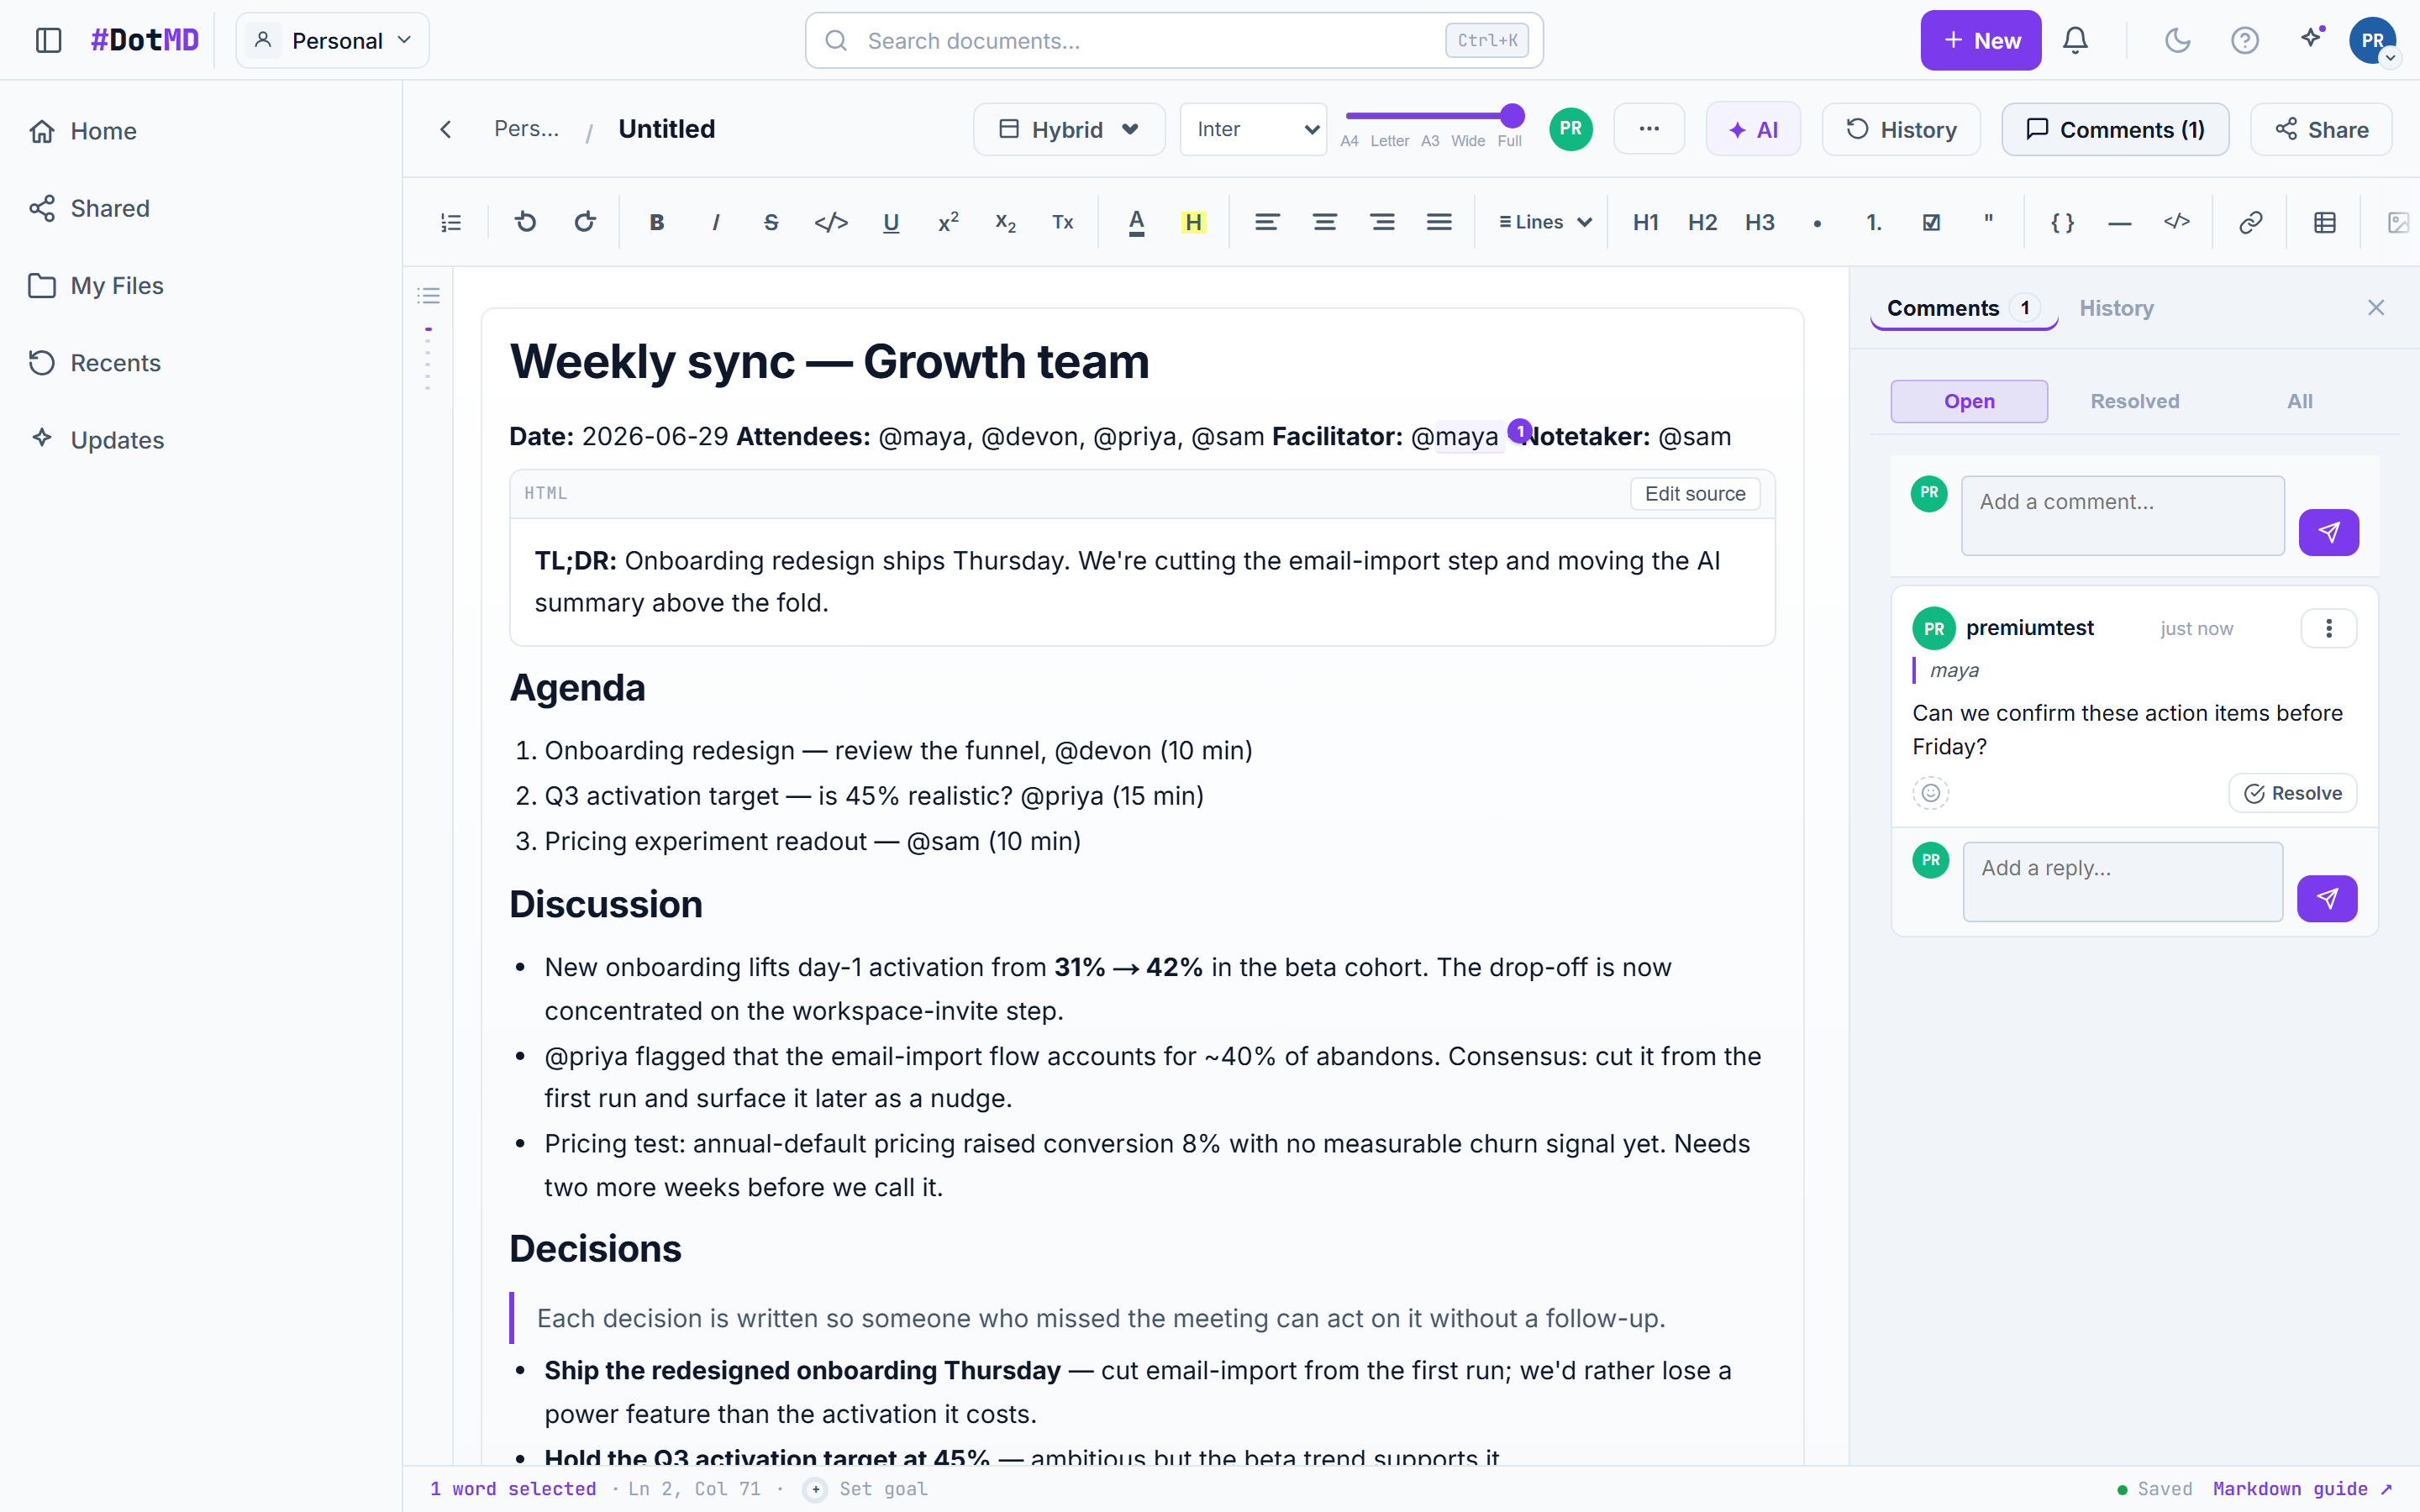
A comment thread open beside selected text in a document, with a reply box and resolve control

Comments & @mentions

Discuss the work right next to the work. Select any text (or any sheet cell), leave a comment, and pull a teammate in with an @mention.

  1. Select the text you want to talk about and choose Comment — your note attaches to that exact spot.
  2. Type @ inside a comment to mention a teammate. They get a notification that links them straight to your comment.
  3. Reply to keep the conversation in one thread, and add emoji reactions for quick acknowledgements.
  4. When the discussion is settled, click Resolve — resolved threads tidy away but are never deleted.
Good to know
  • Your role decides what you can do: Editors and Commenters can write comments; Viewers can read but not comment.
  • In sheets, comments attach to individual cells — @mentions work there too.

Still stuck? Contact Customer Care
The Share dialog for a document with email invitations and the Viewer, Commenter, and Editor role choices

When do others see my changes?

Short answer: people who can write see your changes instantly; people who can only read see the page as it was when they opened it, with a gentle nudge to refresh when it changes.

  1. Editors and Commenters are fully live: while you type, they see your changes appear in real time, along with your cursor and the "N viewing" presence count.
  2. Viewers see the document as it was when they opened the page. If the document is updated while they’re reading, a "This document was updated — refresh" bar appears so they can load the latest version when they’re ready.
  3. People reading through a shared link work the same way as Viewers: they see the page as opened, plus the refresh bar when something changes.
  4. Everything you type is saved automatically as you go — there is no Save button to forget, and nobody ever sees a half-saved document.
Good to know
  • Presenting slides is the exception for viewers: during a live presentation, everyone’s screen follows the presenter slide by slide in real time.

Still stuck? Contact Customer Care
Namespaces & settings

Your personal namespace, your team spaces, and the settings that make DotMD feel like yours.

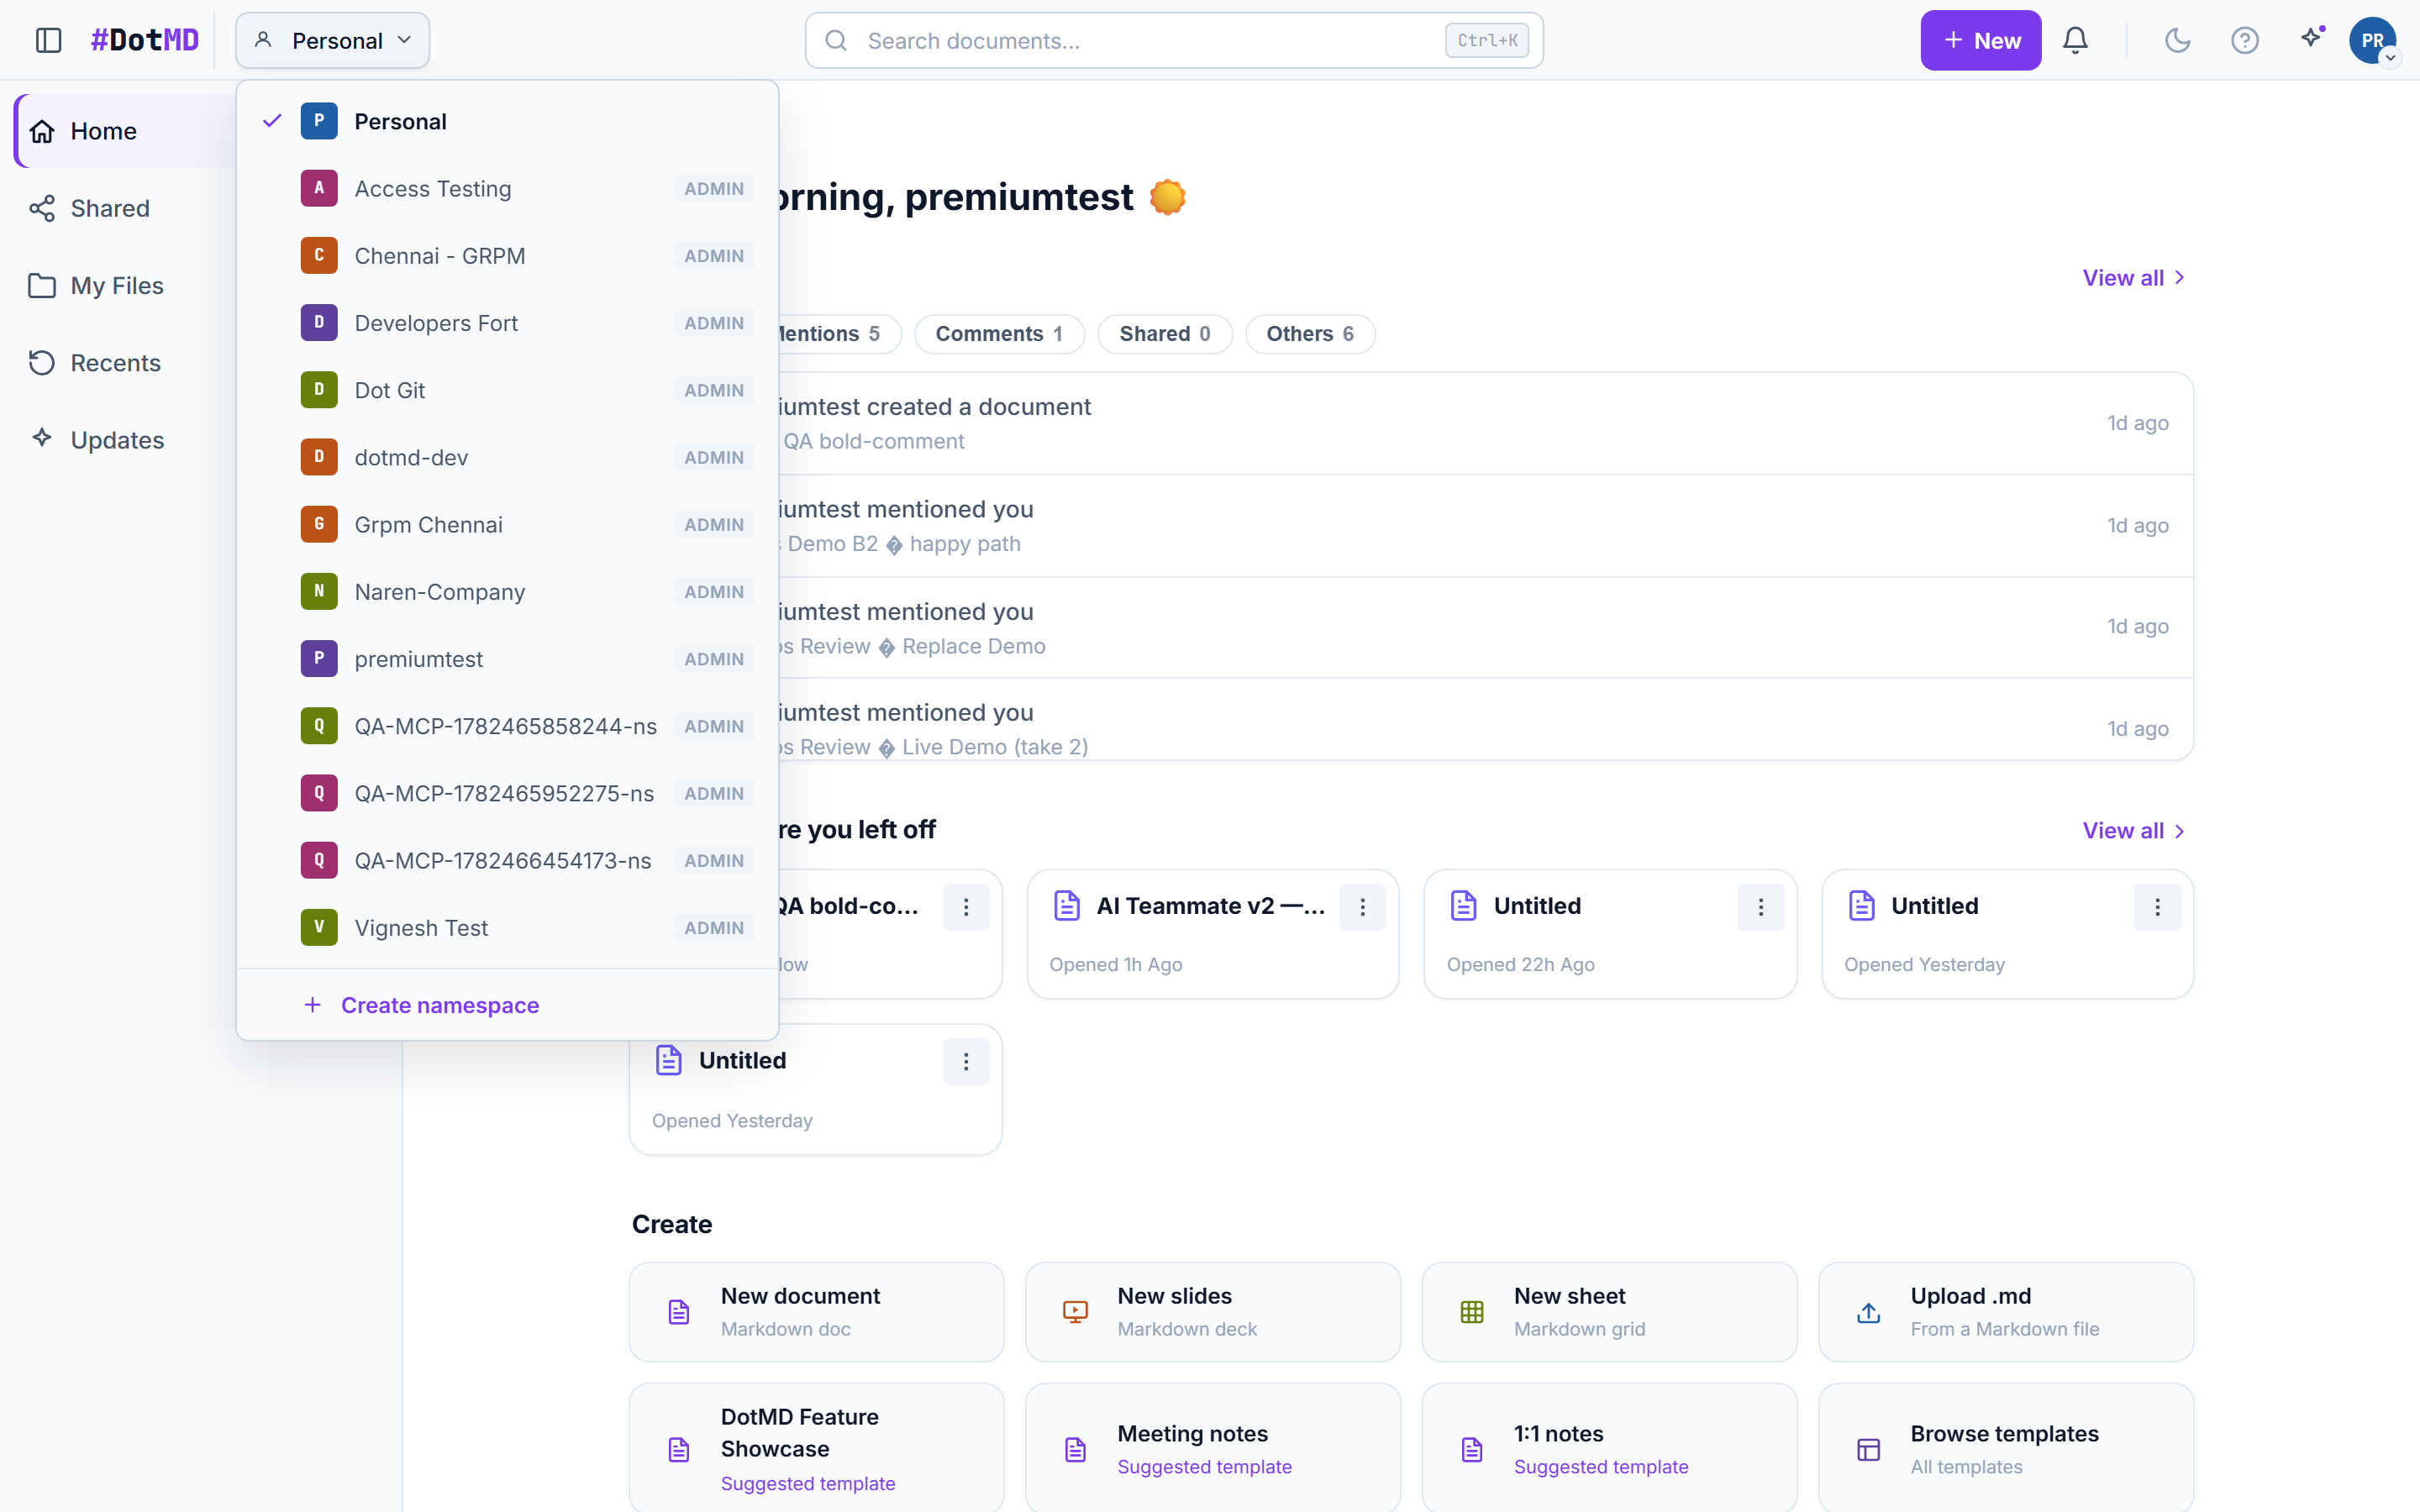
The namespace switcher open in the top bar, listing Personal and the team namespaces you belong to

Namespaces — personal vs team

A namespace is a separate home for documents, folders, and people. Everyone gets a Personal one; teams get shared ones.

  1. Personal is your private namespace — you are its only member. Documents there stay private unless you share them individually.
  2. Namespace roles control namespace management and capabilities; they do not grant blanket document access.
  3. Admins manage the namespace but do not automatically get access to every document.
  4. A member, including an Admin, sees a document only through owner, direct-share, shared-folder, namespace-visibility, or link access rules.
  5. Switch between namespaces with the switcher in the top-left — the sidebar, documents, and folders all change to match.
  6. On Premium, create a team namespace from the switcher, then invite members by email and set each person’s role from the namespace’s member settings.
Good to know
  • On the Free plan you can join team namespaces you’re invited to as a reader, but creating documents in them is a Premium capability.
  • Documents can be moved between your namespaces from the document’s "…" menu.

Still stuck? Contact Customer Care
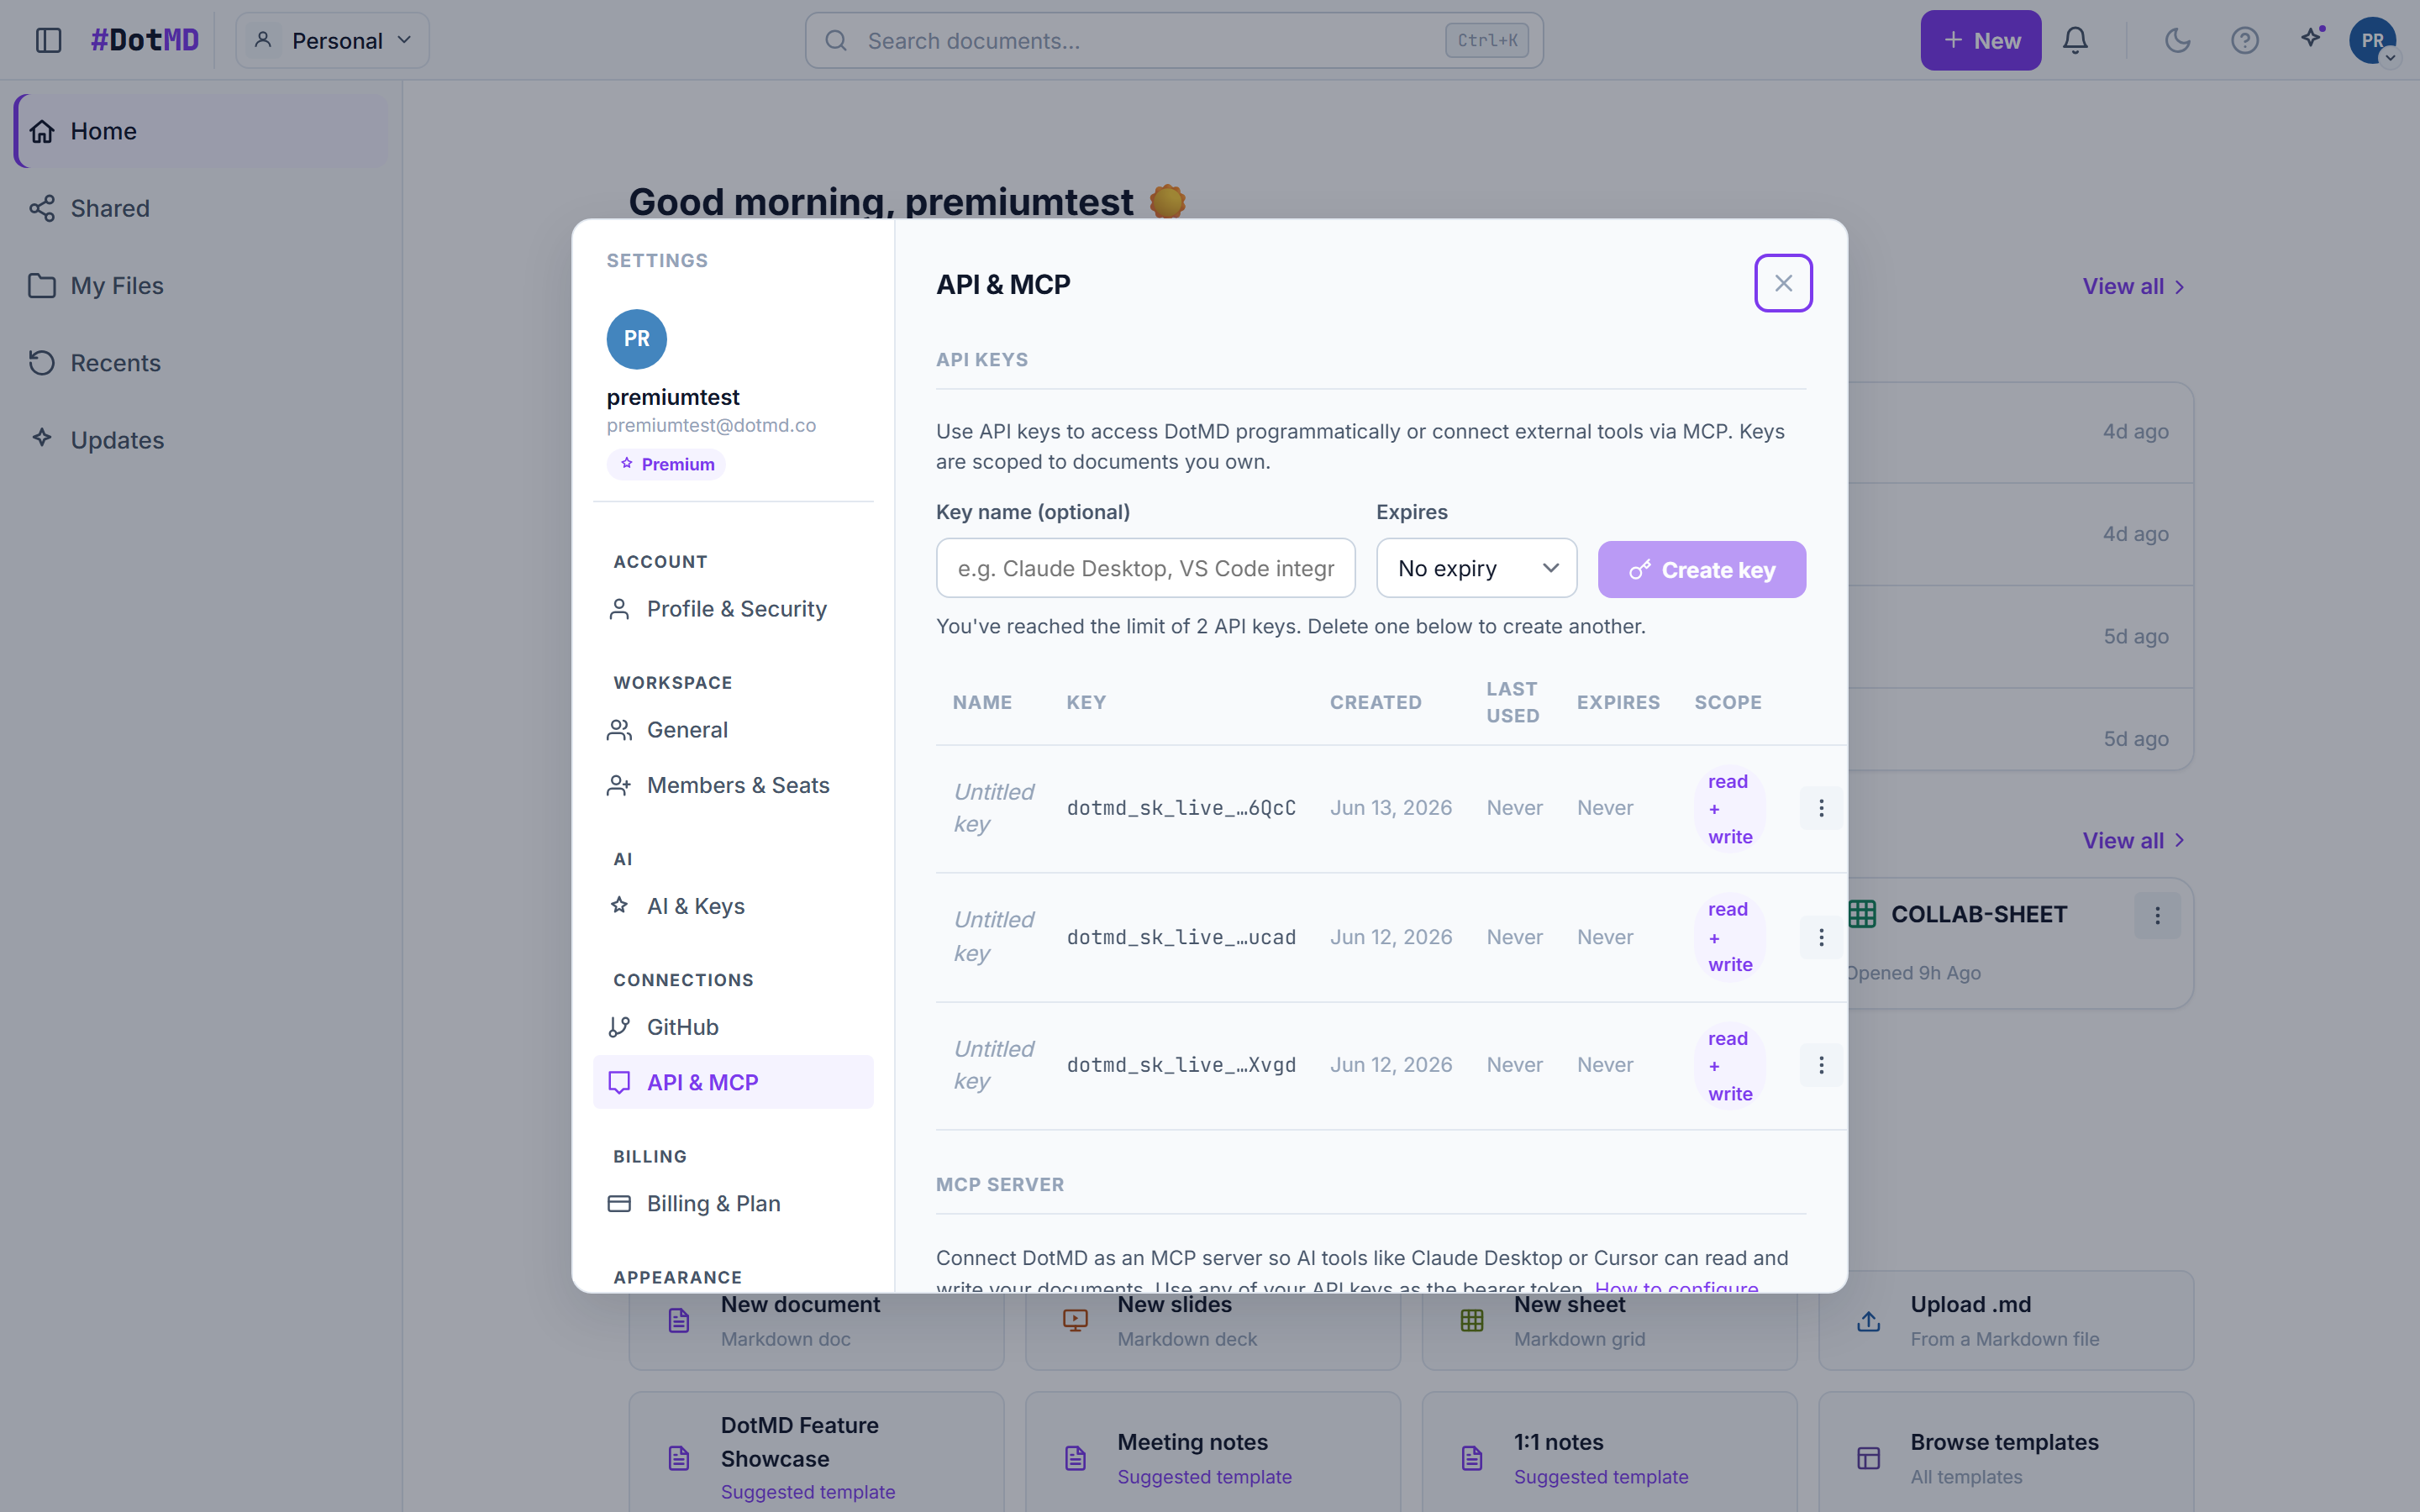
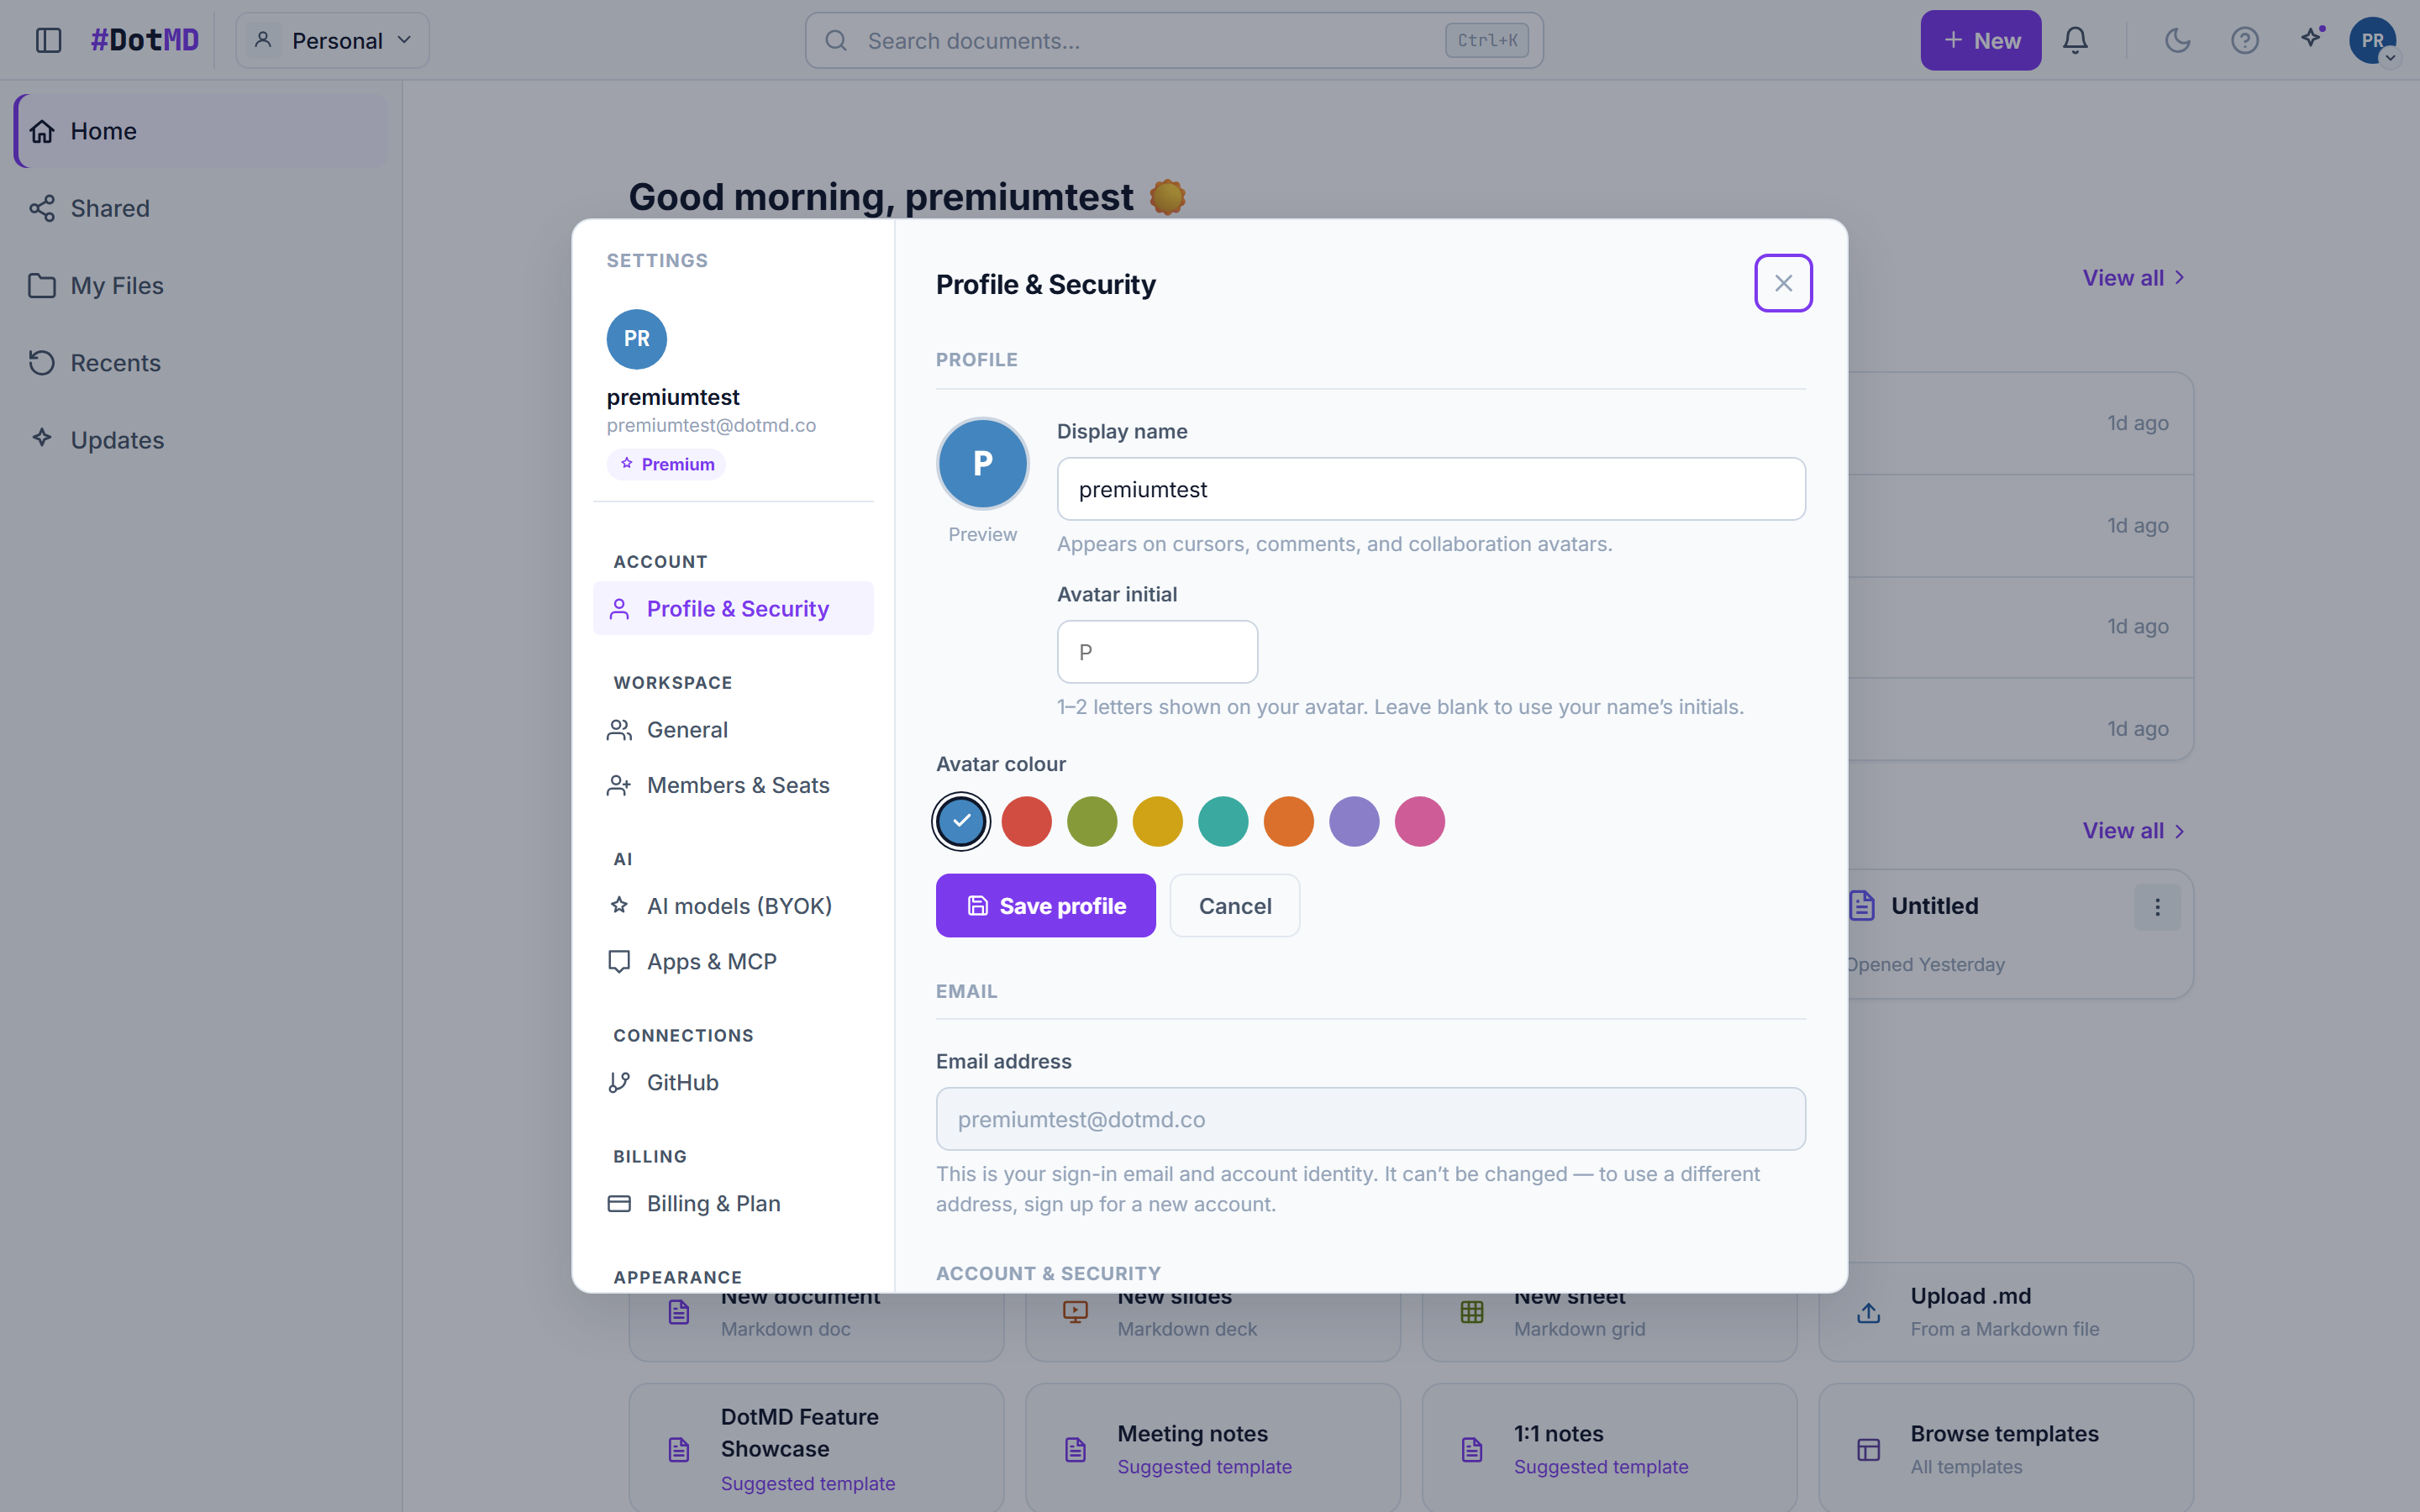
The settings screen showing the section list: Account, Appearance, Editor, Billing, AI, and Apps & MCP

A tour of Settings

Everything about your account lives in one place — profile, appearance, billing, AI keys, and connected apps.

  1. Open Settings from your profile menu in the top-right.
  2. Account — your name and email, plus the big levers: export all your data, or delete your account.
  3. Appearance — pick one of the 6 themes or follow your system’s light/dark setting.
  4. Editor — writing preferences like typewriter scrolling and default behaviours.
  5. Billing — during customer beta, this shows Premium included and explains when payment options open; after launch, it also holds your plan, usage meters, and subscription controls.
  6. AI — connect your own AI key (Bring Your Own Key) and watch your monthly AI usage meter.
  7. Apps & MCP — connect AI assistants like Claude or ChatGPT to DotMD, and manage API keys for scripts and integrations.

Still stuck? Contact Customer Care
AI

Connect your favorite AI — as an editor-side assistant or as a full agent collaborating live in your documents.

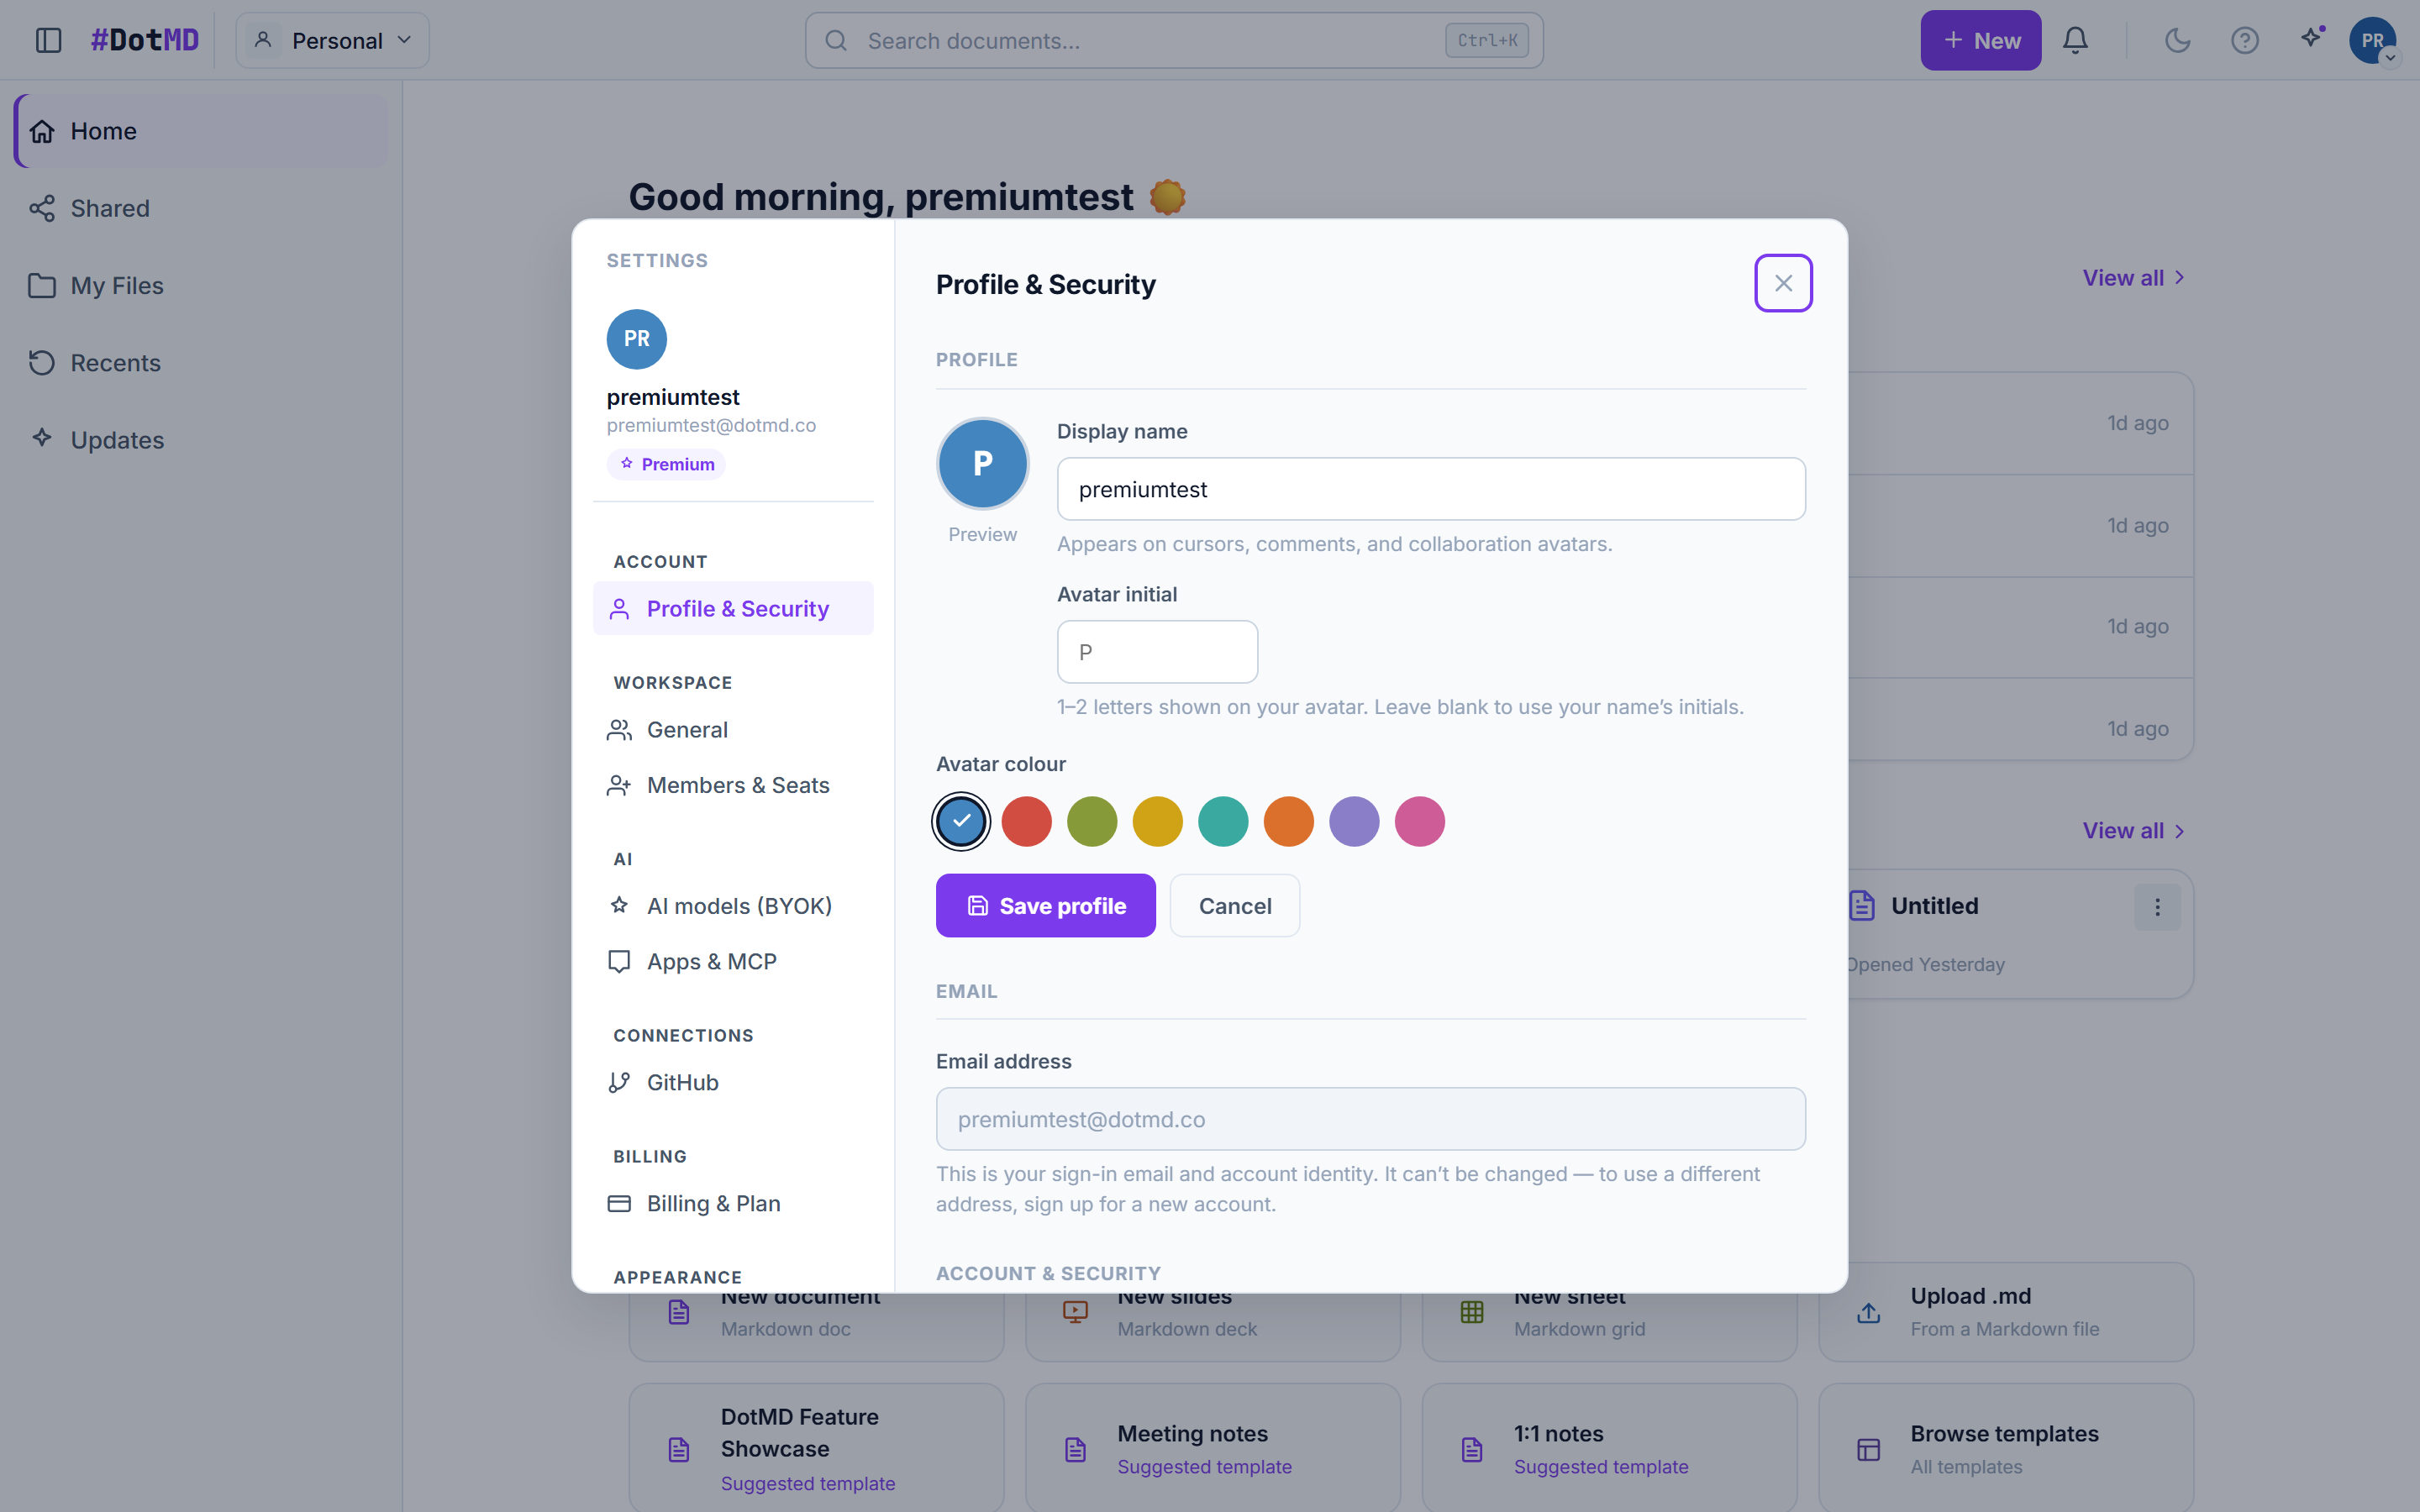
The AI edit bar open in the document editor with preset chips such as Improve writing and Fix spelling & grammar, plus a free-form instruction box

Edit with AI — you stay in control

Ask AI to improve, shorten, translate, or continue your writing. Nothing changes until you’ve seen the proposal and said yes — every AI edit arrives as a reviewable suggestion, never a silent rewrite.

  1. Select some text (or place your cursor) and click the ✦ AI button in the editor.
  2. Pick a preset — Improve writing, Fix spelling & grammar, Make shorter, Make longer, Humanize, Change tone, Translate, or Continue writing — or type your own instruction in plain words.
  3. The AI proposes changes as a highlighted before/after suggestion right in your document. Read it, then accept or reject — you can accept some parts and reject others.
  4. Not editing, just curious? Use the Summary tab to ask questions about the document — Summarize, Key points, Action items, or Explain simply — without touching the text.
Good to know
  • The first time you use AI, DotMD shows you exactly what will be sent before anything leaves the app — nothing is shared without your consent.
  • Included DotMD AI uses trusted AI service providers to process your requests.
  • Bounded edits send selected text and surrounding context. Whole-document and explicitly referenced-document operations send the scope you requested.
  • AI output can be inaccurate; review it before applying any suggestion.
  • AI editing is a Premium feature; see "Your AI allowance" below for how usage is counted.

Still stuck? Contact Customer Care
The Apps & MCP settings pane with the connection instructions for wiring an MCP client to DotMD

Add an AI teammate — your own AI subscription, no API keys

Bring the AI you already pay for — Claude, ChatGPT, or Cursor — into DotMD as a teammate. You sign in once with OAuth (your AI subscription, not an API key), and from then on your AI can answer questions about your docs and contribute to them directly, appearing in the document like a human collaborator with its own live moving cursor.

  1. In your AI app (Claude, ChatGPT, Cursor, or any MCP client), add DotMD as a connector — Settings → Apps & MCP shows the exact steps (Premium).
  2. Approve the OAuth screen once. No API keys to create or paste — the connection uses your existing AI subscription and respects your DotMD permissions.
  3. Now treat it like a teammate: ask it questions about a doc, have it draft or restructure sections, sync GitHub, or build sheets and slides for you.
  4. When it edits a doc you have open, you can watch it work — it joins as a live collaborator with a moving teal "(MCP)" cursor, just like a person typing.
Good to know
  • In-editor AI: "Edit with AI" proposes changes as a reviewable diff with per-hunk accept, "Ask AI" answers questions about your document, and staged suggestions never touch your text until you approve them.
  • Bring your own key under Settings → AI: OpenAI, Anthropic, or Gemini. A usage meter shows consumption, and a consent disclosure tells you exactly what is sent before anything leaves DotMD.

Still stuck? Contact Customer Care
The AI settings pane showing the monthly usage meter and the Bring Your Own Key connection form

Your AI allowance & bringing your own key

Premium includes a generous monthly AI allowance out of the box. If you want more, connect your own AI provider account — then your provider’s limits apply instead of ours.

  1. During customer beta, DotMD-hosted AI includes 100,000 tokens per month. At general launch, Premium includes 250,000 tokens per month. Tokens are the units AI providers count work in, and both what you send and what DotMD AI writes back count.
  2. Edit with AI and Ask AI / Summary use the hosted allowance. MCP uses the connected assistant’s own model and subscription, so MCP work does not count against it.
  3. Watch your usage any time: the meter lives in Settings → AI, and a small usage pill appears near the AI tools in the editor.
  4. Want more than the included allowance? Bring your own key: paste an API key from OpenAI, Anthropic, or Google Gemini into Settings → AI. DotMD auto-detects the provider and uses your key from then on.
  5. BYOK sends the requested content to the provider you configure; that provider’s terms and data-processing practices apply.
  6. With your own key connected, the monthly cap no longer applies — your usage is billed by your provider under their limits. Your key is stored encrypted and never shown again.
Good to know
  • The allowance resets monthly. If you hit the cap mid-month, connecting your own key lifts it immediately.
  • Remove your key any time from the same pane — DotMD switches back to the included allowance.

Still stuck? Contact Customer Care
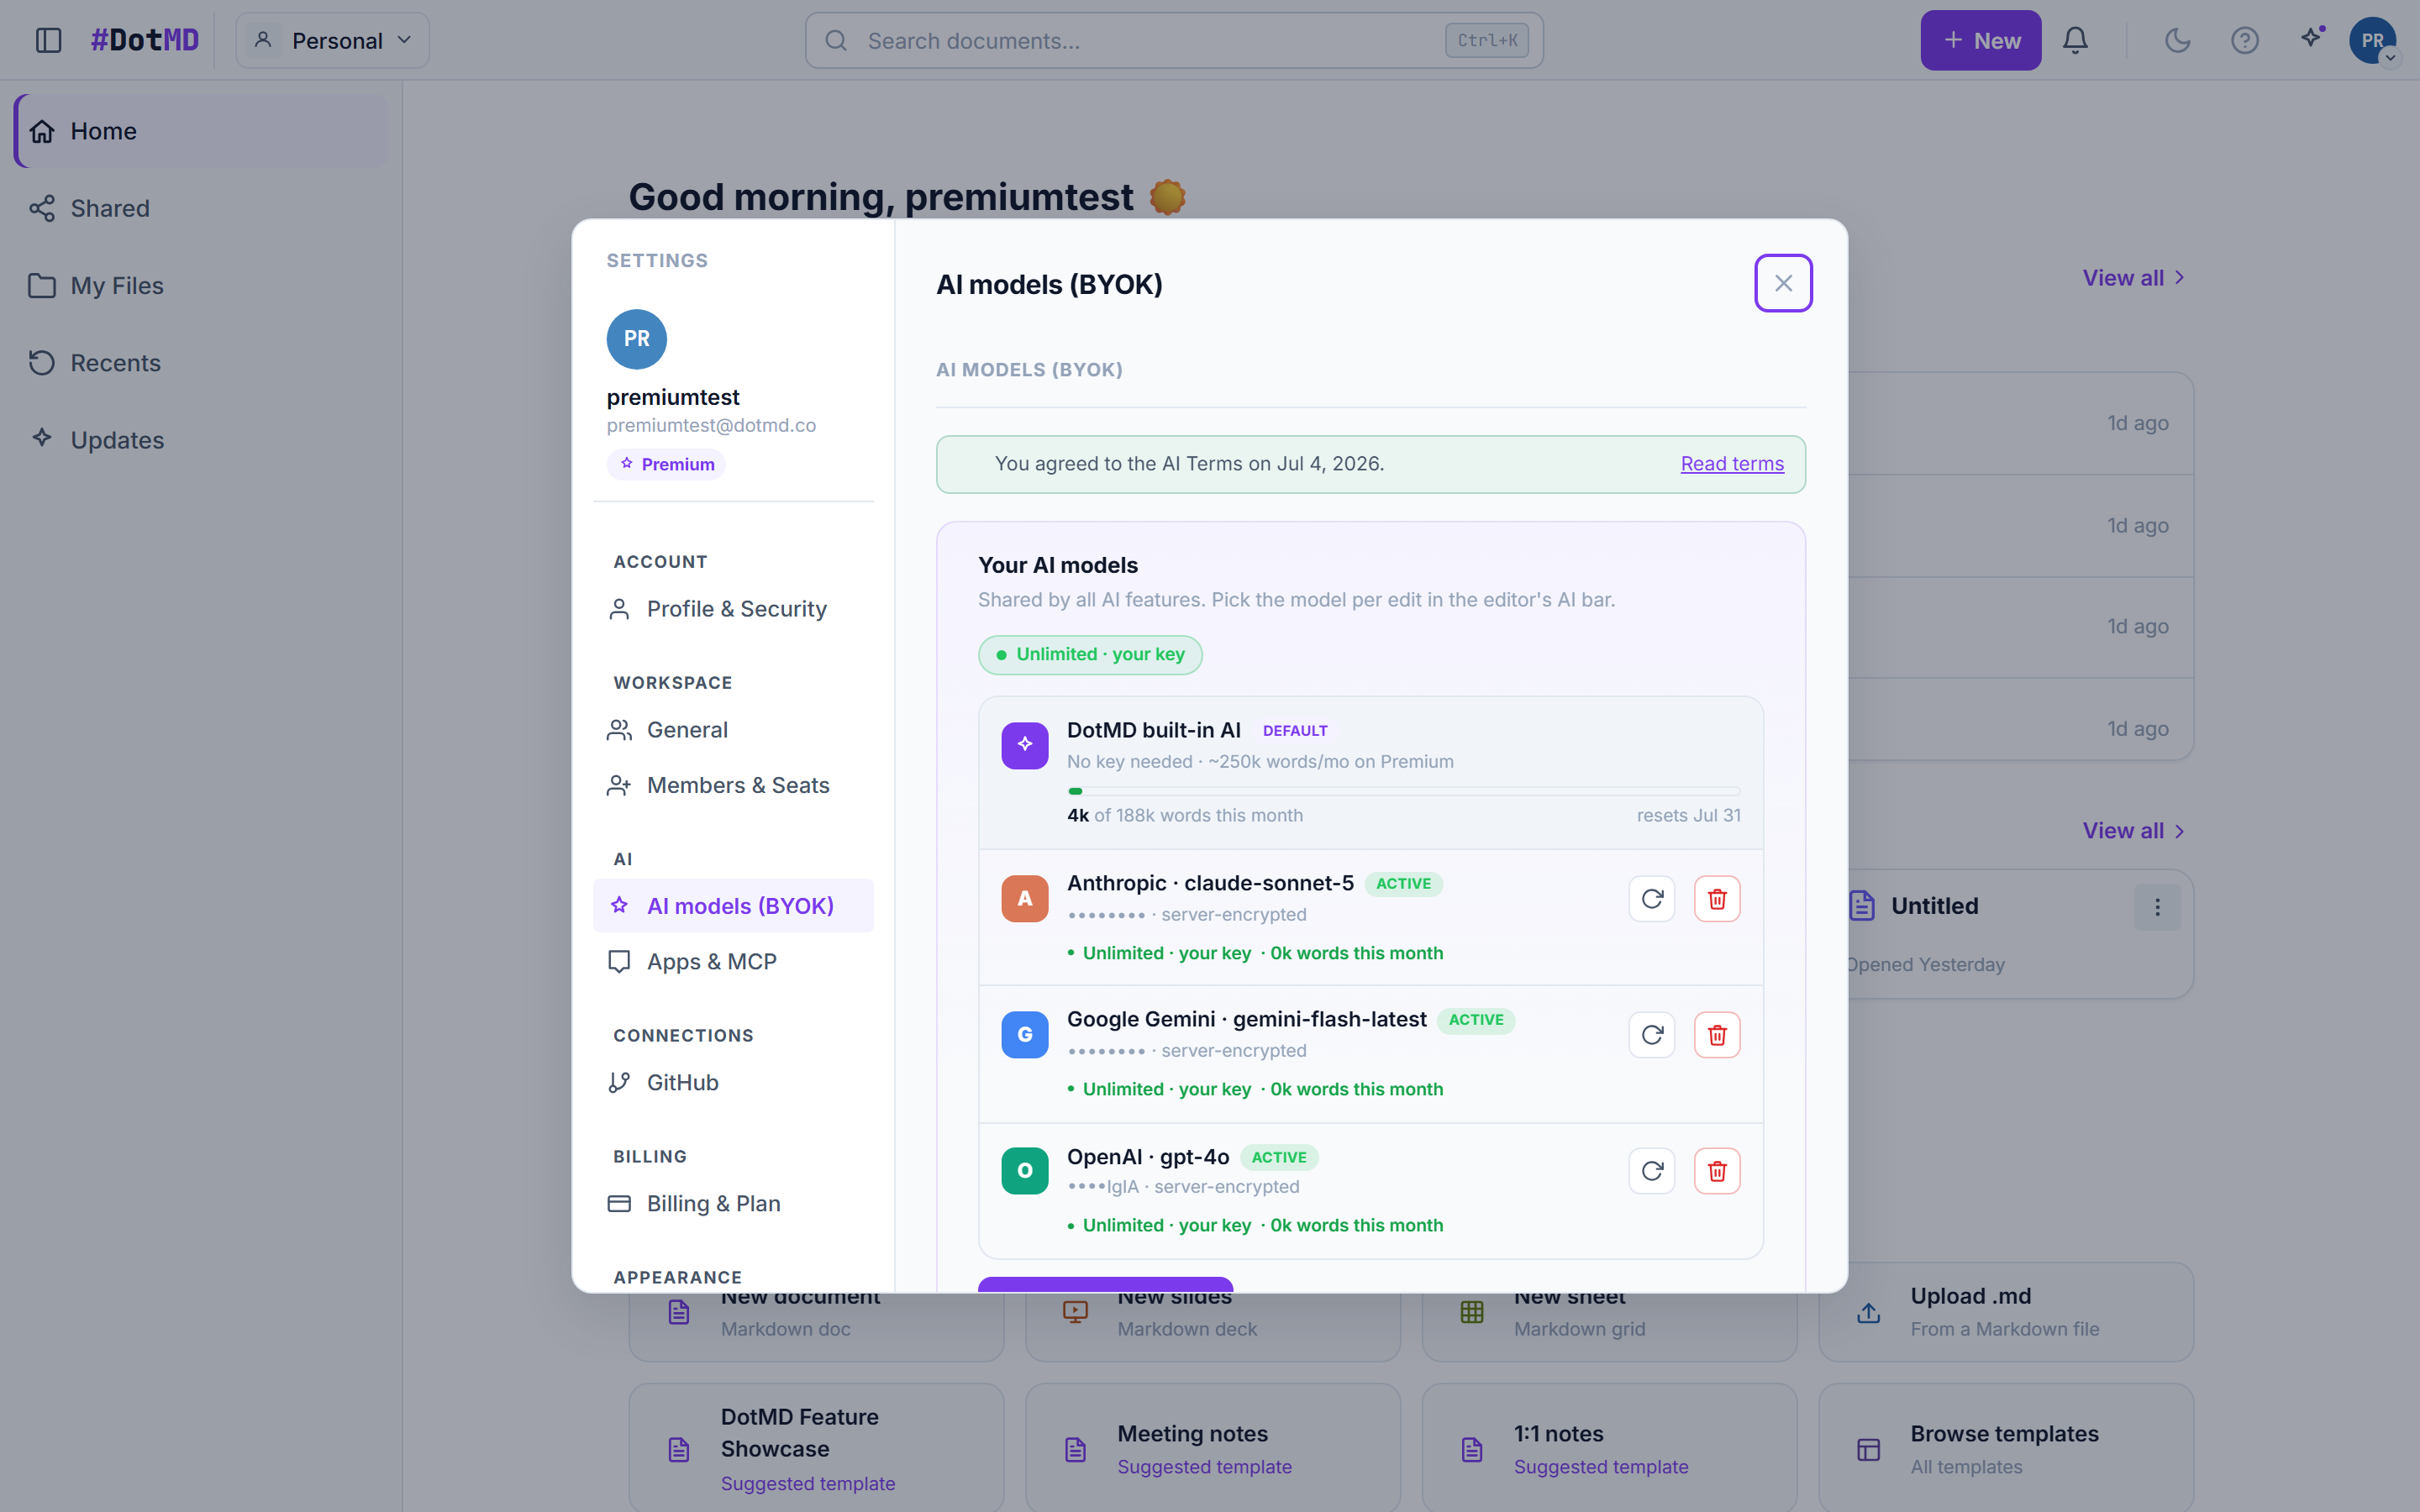
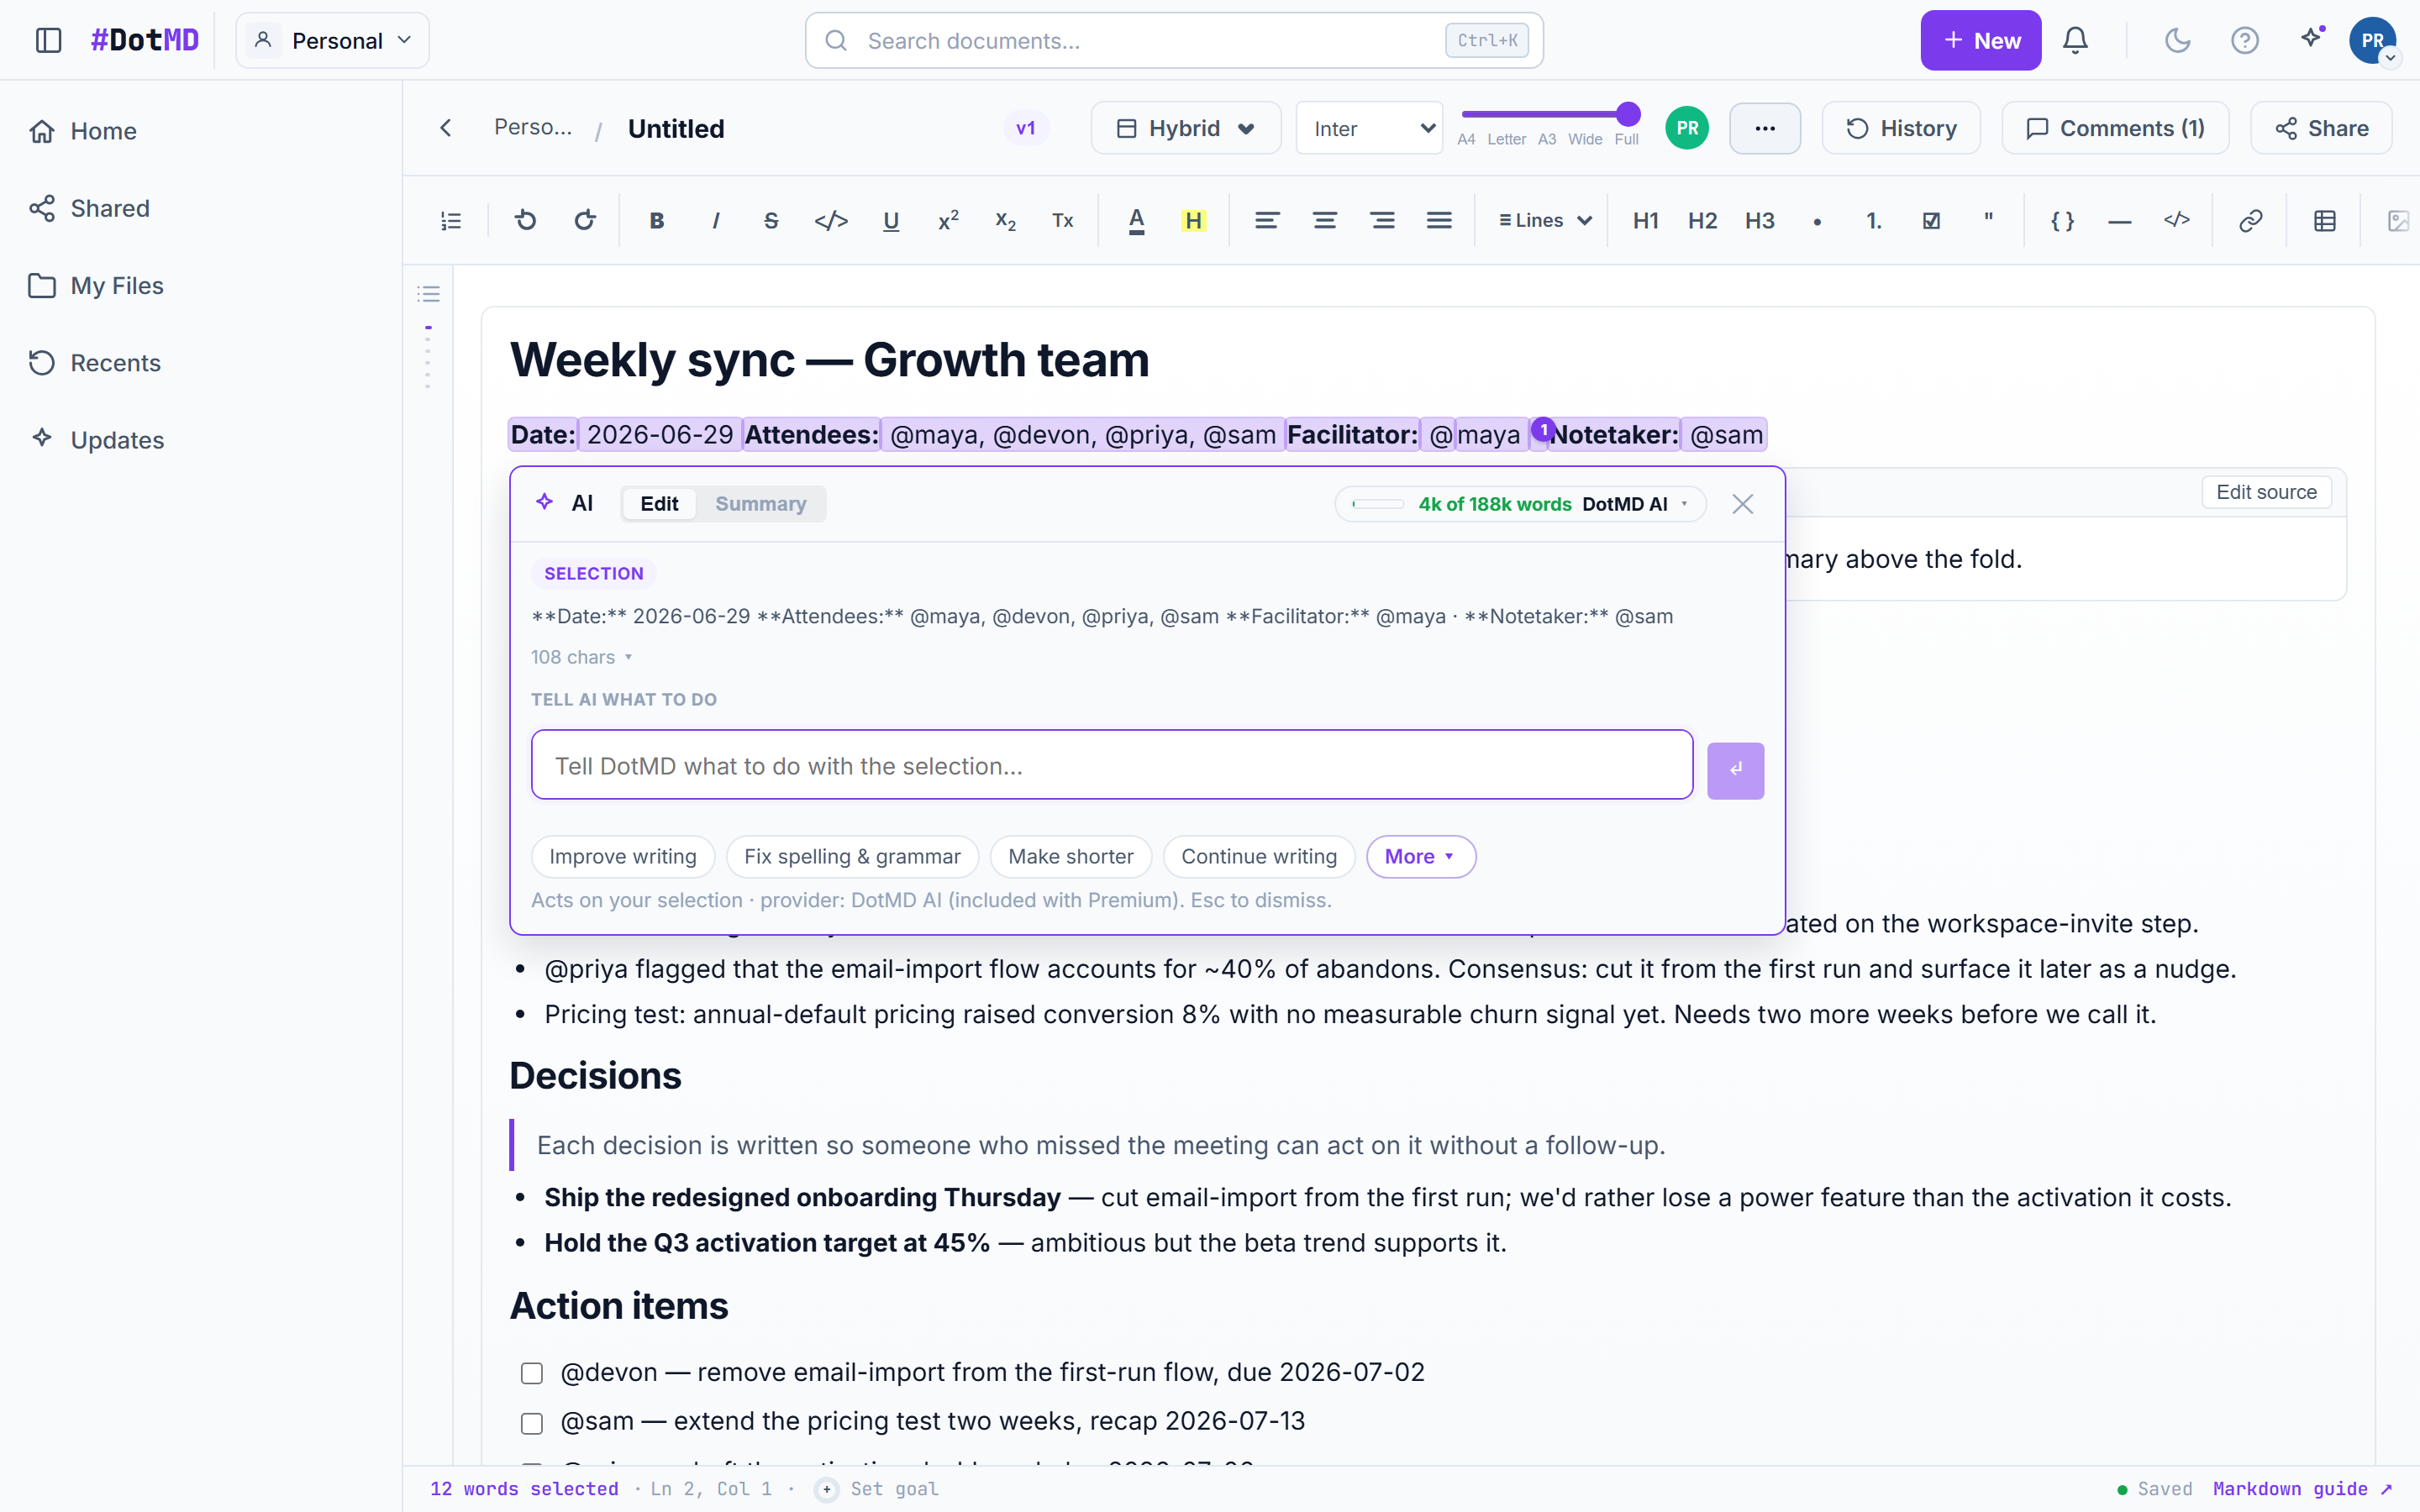
The Apps & MCP settings pane showing the DotMD MCP endpoint with per-client connect instructions and the advanced API-key option

Connect an AI assistant (MCP) — OAuth or API key

DotMD speaks MCP, the open standard AI assistants use to work with your tools. Connect Claude, ChatGPT, Cursor, or any MCP client two ways: a one-click sign-in (recommended), or an API key for tools that prefer one.

  1. Open Settings → Apps & MCP. Your personal connection address is shown there — it ends in /api/mcp (Premium).
  2. Option 1 — sign in with OAuth (recommended): in claude.ai or ChatGPT, go to Settings → Connectors, add a custom connector, and paste your DotMD address. A DotMD sign-in screen appears once; approve it and you’re connected — no keys to manage. Claude Desktop and Cursor work the same way with a small copyable config (shown on the page): the first use opens a browser window to sign in and approve.
  3. Option 2 — use an API key: under the Advanced section of the same page, create an API key and copy it (it is shown only once). Then use the provided config snippet, which sends the key as an "Authorization: Bearer" header — useful for scripts, servers, or MCP clients that don’t support the sign-in flow.
  4. Either way, the assistant acts as you: it can only see and edit what your account can, and everything it does shows up under its own name in the document.
  5. Manage connections any time from the same page — disconnect an app or delete an API key and its access ends immediately.
Good to know
  • Prefer OAuth when your tool supports it: nothing to copy, nothing to leak, and revoking is one click.
  • You can rotate an API key (get a fresh secret without reconfiguring permissions) from the keys table.
  • Fair-use quota: each API key allows up to 100 requests per minute and 20,000 calls per month.

Still stuck? Contact Customer Care
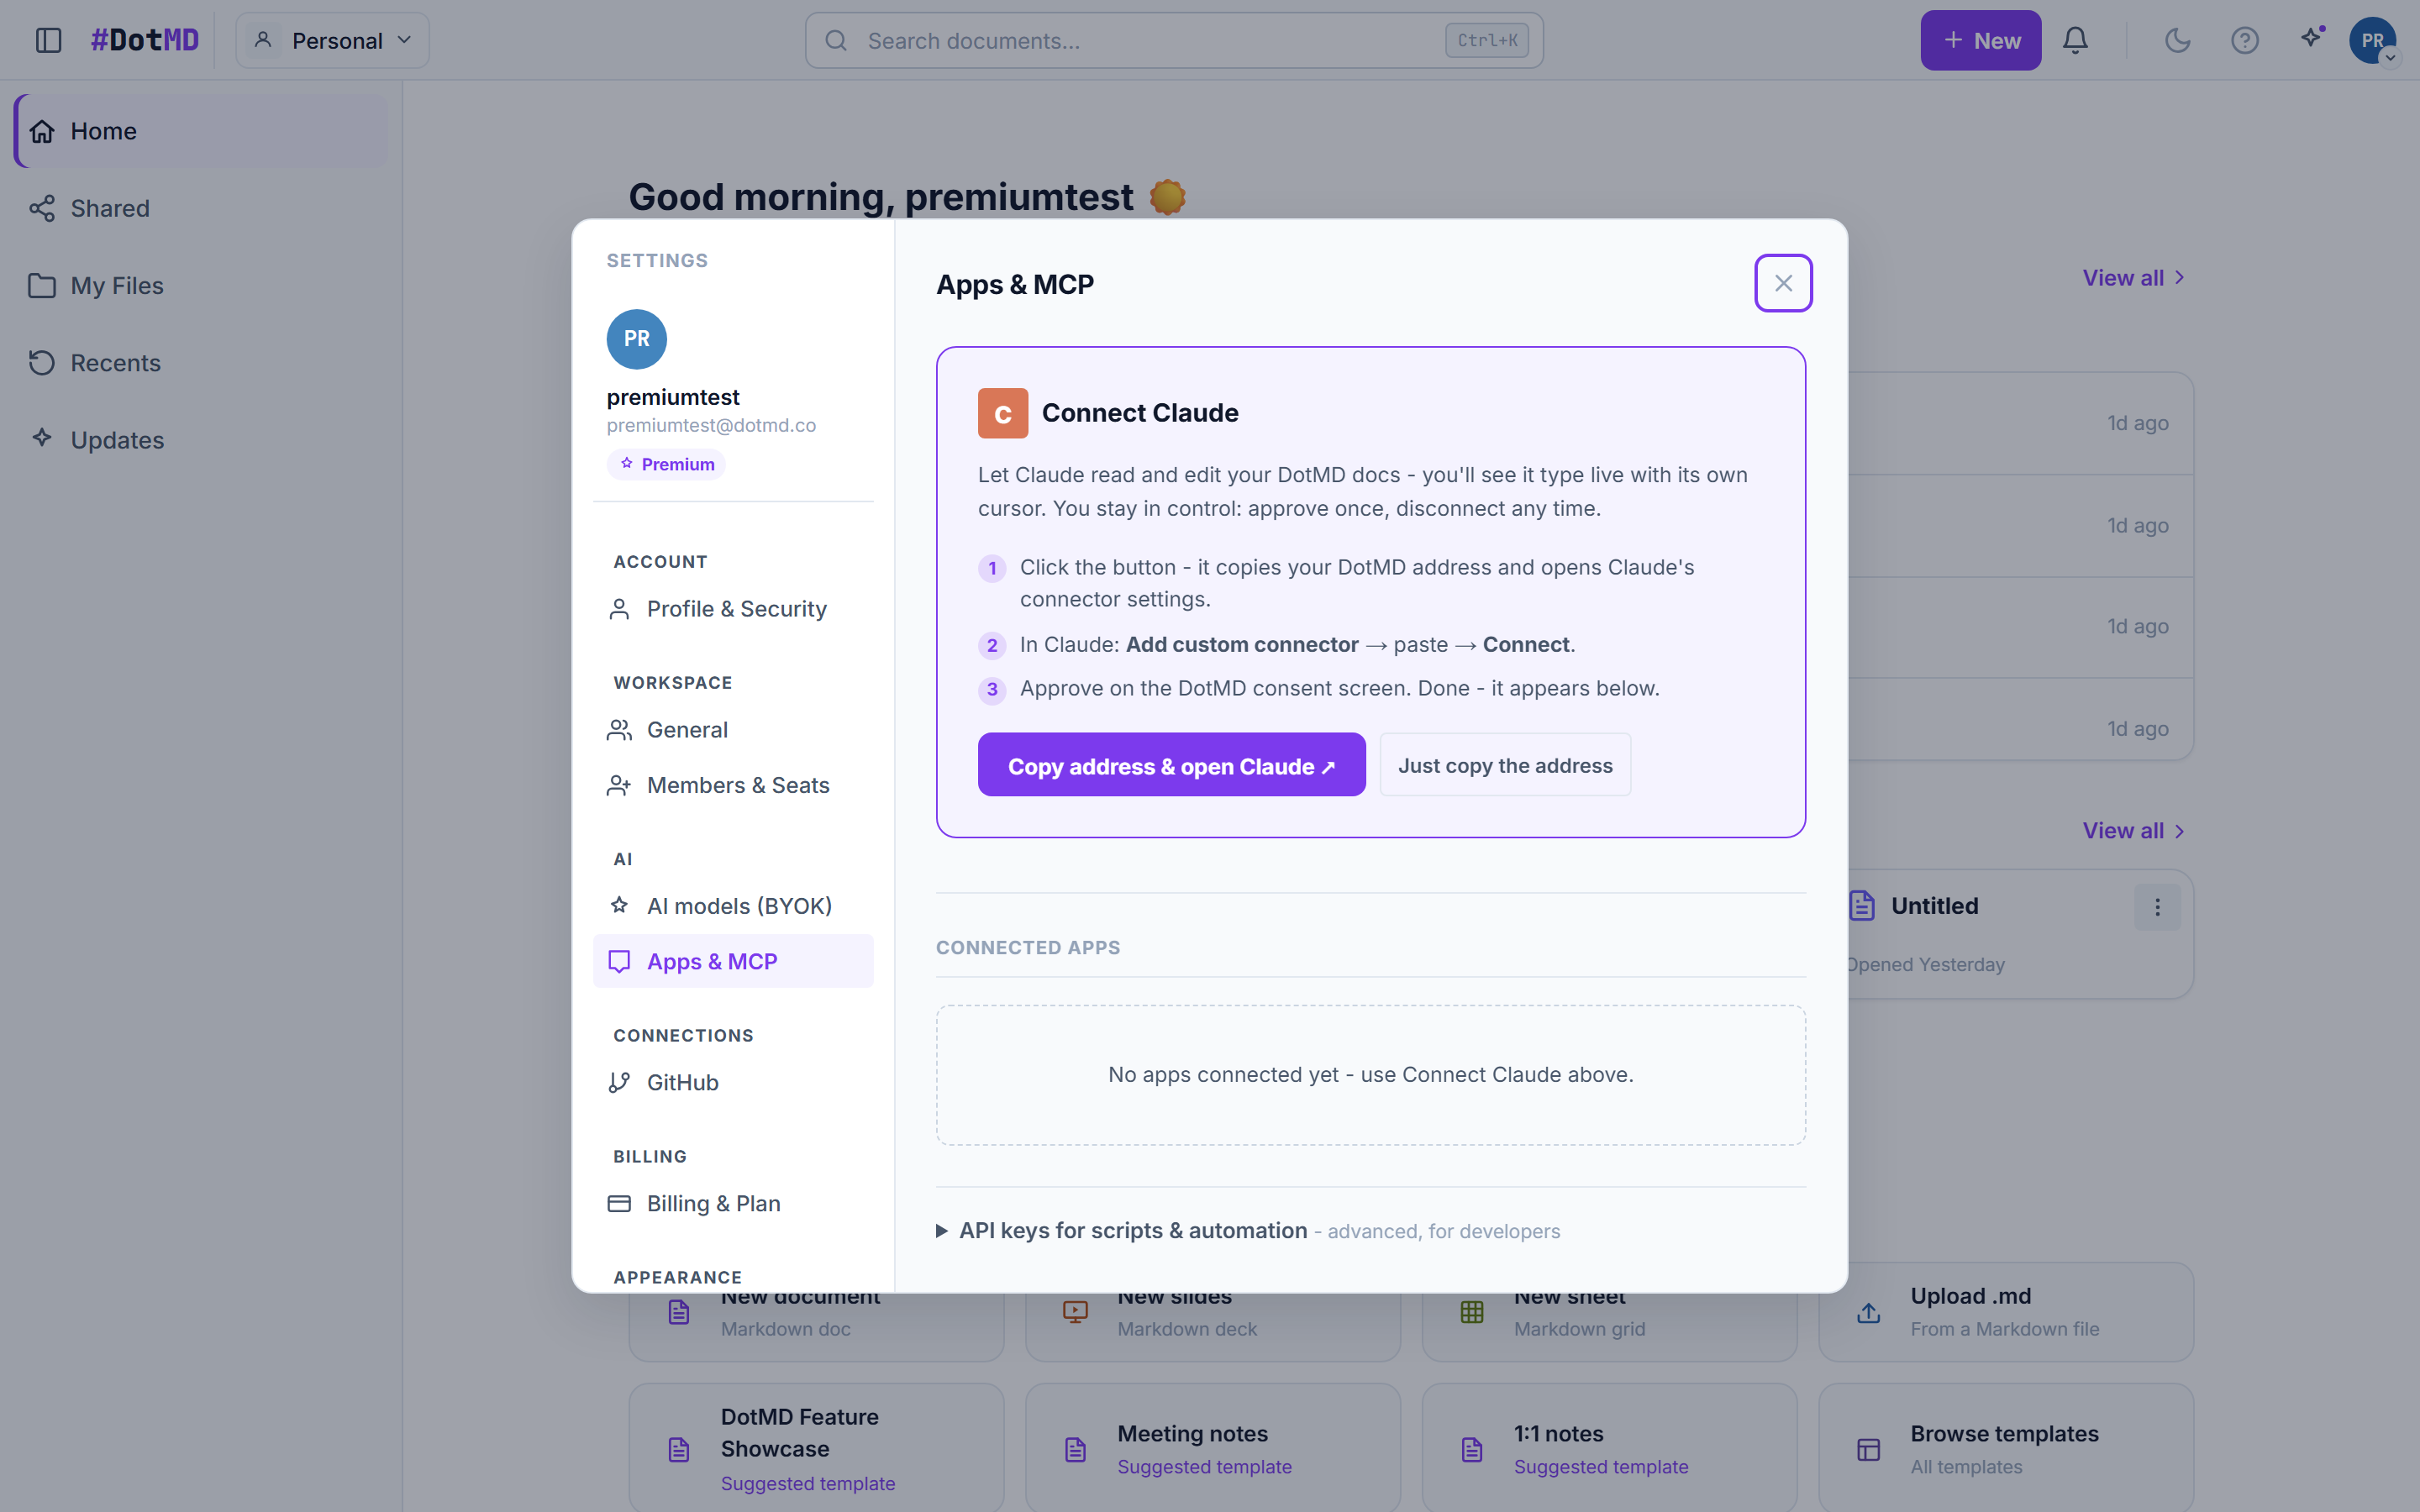
Slides

Decks are just Markdown — write slides like a document, present like a pro.

The slides editor showing a Markdown deck with the slide list and a rendered slide preview

Markdown → slides

Separate slides with "---" lines and you have a deck. Themes, layouts, and backgrounds are one directive away.

  1. Create a deck from "New slides" (or the slides template) — slides are separated by "---" lines in the Markdown.
  2. Pick one of the 4 themes — light, dark, midnight, or paper — in the deck settings.
  3. Add layout directives for title, section, and two-column slides, and set per-slide backgrounds.
  4. Write speaker notes under a slide — only you see them while presenting.

Still stuck? Contact Customer Care
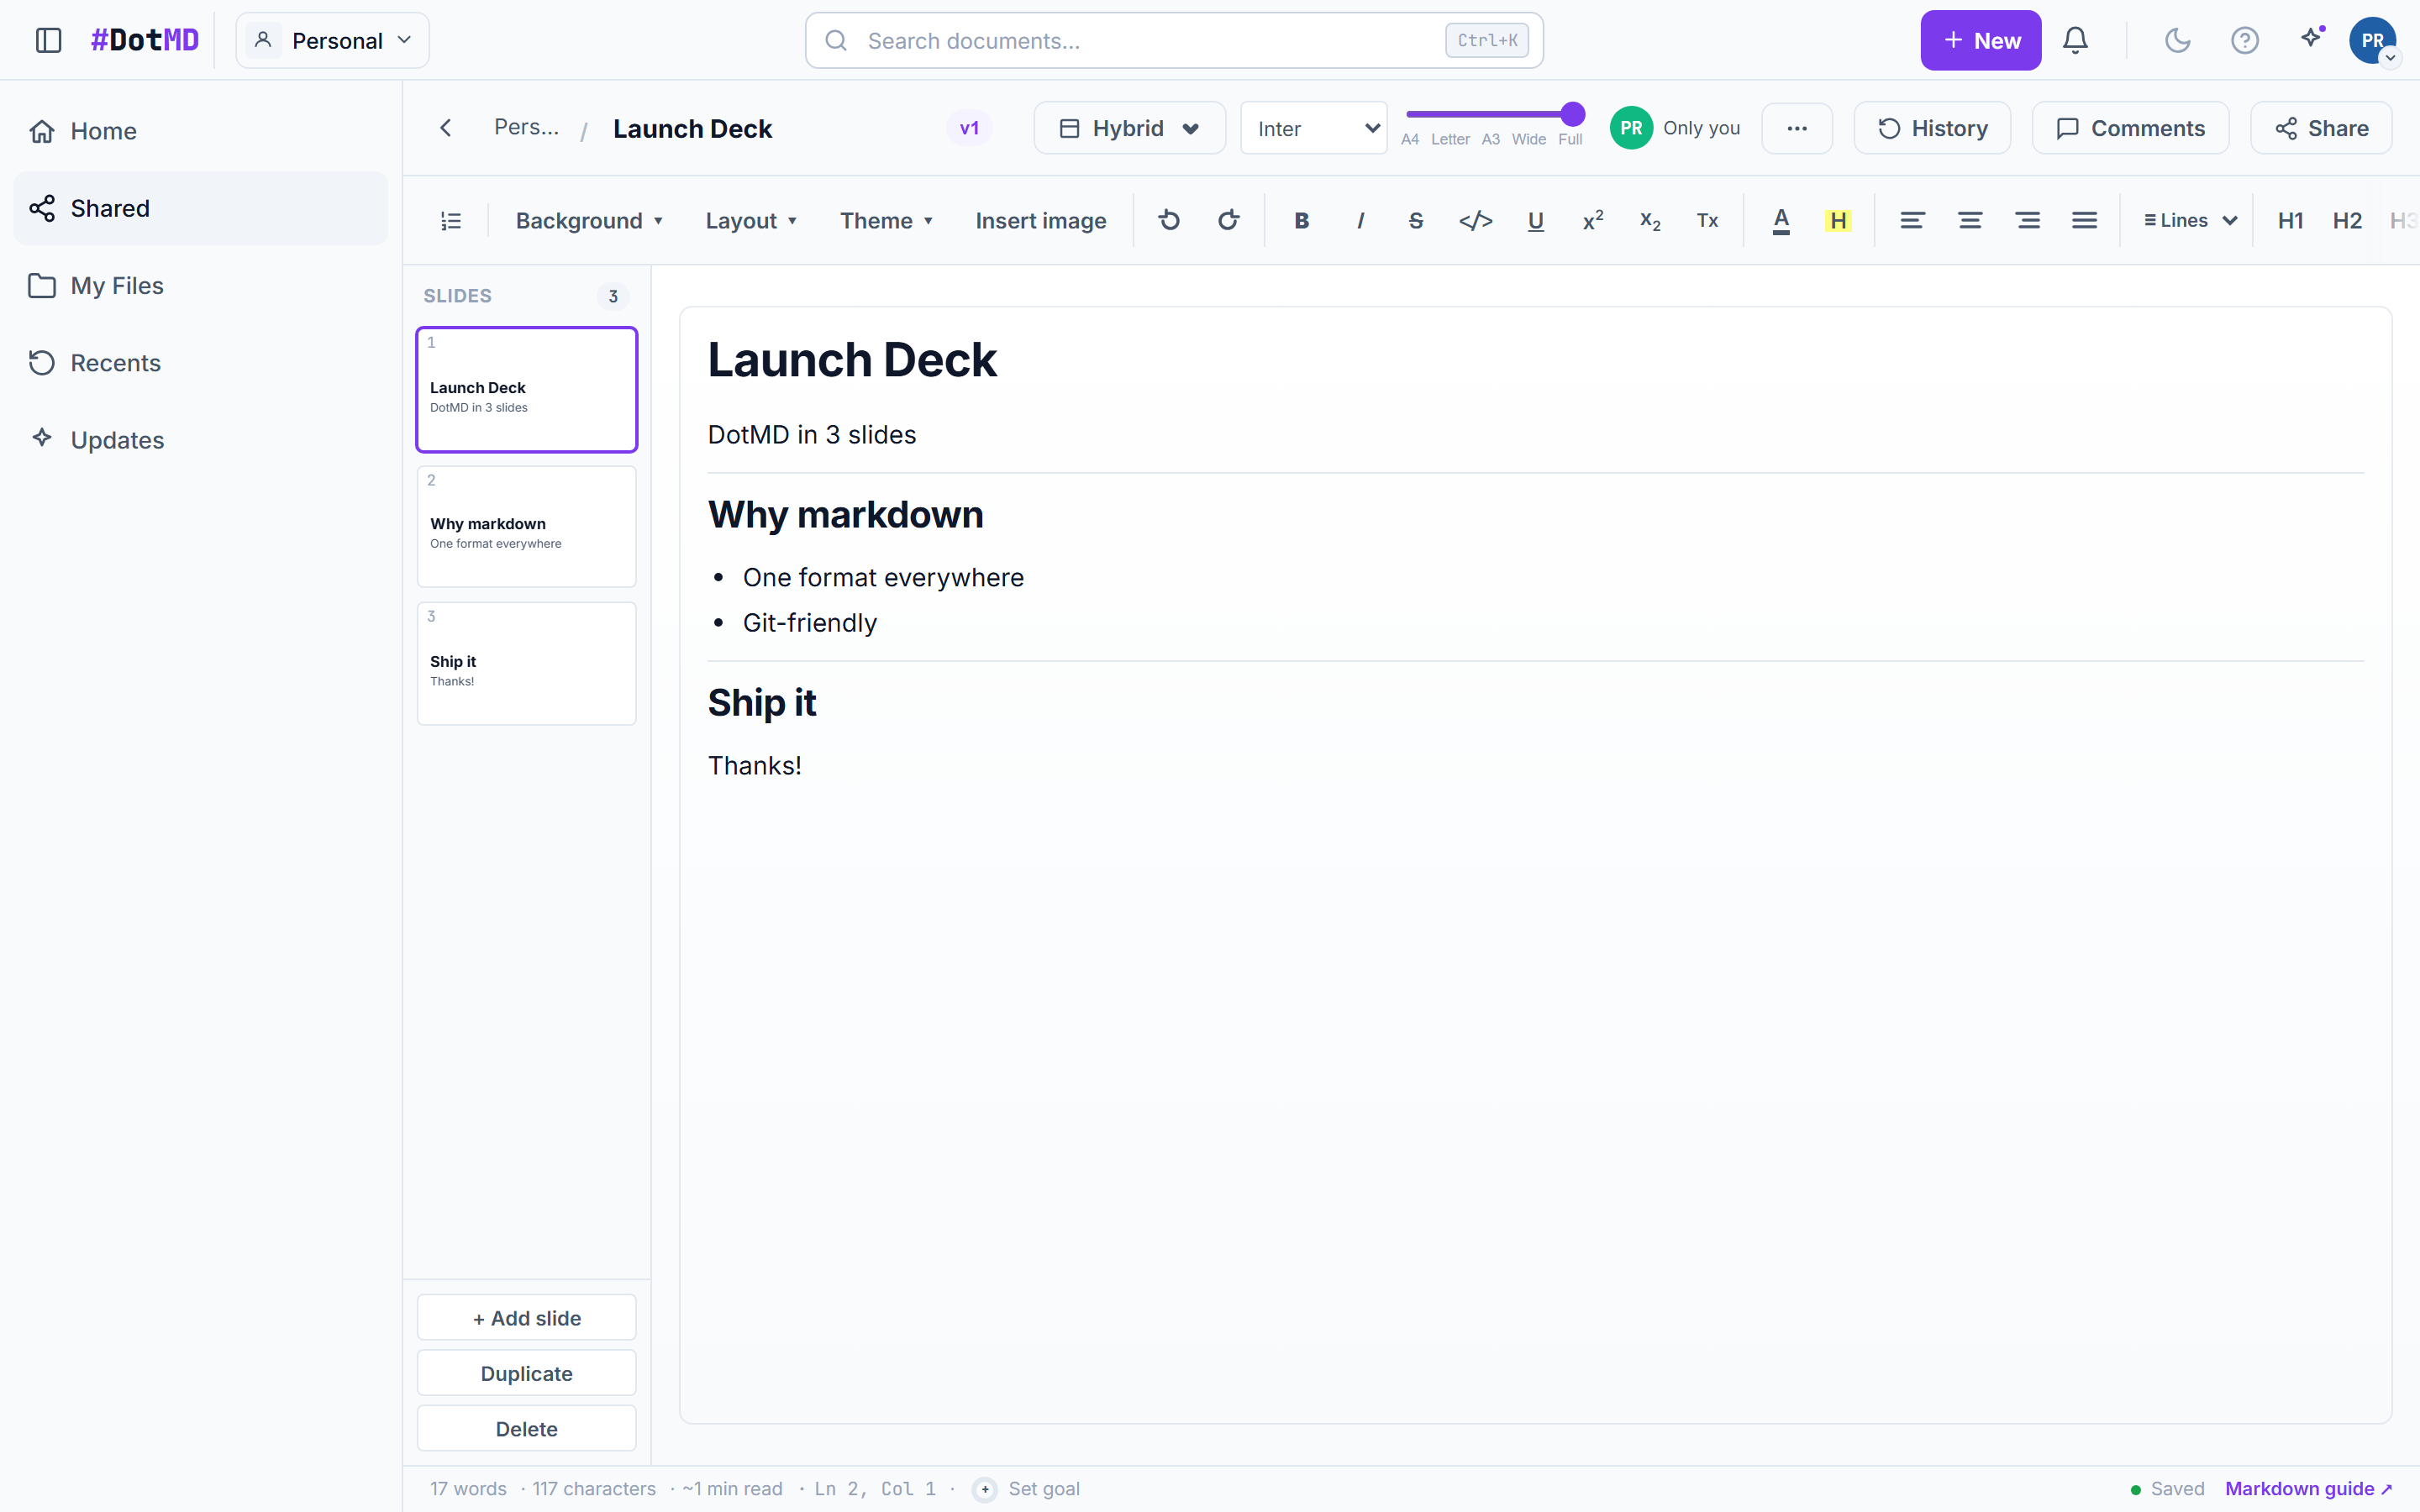
A slide deck in full-screen Present mode with navigation controls

Present mode & live presentations

Full-screen presenting with a twist: present to your viewers over the internet and their screens follow you slide by slide.

  1. Click Present to go full-screen. Navigate with the arrow keys or Space; press B to blackout the screen, Esc to exit.
  2. Choose "Present to viewers" to go live — everyone with the document open auto-follows your current slide.
  3. Viewers can browse ahead on their own; manual navigation breaks the follow and a "Re-follow" control snaps them back to you.
  4. Another presenter can take over mid-session, and you always see the live audience count.

Still stuck? Contact Customer Care
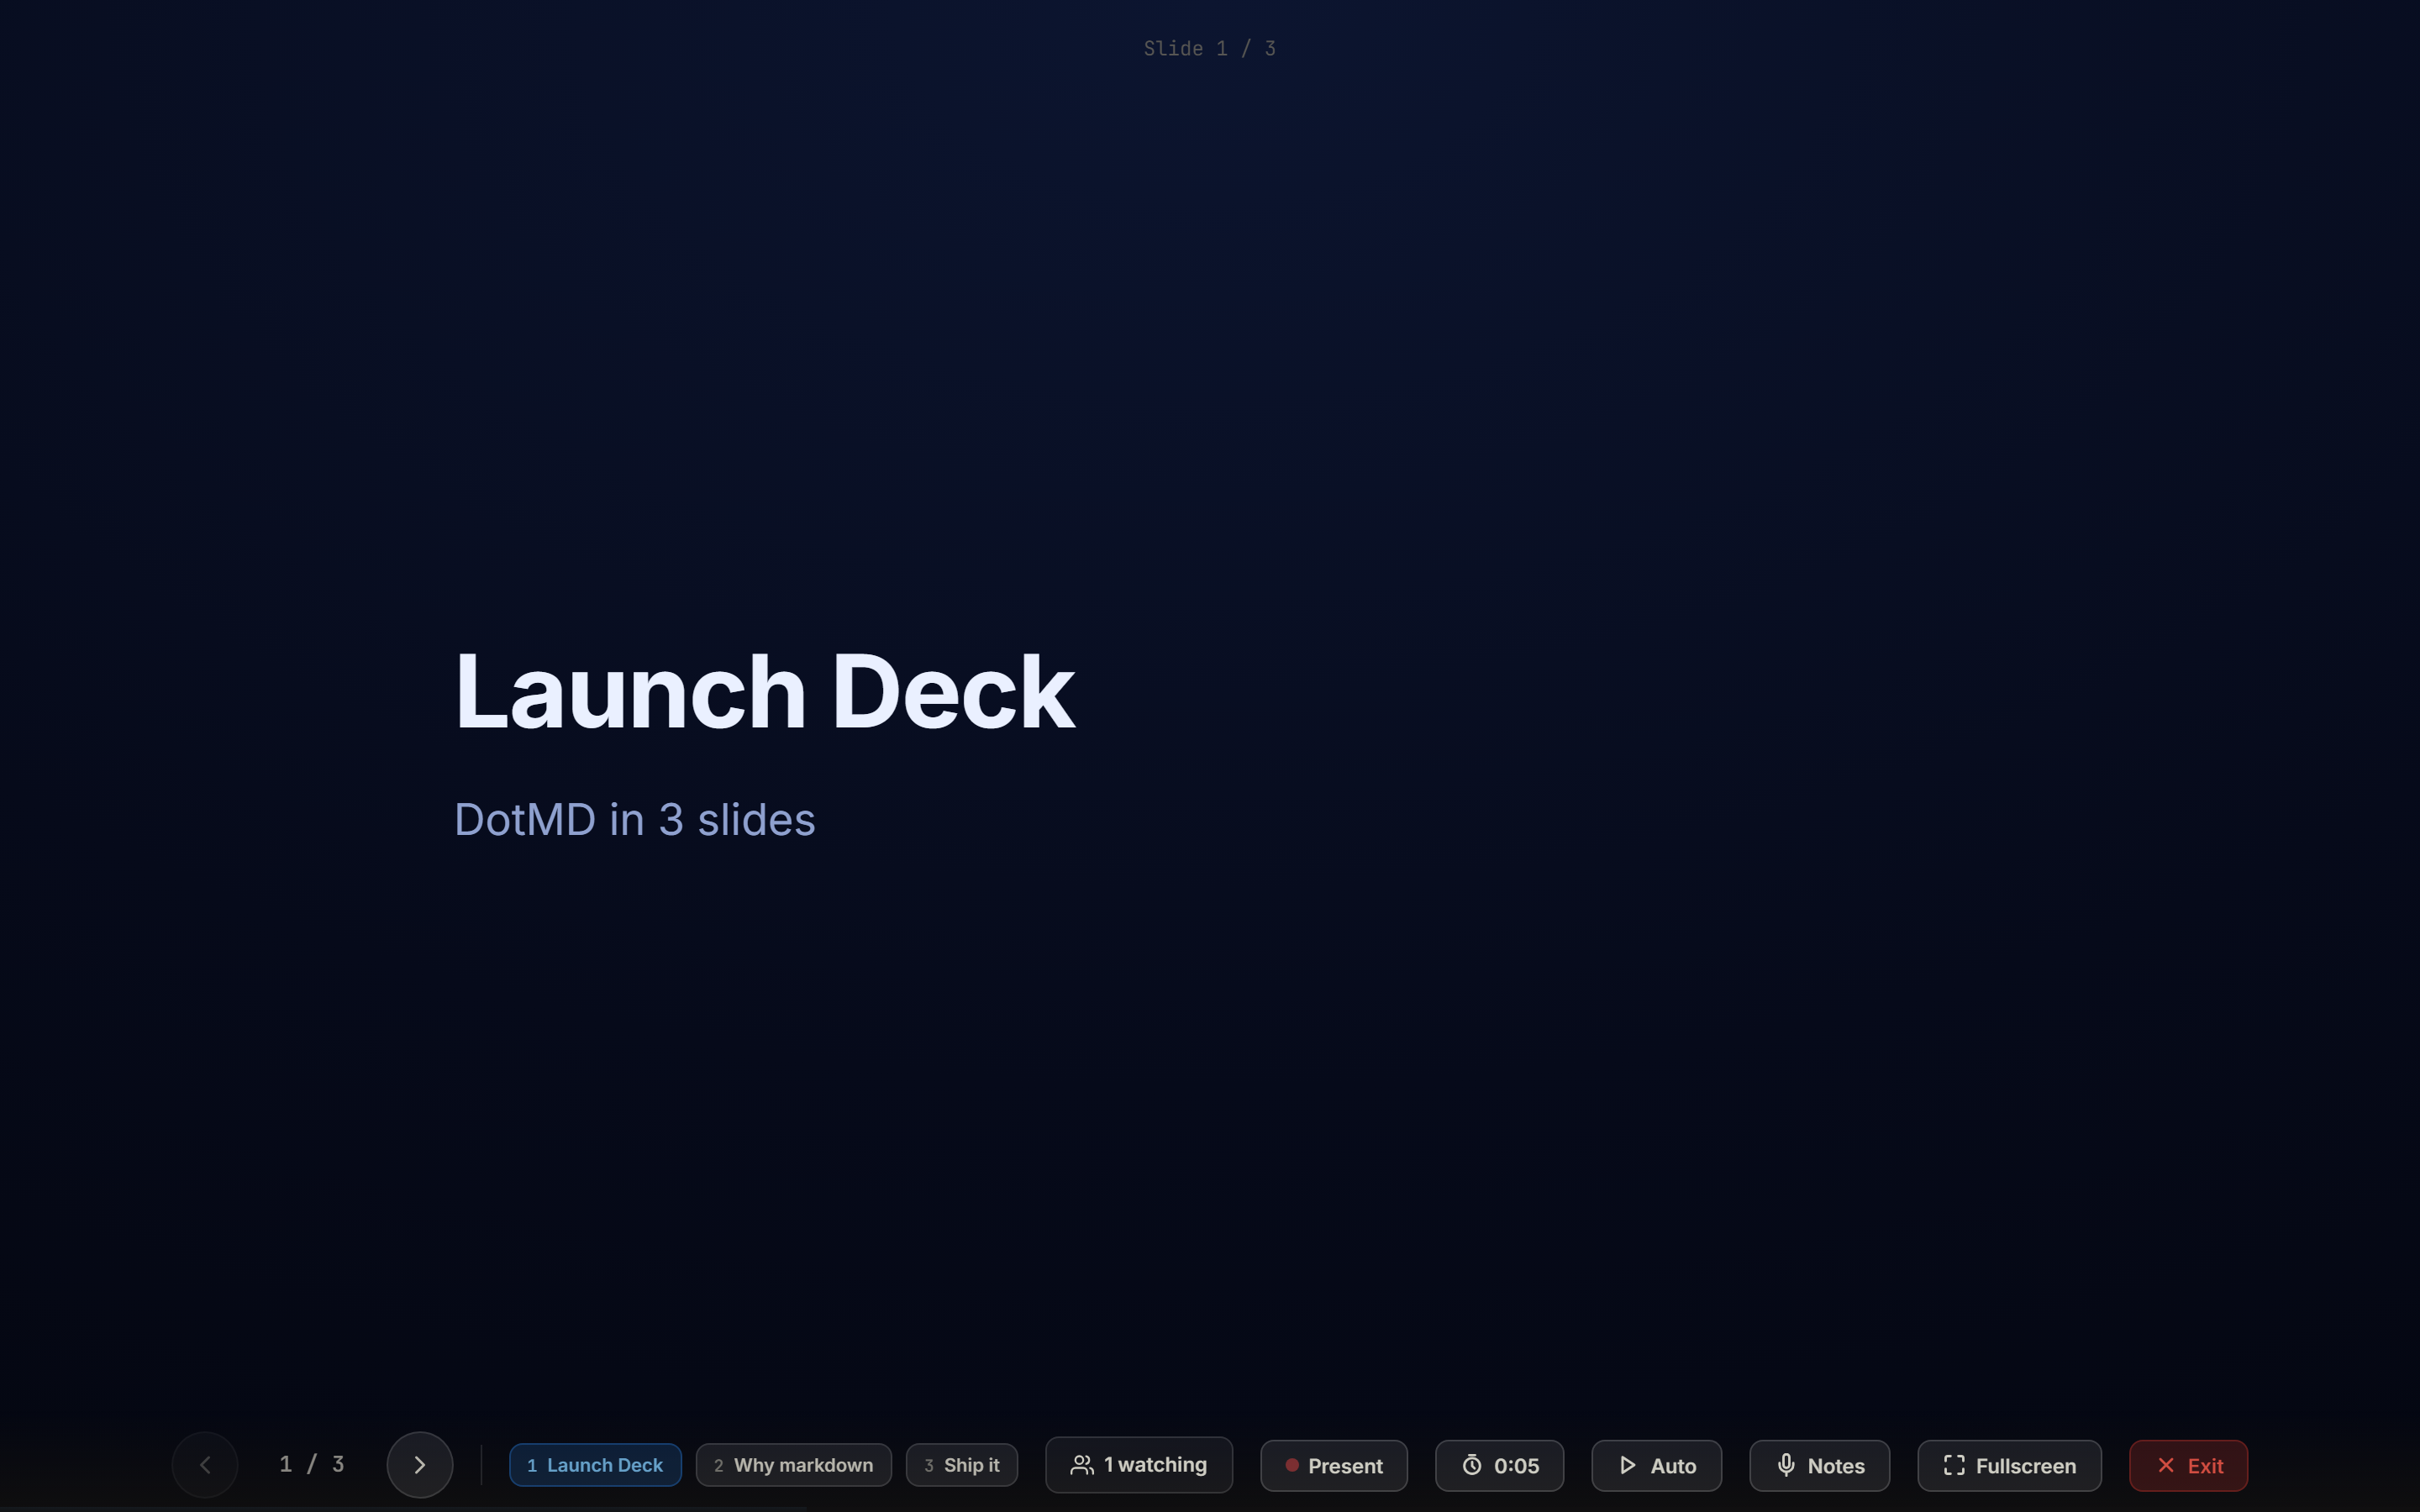
Sheets

Real spreadsheet power — formulas, formatting, and live collaboration — still stored as Markdown.

A DotMD sheet with a formula being edited, the fx assist panel open, and multi-sheet tabs along the bottom

Sheets & formulas

80 formulas across 8 categories (Math, Statistics, Logic, Information, Conditional, Text, Lookup, Date) — from SUM and VLOOKUP to SUMIFS, TEXTJOIN, and DATEDIF — with an assist panel that guides every argument.

  1. Create a sheet from "+ New" → Sheet, or add one to a workbook with the multi-sheet tabs along the bottom.
  2. Type "=" in a cell to start a formula — the ƒx assist panel lists all 80 functions by category and walks you through each argument.
  3. Format cells (including strikethrough), sort and filter columns, and freeze the header row for long tables.
  4. Comment on any cell and @mention teammates; collaborate live with per-cell cursors showing who is where.
  5. Import a CSV, TSV, XLS, XLSX, or Markdown file from the Download menu (or drop it onto the sheet). Excel and downloaded sheet .md files restore full workbooks as new tabs or replacements; CSV/TSV moves one sheet. Paste blocks straight from Excel or Google Sheets to spill across cells.
  6. Export the workbook as PDF (one page per sheet) or Markdown — the "With formulas" .md re-imports losslessly, and uploading it from the dashboard recreates a sheet.

Still stuck? Contact Customer Care
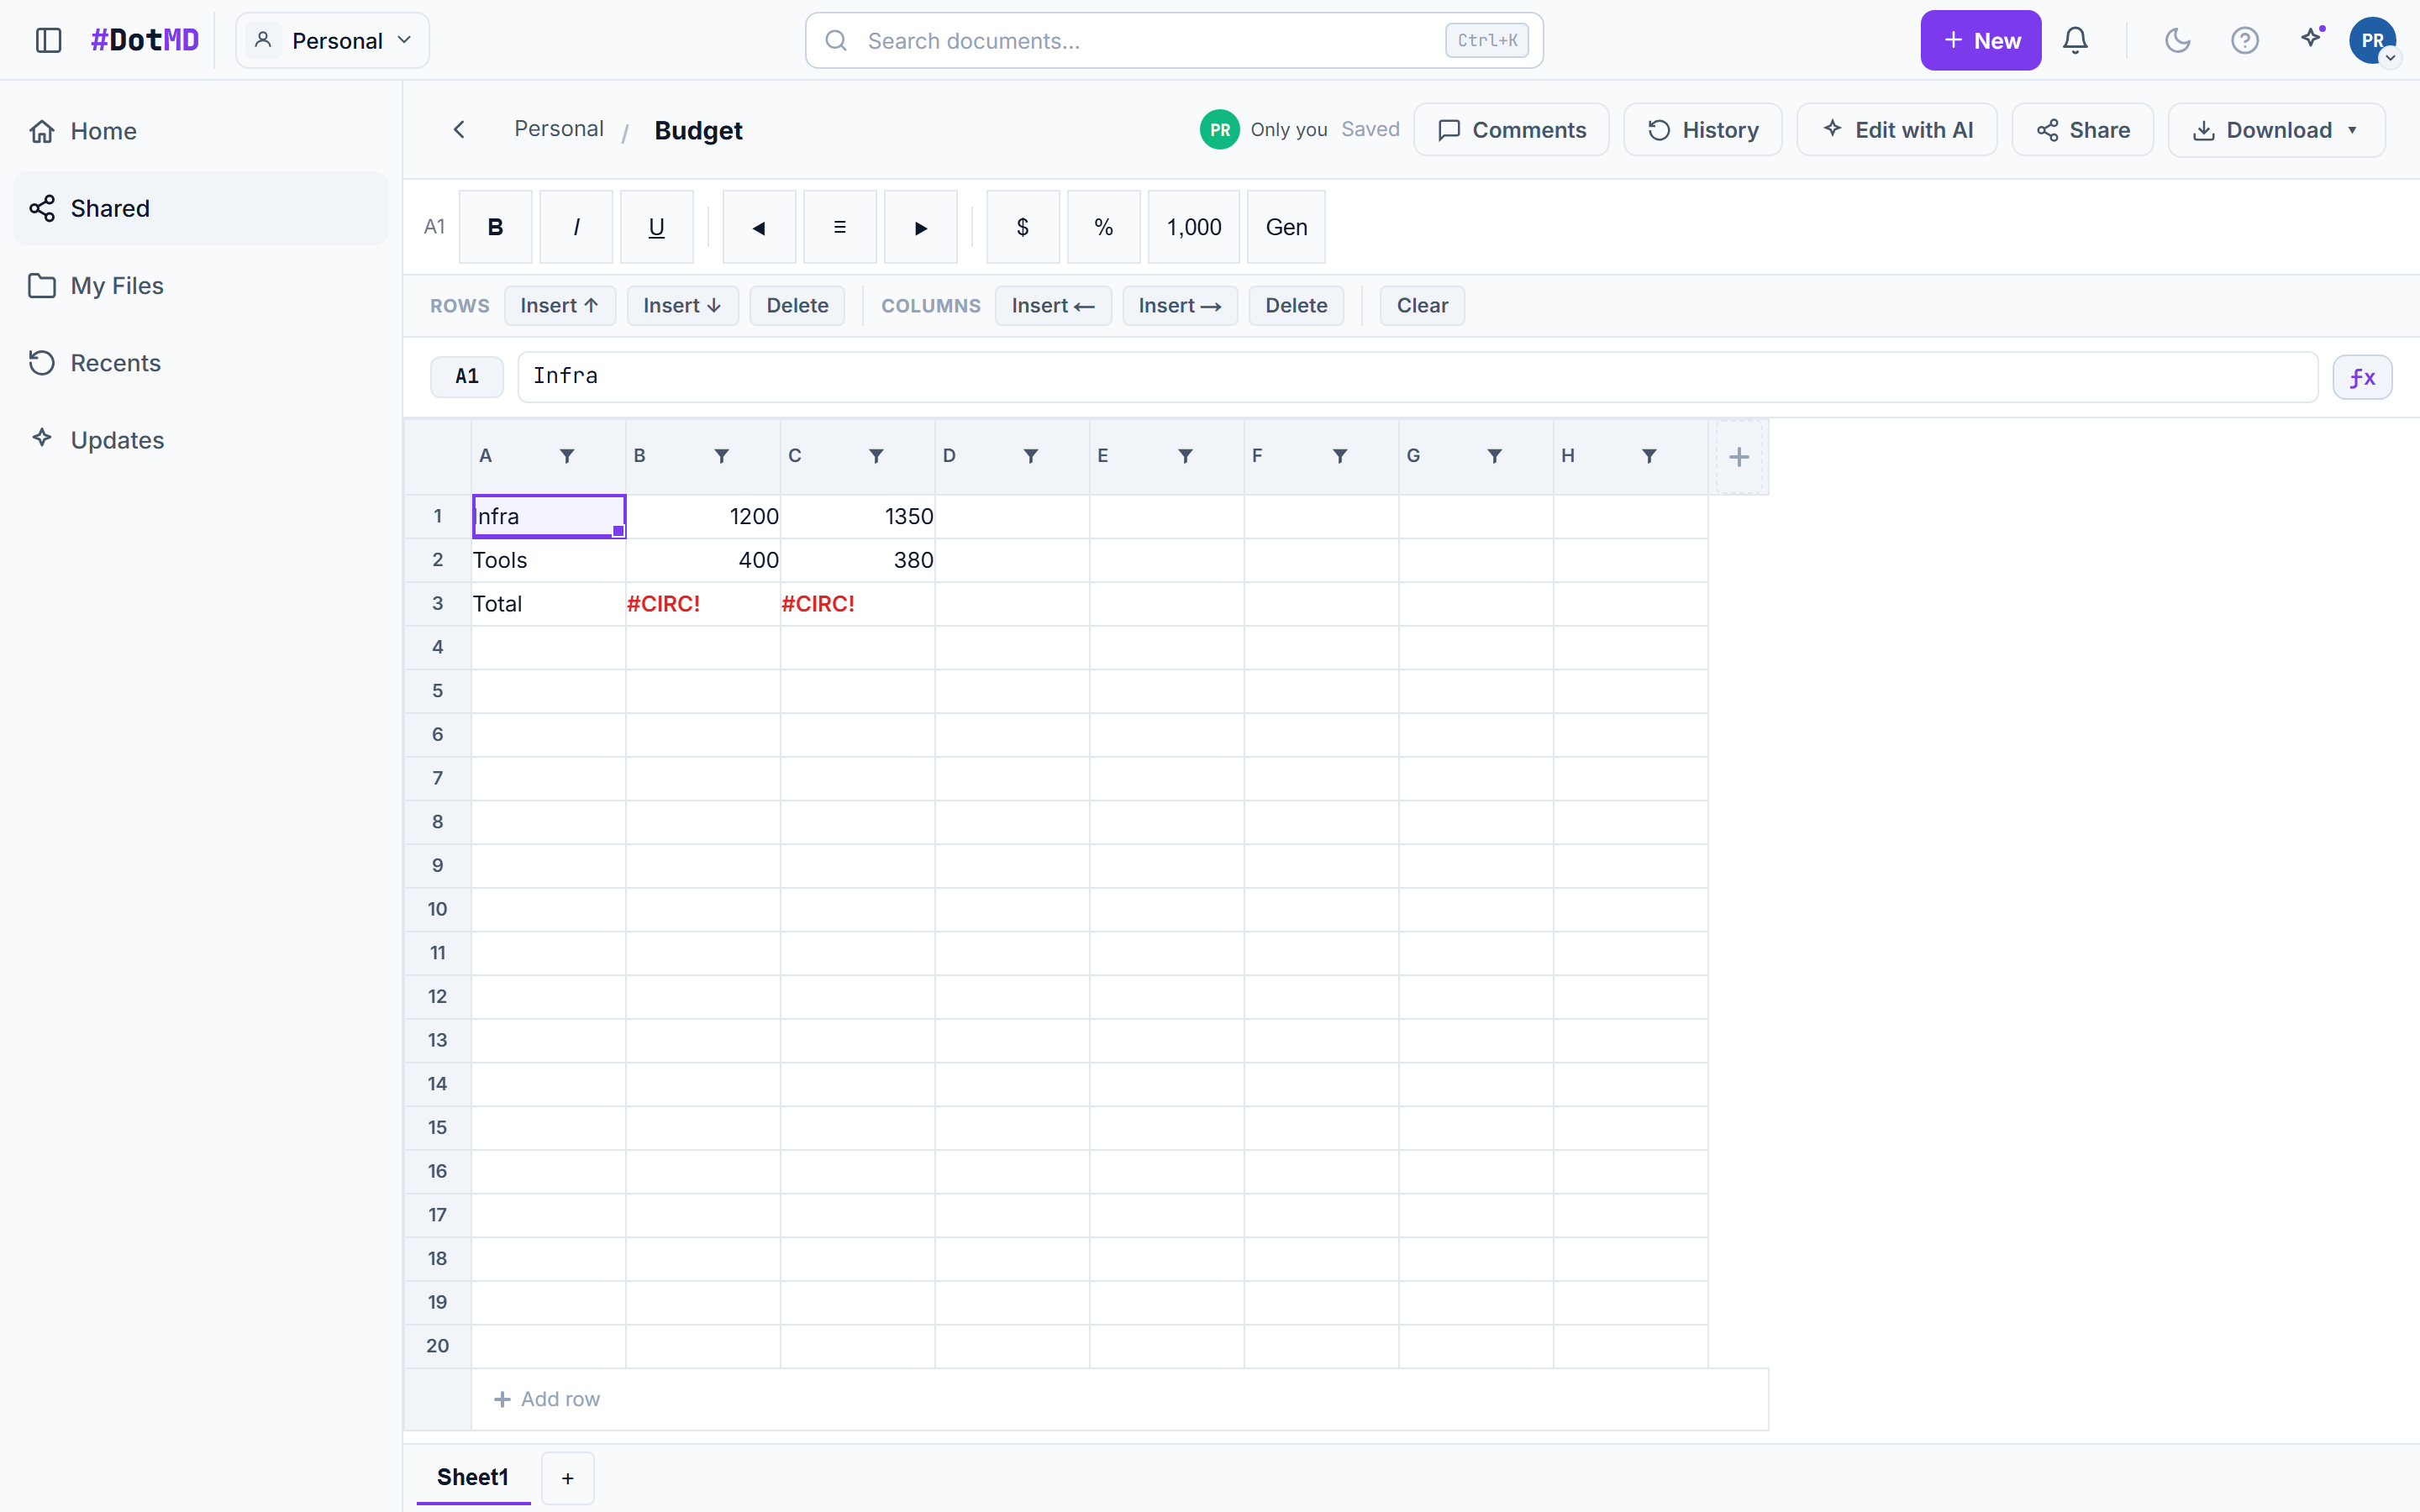
GitHub

Your docs and your repo, in two-way sync — with real merges, not overwrites.

The GitHub settings pane showing a connected repository, a linked folder with branch and path, and sync status badges

Two-way GitHub sync

Link a DotMD folder to a repo path and edits flow both ways. Concurrent changes 3-way-merge automatically; real conflicts get a visual side-by-side resolver.

  1. Connect GitHub under Settings → GitHub by installing the DotMD GitHub App.
  2. Link a folder to a repository, branch, and path — the repo’s existing Markdown imports as documents so you start in sync.
  3. Click "Sync now" to reconcile both directions: your edits push as commits, changes from GitHub pull into your docs, and concurrent edits merge automatically with a 3-way merge.
  4. When both sides changed the same lines, the file gets a conflict badge — open the visual MergeView to pick the final text, which then pushes back.
Good to know
  • Status badges on each linked folder show synced / pending / conflict at a glance.

Still stuck? Contact Customer Care
Platform

An app that fits how you work — installable, themeable, and respectful of your data.

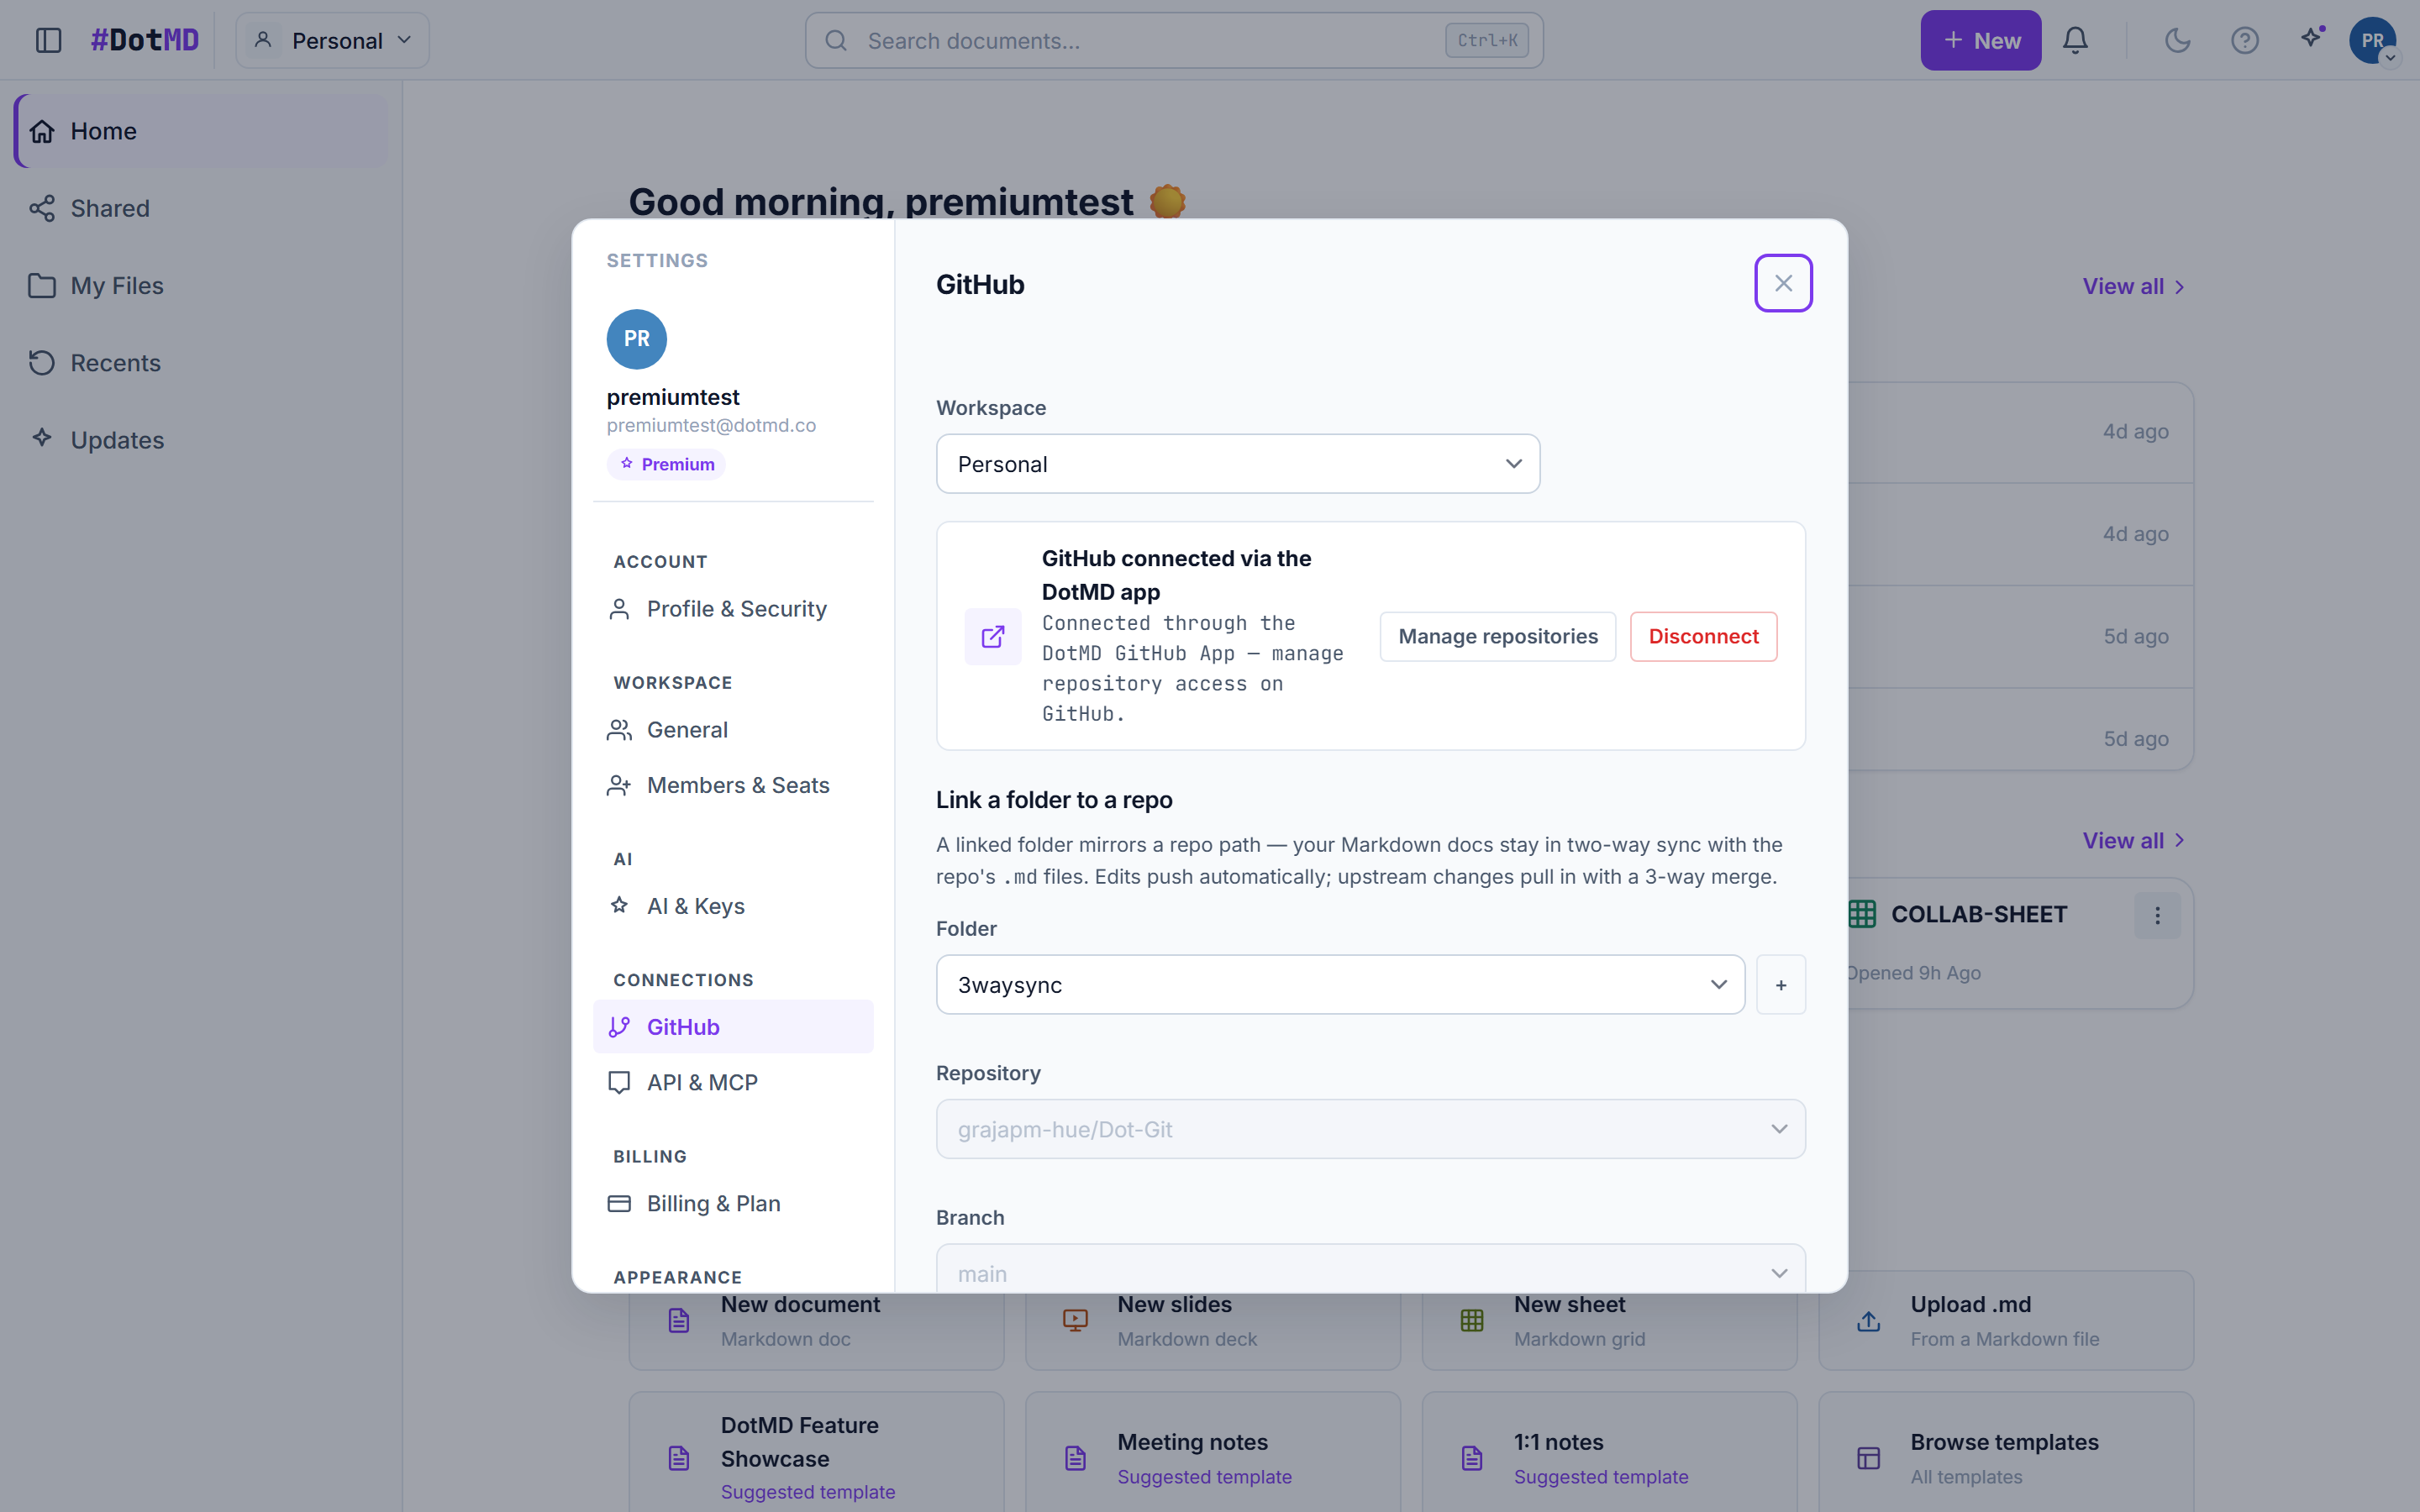
The appearance settings showing the six theme choices plus the System option

Themes & preferences

Six themes plus System auto-switching, per-category notification controls, and editor preferences tuned to how you write.

  1. Open Settings → Appearance and pick one of the 6 themes, or choose System to follow your OS.
  2. Tune notifications per category (comments, shares, mentions, …) under Settings → Notifications.
  3. Adjust editor preferences — behaviors like typewriter scrolling and defaults — under Settings → Editor.

Still stuck? Contact Customer Care
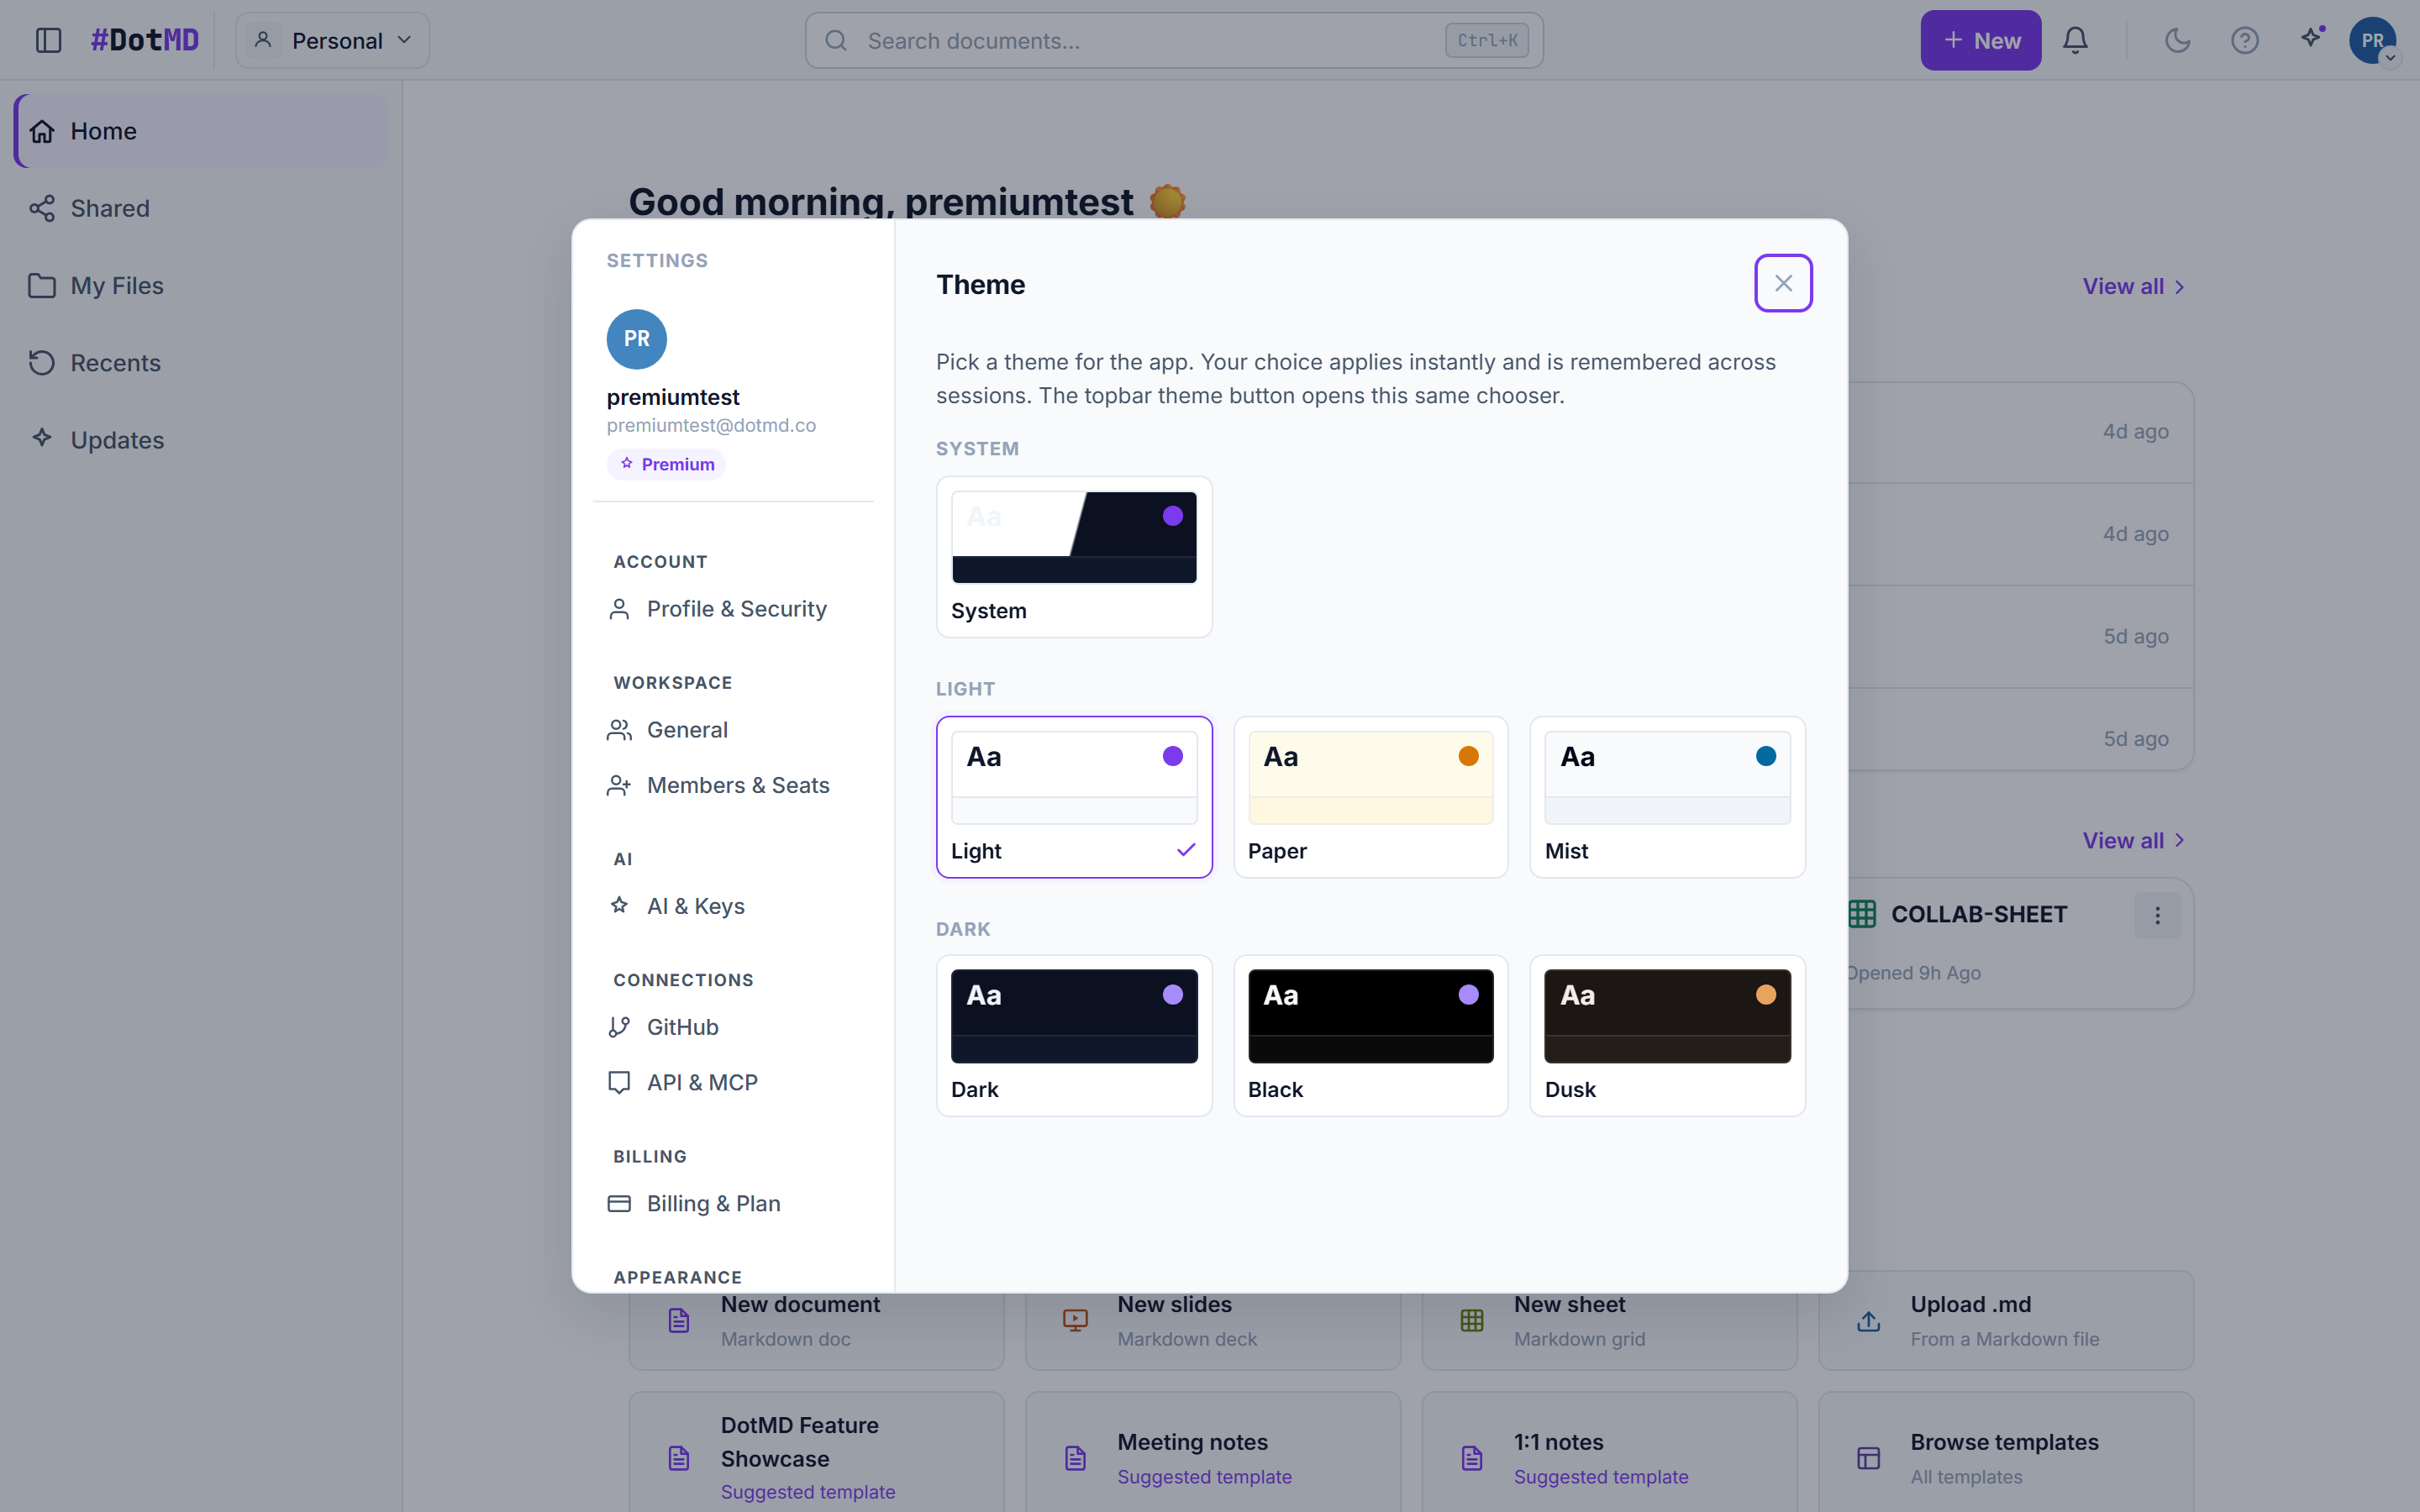
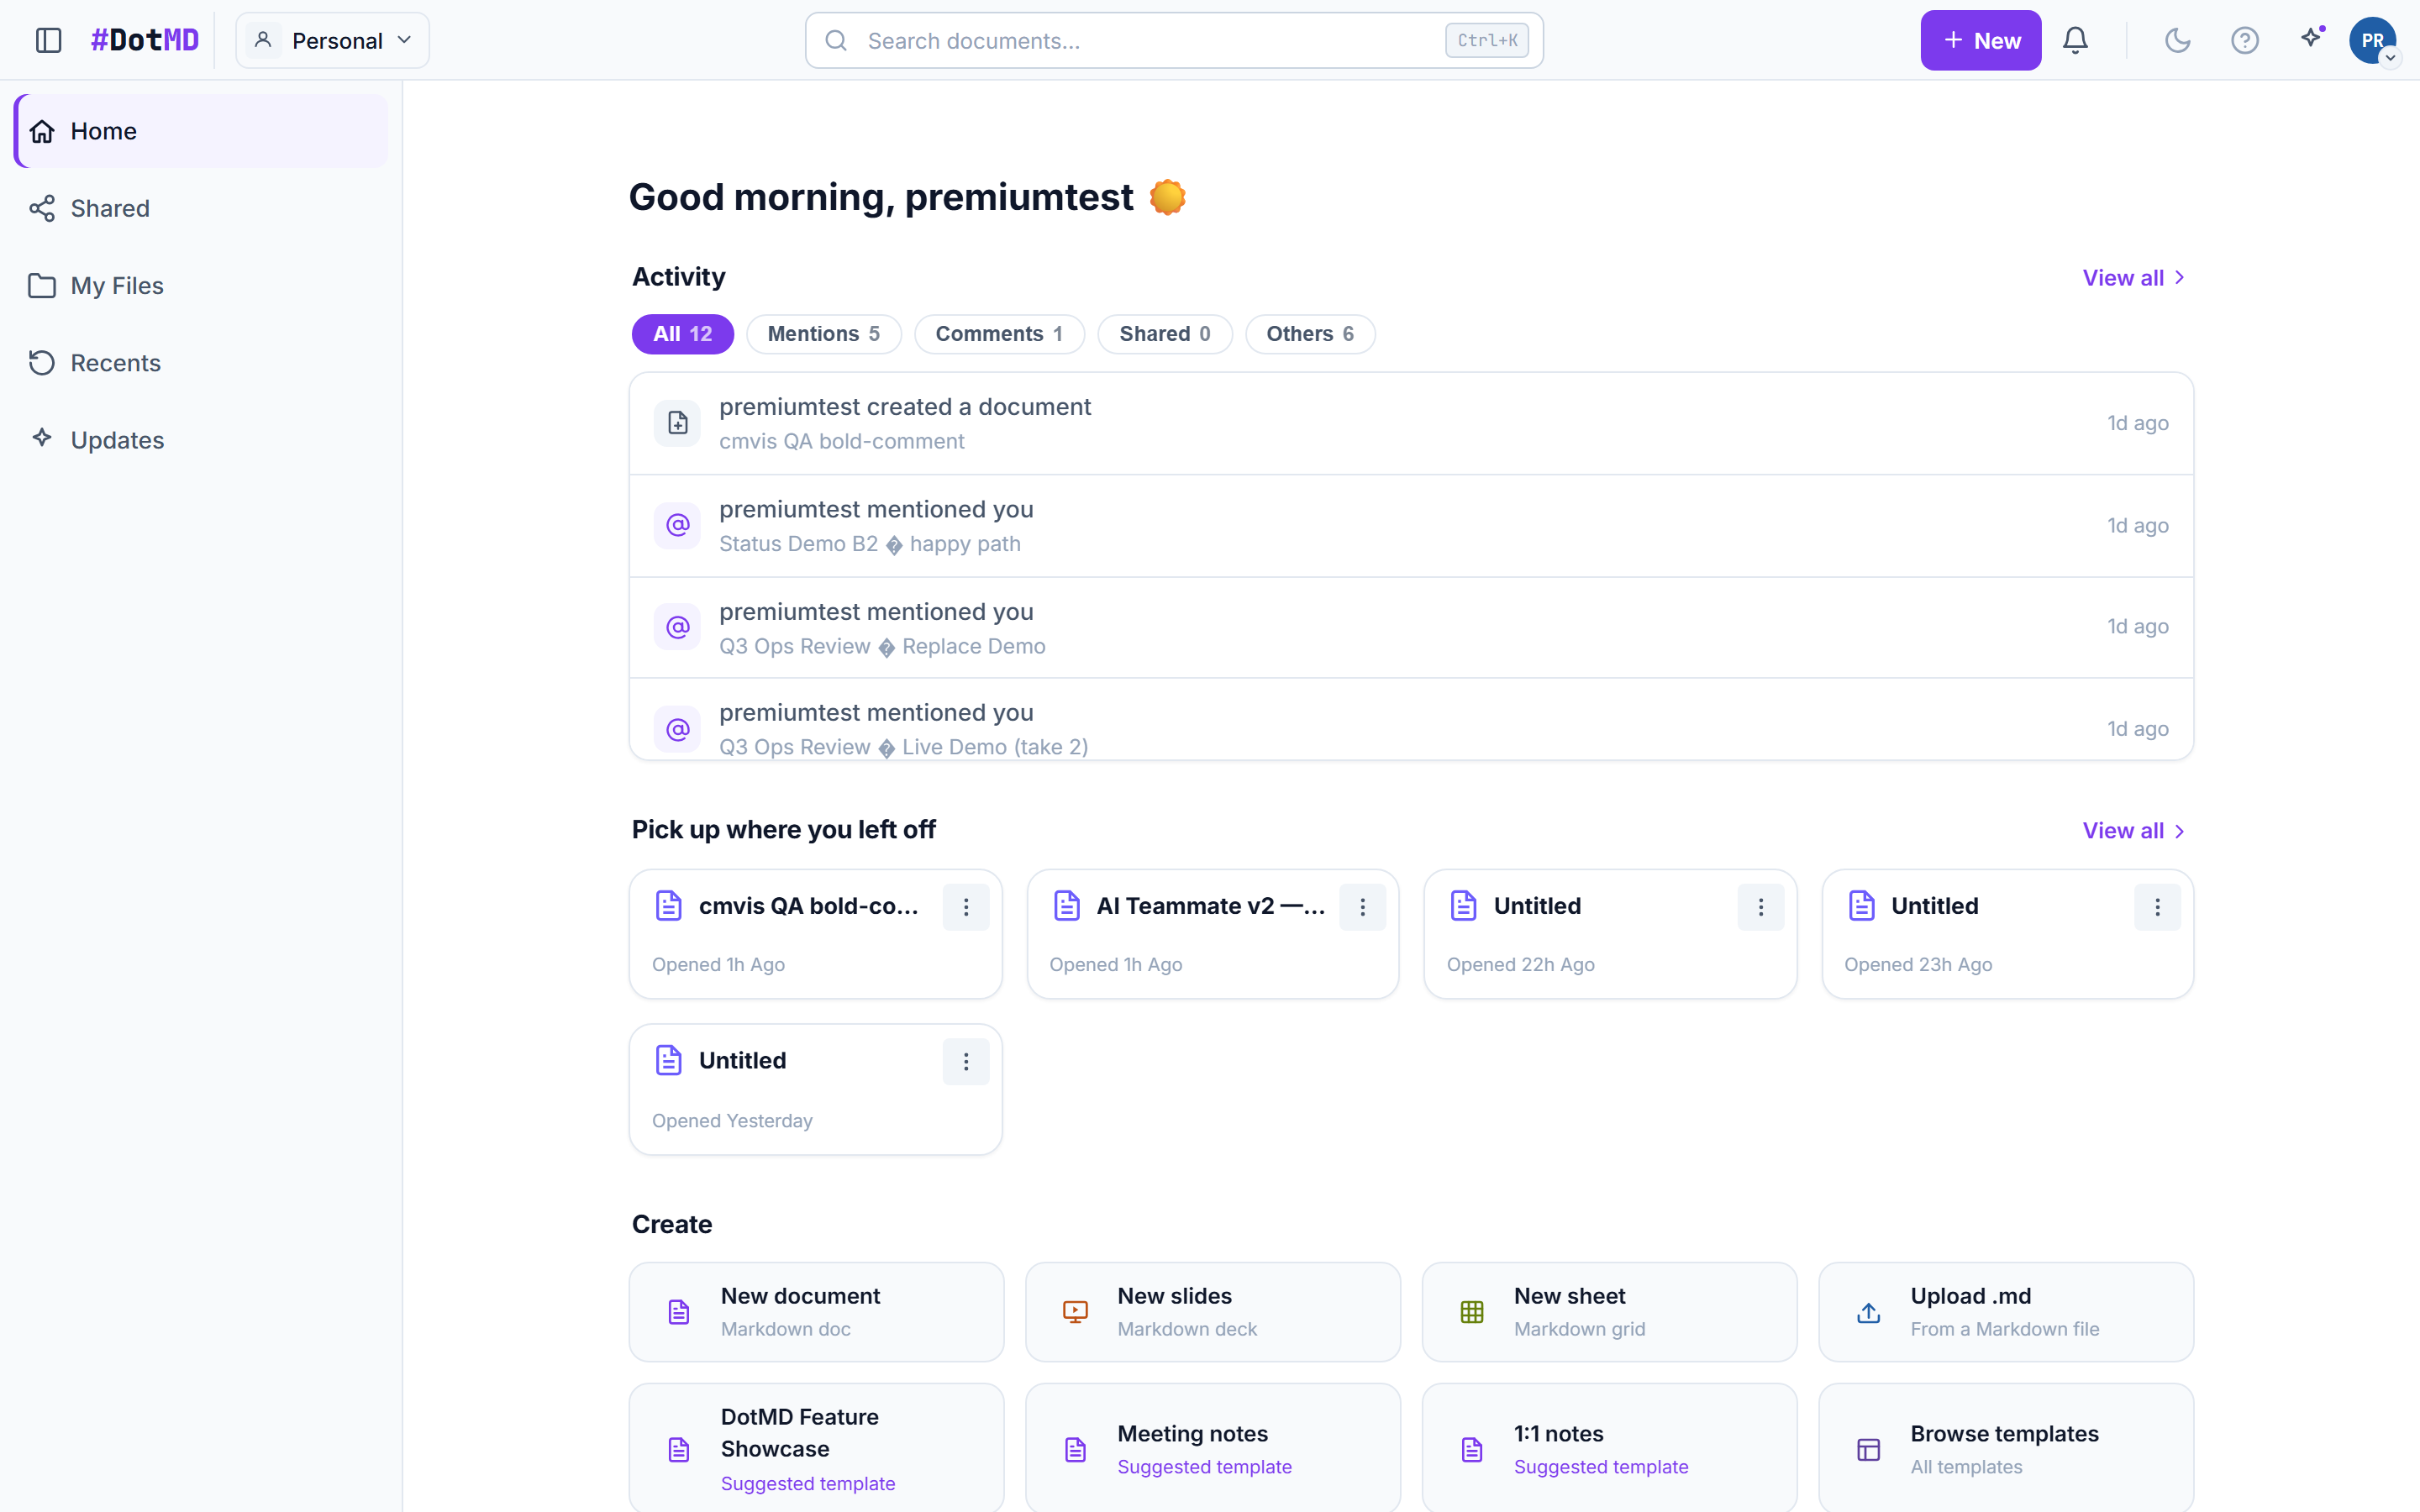
The DotMD dashboard with quick-action cards, the continue-where-you-left-off card, and the document list

Install the app & own your data

DotMD is an installable PWA that works like a native app — and your account is fully yours: export everything, or delete it all, any time.

  1. Install DotMD from your browser’s install prompt (or the address-bar install icon) to get a windowed, dock-launchable app.
  2. Export all your data as a portable bundle from Settings → Account; account deletion (GDPR) erases everything on request.
  3. Create API keys under Settings → Apps & MCP to script DotMD or connect agents.
  4. On Premium, create team namespaces — shared spaces with member management.

Still stuck? Contact Customer Care
Plans, teams & your data

Your plan and staying in control of your data.

The Account settings pane with the export-your-data action and the account deletion section

Your data — export everything, or delete it all

Your words are yours. Take a complete copy of everything whenever you like, and if you ever leave, deletion is real deletion.

  1. Open Settings → Account.
  2. Export your data downloads a portable bundle of all your documents — plain Markdown files you can open anywhere, no DotMD required. Large accounts are prepared in the background: we notify you when the bundle is ready, and its download link stays live for 7 days.
  3. Delete account permanently removes your documents, comments, namespaces you own, API keys, and personal data. Documents you shared with others stop being yours to manage.
  4. Deletion takes effect immediately; residual copies in backups are removed as those backups expire. If you have an active team subscription it is cancelled as part of deletion.
Good to know
  • Deleting a single document? Use its "…" menu — you don’t need to touch your account for that.
  • Export first if you’re unsure: the bundle is yours to keep either way.
  • You can request one export per day — Settings shows your last export (with its download link while it lasts).

Still stuck? Contact Customer Care
Plans at a glance

During beta there is one signed-in offer: Premium workspace access at no charge.

Capability comparison: Visitor (shared link) vs Beta member
CapabilityVisitor (shared link)Beta member
PriceNo account needed$0 through September 30, 2026
Documents you can createNone — view onlyAll Premium workspace features included (fair use: 5,000 documents)
Collaborators per documentUnlimited (fair use)
Reading a shared link5-minute preview, then sign up free to keep readingUnlimited while signed in
Editing & commenting on shared docsNo — view onlyYes, when invited as Commenter or Editor
Version historyEvery version, kept forever
DotMD AI100,000 tokens / month during beta. DotMD AI uses trusted AI service providers; bring your own key for more.
Team namespacesCreate teams, invite members, and create docs in them
Image uploadsIncluded (up to 10 MB per image)
Signed-in devicesUp to 5 active sign-ins; a document can be open in 2 places at once
API & MCP usage100 requests / minute, 20,000 calls / month per key (fair use)
AI teammates & integrations (MCP, API keys, GitHub sync)Included: MCP, API keys, and GitHub sync
Export (PDF & Markdown)Every document, any time

How DotMD compares

An honest look at how DotMD stacks up against the tools it is most often weighed against.

Capability comparison: DotMD vs Notion, Google Docs, Confluence, and Obsidian
CapabilityDotMDNotionGoogle DocsConfluenceObsidian
Markdown-native & zero lock-inEvery doc IS Markdown; export anytimeMarkdown export, proprietary storageProprietary formatProprietary formatLocal Markdown files
Two-way GitHub sync with 3-way mergeFolder ↔ repo, auto-merge + visual conflictsRead-only embeds via add-onsVia community git plugin, manual merges
AI as a teammate — connect your own AI subscription via MCP (no API keys)MCP tools let a connected assistant read and edit your docsMCP server, no live-cursor presenceAPI access, no MCP-native presenceMCP server, no live-cursor presenceCommunity MCP plugins, local only
Real-time collab + live presentationsLive cursors + audience-follow presentingLive editing; no live present modeLive editing; Slides is a separate appLive editing; no present modeNo built-in real-time collab
All-in-one Docs + Slides + Sheets + ArtsPortable Markdown plus governed interactive HTMLDocs + databases; no true slides/sheetsThree separate appsDocs onlyNotes + slides plugin; no sheets
Bring-your-own-key AIOpenAI / Anthropic / Gemini, your keyBundled Notion AI onlyGemini built in, no BYOKBundled Atlassian IntelligenceVia community plugins
Price$7/user/mo regular; eligible beta members keep $5 while subscribedFrom ~$10/user/mo; AI extraFree personal; Workspace from ~$7/user/moFrom ~$5/user/mo; scales with add-onsFree app; Sync/Publish are paid add-ons

Guides

Getting started

Sign in with your email and password or with Google. You land on the dashboard: quick-action cards to start something new, a "Continue where you left off" card for your latest document, and the full document list below.

Create your first document

  • Click "New document" or "New slides" on the dashboard (or the "+ New" button in the top bar), give it a name, and you are in the editor.
  • "Templates — Browse gallery" opens the template gallery with a live preview; pick a starter (meeting notes, slides deck, …) instead of a blank page.
  • Everything saves automatically as you type — there is no Save step.

Find your way around

  • The sidebar lists your Documents (with folders), documents Shared with you, and Recents.
  • Press Ctrl/Cmd+K anywhere to open the command palette: search documents and jump to actions from the keyboard.
  • Use the moon/sun toggle in the top bar to switch between light and dark themes.
  • The Free plan includes 5 documents; the dashboard quota line shows how many you have used.

GitHub two-way sync

Mirror a DotMD folder to a path inside a GitHub repository: your documents and the repo’s .md files stay in two-way sync. Edits you make in DotMD push to GitHub, changes made on GitHub pull back into your docs, and when both sides change the same file DotMD 3-way-merges them automatically. It works for your personal documents and, if you administer a team namespace, for a shared admin-managed connection.

Connect GitHub (one-time)

  • Open Settings → GitHub and choose Connect GitHub. GitHub will ask you to install or approve the DotMD GitHub App.
  • Choose which repositories DotMD can access, then return to DotMD. You can change that access later in GitHub.
  • For a team namespace, a namespace admin installs the app and chooses the repositories available to the team.

Link a folder to a repo

  • Pick a folder (or create one), then choose a repository and branch from the live dropdowns and set the path prefix — the folder inside the repo to mirror (for example, docs). Click Link & import.
  • DotMD imports the repo’s existing Markdown as documents in that folder, so you begin fully in sync.

Keep it in sync

  • Click Sync now on a linked folder to reconcile both directions at once: your local edits push to GitHub, changes from GitHub pull into your docs, and concurrent non-overlapping edits 3-way-merge automatically.
  • If both sides edited the same lines, the file is flagged as a conflict — open Resolve to choose the final text, which is then pushed back to GitHub.

Protected branches

Protected branches pull from GitHub normally. DotMD collects outbound changes and shows Review required. Review the changes, then click Create pull request. DotMD creates one pull request for that sync batch and never merges it automatically.

  • Review required is an expected GitHub policy state, not a failed document save. DotMD shows the repository, protected branch, and safe pending-change count.
  • If you see “Couldn’t create the pull request,” your changes remain safe. Check the GitHub connection, resolve any repository-rule or file blockers shown, and try again.
  • DotMD never disables, bypasses, approves, or weakens branch protection for this flow.

Examples

  • Import: link a folder to northstar-labs/handbook at path docs. Every docs/*.md file in the repo becomes a DotMD document.
  • Push — edit “Onboarding.md” in DotMD and click Sync now: the change lands on GitHub as a commit ("docs: update from DotMD").
  • Pull + merge — a teammate edits the top of a file on GitHub while you edit the bottom in DotMD; Sync now pulls their change, merges it with yours, and pushes the merged result, so both sides match.

Automate it from the API (MCP)

Everything in this pane is also scriptable from the DotMD API server (MCP) using an API key from Settings → Apps & MCP, so an agent or a CI job can set sync up for you.

  • Connect GitHub with github_connect, then browse with github_repos and github_branches.
  • Link a folder with github_link_folder (folderId, owner, repo, branch, optional pathPrefix), reconcile with github_sync, review with github_status / github_links, and remove with github_unlink.
  • Add a namespaceId to any of these to manage a team namespace’s shared connection (you must be a namespace admin); omit it for your personal documents.

Markdown & the editor

DotMD documents are Markdown-native: what you write is portable Markdown, rendered as you type. Standard syntax works directly — # headings, **bold**, *italic*, lists, > quotes, `code`, and fenced code blocks.

Faster than typing syntax

  • Type "/" on an empty line to open the slash menu and insert headings, lists, and other blocks.
  • Use the formatting toolbar for bold, italic, links, and lists when you prefer clicking.
  • Switch the view between Edit, Split, and Preview from the editor toolbar — Split shows the Markdown source and the rendered result side by side.

Export & history

  • Export any document from the editor’s Export menu as Markdown (.md) or as a PDF.
  • Version history (the clock icon) keeps snapshots you can review and restore. The Free plan keeps your last 10 snapshots; Premium keeps every version.

Slides

A slides document is still just Markdown: slides are separated with "---" lines, and the deck’s frontmatter sets its theme. Edit the source or work slide-by-slide in the slides editor — both stay in sync.

Building a deck

  • Create one from "New slides" on the dashboard, or start from the slides template in the gallery.
  • Add a slide with the editor’s add-slide control, or just type a new "---" separator in the source.

Presenting

  • Click Present to enter full-screen presentation mode.
  • Move between slides with the arrow keys (or on-screen controls); press Esc to leave the presentation and return to the editor.

Collaboration & comments

Documents are collaborative in real time: everyone with access edits the same live document, with collaborators’ cursors and avatars visible while they are in it. Changes sync instantly — and if your connection drops, a reconnect banner appears and the document catches up when you are back online.

Comments

  • Select text in a document to add a comment; threads live in the comments rail beside the editor.
  • Reply to discuss, and resolve a thread when it is done — resolved threads leave the rail.
  • The dashboard marks documents with open comments, and the notification bell (plus the "Since you were away" feed) tells you when someone comments on, resolves, shares, or mentions you in a document.

Collaboration is included on every plan: invite people to edit together with no fixed collaborator limit per document, subject to the Service’s fair-use and technical limits.

Namespaces & sharing

Sharing a document

  • Open the Share dialog from the editor’s top bar to invite people by email.
  • Each person gets a role: Viewer (read only), Commenter (read + comment), or Editor (full editing). You can change or revoke a role later from the same dialog.
  • Link sharing controls who can open the document with the link — keep it private or let the link grant view access to guests.

Team namespaces (Premium)

  • A namespace is a shared space for a team: its documents live at /ns/your-team, and you switch between Personal and team namespaces from the top bar.
  • Create one from the namespace switcher; you become its Admin and can invite members from the Members page (by email or with an invite link).
  • Namespace roles control namespace management and capabilities; they do not grant blanket document access.
  • Admins manage the namespace but do not automatically get access to every document.
  • A member, including an Admin, sees a document only through owner, direct-share, shared-folder, namespace-visibility, or link access rules.

AI

AI editing is built into the editor: open the AI bar, describe the edit you want ("tighten this section", "turn these notes into a summary"), and DotMD proposes the change. AI output can be inaccurate; review it before anything is applied. Accept or reject the proposal; nothing is changed behind your back.

Included AI and your own key

  • Included DotMD AI uses trusted AI service providers to process your requests.
  • Bounded edits send selected text, surrounding context, and your instruction. Whole-document and explicitly referenced-document operations send the scope you requested.
  • BYOK sends the requested content to the provider you configure — OpenAI, Anthropic, Gemini, or any compatible endpoint — and that provider’s terms and data-processing practices apply.
  • Each saved key has its own model, chosen in Settings → AI (BYOK): pick from the current models for your provider or enter a custom model name.
  • In the editor, the AI bar's provider menu simply picks who runs the request — DotMD AI (built-in) or one of your keys, shown with its configured model. Model changes happen in Settings, not in the editor.
  • Your prompts go to your chosen provider with your key; the key is never stored in plaintext on our servers.
  • AI features (Write with AI) are part of Premium.

Account & billing

Plans

  • During customer beta, Premium workspace features are free through September 30, 2026, with no card and no automatic charge.
  • Free: 5 documents, unlimited collaboration, and your last 10 version snapshots.
  • Premium: unlimited documents and folders (fair use: 5,000 documents per account), included DotMD AI and optional BYOK, image upload, and full version history.
  • At launch, eligible beta members may choose the Founding rate ($5 / user / month) while continuously subscribed. If you cancel and return later, the regular $7 / user / month rate applies.
  • Founder Edition is a separate US$149 one-time purchase for 5 years of Premium access for one account. It is limited to 100 completed purchases and does not renew automatically.

Upgrading & managing your subscription

  • During beta, recurring Premium subscription checkout remains closed until launch. Founder Edition can be purchased now from Settings → Billing & Plan.
  • Choose Get Founder Edition, sign up or sign in, then select Purchase Founder Edition — US$149. Stripe securely collects the one-time payment; access begins only after payment is confirmed.
  • From October 1, 2026, choose and authorise a paid plan to continue paid Premium access; checkout is handled securely by Stripe.
  • Manage or cancel anytime from the same page via the Stripe customer portal — receipts and invoices live there too.
  • If you cancel, Premium stays active until the end of the paid period; afterwards your account returns to the Free plan (documents over the 5-doc limit become read-only, nothing is deleted).

Account basics — your name, email, and password — live under Settings → Account, where you can also delete your account.

Release notes

New2026-09-06

Meet Arts

  • Create interactive, single-page HTML Arts from a prompt, then refine the result as a new version.
  • Share Arts like any other DotMD file and pin comments to specific elements, including moments during an animation.
  • Arts run JavaScript inside a sandbox that blocks external network calls, and they do not preserve interaction state yet.
  • Find every Art in Files, with the same private access, authenticated images, version history, and AI token meter as your other documents.

Keyboard shortcuts

  • Open command palette / searchCtrlK
  • Close menus and dialogsEsc
  • Find & replaceCtrlF
  • BoldCtrlB
  • ItalicCtrlI
  • UnderlineCtrlU
  • Paste as plain textCtrlShiftV
  • Copy a link to this section (anchor)CtrlShiftA
  • Export / print to PDFCtrlP
  • Open the slash-command menu/

Frequently asked questions

Can I export my documents?

Yes. Every document is stored as Markdown and can be exported at any time from the document menu — your content is never locked in.

What is included during the customer beta?

Every signed-in beta member gets Premium workspace features free through September 30, 2026. No card is required and there is no automatic charge. Billing choices open October 1, 2026.

How many devices can I stay signed in on?

Up to 5 active sign-ins (devices) per account. Signing in on a sixth device signs out the oldest session. Separately, a single document can be open in at most 2 places at once per account — opening it in a third place disconnects the oldest one.

How large can uploaded images be?

Image uploads (a Premium feature) can be up to 10 MB each. There is no separate total-storage cap beyond the fair-use rules in the Terms.

Are there limits on the API and MCP?

Yes. Each API key allows up to 100 requests per minute and 20,000 calls per month under Premium fair use. If you need more, contact us.

Do I need my own API key for AI features?

No. Included DotMD AI uses trusted AI service providers to process your requests. Bounded edits send selected text and surrounding context; whole-document and explicitly referenced-document operations send the scope you requested. AI output can be inaccurate; review it. BYOK sends the requested content to the provider you configure, whose terms and data-processing practices apply. We never store your key in plaintext.

How do I delete my account and data?

You can delete any document or your whole account from settings at any time. Account deletion removes your documents immediately; residual copies in backups are removed as those backups expire. See the Privacy Policy for details.

Can I collaborate with others in real time?

Yes. Invite collaborators to a document for real-time editing with presence, inline comments, and threaded review.

Why does view-only ask me to refresh?

People who can edit or comment are connected live and see changes as they happen. If you can only view a document, you see the page as it was when you opened it — so when someone changes it, a "This document was updated — refresh" bar appears, and refreshing shows you the latest version. See "When do others see my changes?" in the tutorials above.

What counts against my AI limit?

DotMD-hosted AI includes 100,000 tokens per month during beta; the included allowance becomes 250,000 tokens per month at general launch. Edit with AI and Ask AI / Summary count both input and output. MCP uses the connected assistant’s own model and subscription and does not count against this allowance. BYOK usage is billed by your provider instead.

What's a namespace?

A namespace groups people and their documents. Everyone starts with Personal — your default, private namespace, where you are the only member. Premium users can create team namespaces and invite others, each with a role. Namespace roles control namespace management and capabilities; they do not grant blanket document access. Admins manage the namespace but do not automatically get access to every document. A member, including an Admin, sees a document only through owner, direct-share, shared-folder, namespace-visibility, or link access rules. Moving a document between folders can change inherited folder access, and moving it between namespaces can change its access context. Switch namespaces with the switcher in the top-left.

Can guests comment?

No — a shared link is view-only. Guests can read the document (with a 5-minute free preview before they’re asked to create a free account), but they can’t edit or comment. To let someone comment, invite them by email from the Share dialog with the Commenter role.

Contact us

Questions about plans, teams, partnerships — or anything else? Reach us directly.

Contact support

Can’t find what you need? Send Customer Care a request and we’ll help you out.

Contact Customer Care

View my requests

We'll get back to you within 3 business days.